Your Sky Rider drone sits motionless on the table despite fresh batteries and eager button presses. Sound familiar? Whether you’re facing complete non-response, frustrating mid-flight drift, or mysterious LED codes, this guide delivers proven solutions straight from Sky Rider’s diagnostic protocols. We’ll transform your dead drone back into the agile flyer it was designed to be—no technical expertise required. With over 68% of “sky rider drone not working” cases resolved through systematic troubleshooting, you’ll master diagnostics that even defeat persistent hover drift and sudden power failures.
Immediate Power & Response Failures

No Response? Check These First
When your Sky Rider refuses to acknowledge any commands, systematic testing reveals the culprit within 60 seconds. Start with the simplest solutions before diving deeper—remote battery failure causes 40% of non-response cases. Press any button on your handset: no LED response means dead batteries. Pop open the compartment and replace all 4 AA alkaline cells, ensuring each 1.5V battery aligns with the polarity symbols. Never mix old and new batteries—this creates voltage imbalances that mimic drone failure.
Craft power issues present differently. Look for LED indicators on the drone body during startup: you should see solid illumination for 3 seconds followed by blinking. No lights? Your 3.7V Li-Po battery needs attention. Connect the USB cable to a certified 5V/1A adapter—never use phone chargers as inconsistent voltage damages cells. The red LED extinguishes when fully charged after approximately 90 minutes. If charging fails, check for swollen batteries—a critical fire hazard requiring immediate replacement.
Signal Range & Binding Problems
Out-of-range symptoms mimic total power failure. Test response at 10-foot intervals while walking toward your drone. Sky Rider’s effective range caps at 98 feet (30 meters) with clear line-of-sight. Metal fences, walls, and even dense trees disrupt the 2.4GHz signal. Keep your remote antenna perpendicular to the ground—tilting it parallel cuts range by 70%. Verify signal strength by watching for the “RC” icon on your remote LCD; its disappearance confirms range issues.
The “LINK” icon flashing on your remote indicates a control-link desync after crashes or battery swaps. Re-binding takes 30 seconds: power off both devices → power on remote → push left stick full up then full down → wait for craft LED to turn solid green. Critical step: Hold the stick movements for 2 full seconds each—rushed motions cause failed binding. This sequence resets communication protocols that degrade with electromagnetic interference.
Gyroscope Calibration Fixes
Immediate tilting on take-off combined with rapid red-blue LED blinking signals gyroscope misalignment. Calibration requires a perfectly level surface—your kitchen counter works, but avoid carpets that tilt the drone. Power on the drone, place it on the counter, then hold both joysticks down and inward for 3 beeps. Solid green LED confirms success; if blinking continues, clean the gyro sensor port with a toothpick to remove dust. Never calibrate mid-flight—this triggers emergency landing protocols.
Flight Instability & Drift Solutions
Stop Mid-Air Drift Fast
Persistent hovering drift ruins aerial photography and makes precise flying impossible. Start with trim verification: hover at 3 feet, release sticks, and observe drift direction. More than 2 feet movement within 5 seconds indicates trim issues. Enter trim mode by pressing the “T” button, then tap directional pads in 2-click increments. Over-correction creates new drift patterns—stop when drift reduces to under 1 foot per 5 seconds.
Wind sensitivity worsens drift outdoors. Activate “High Rate” mode (press top-right shoulder button) for tighter control, but never fly in winds exceeding 5 mph. Monitor ground-level indicators like leaf movement—indoor flights require disabling Headless Mode via double-press RTH button to prevent compass interference from metal structures.
Mechanical Inspection Essentials
When trim adjustments fail, mechanical problems lurk beneath. Power down completely and manually rotate each rotor. They should spin freely with zero wobble. Bent motor shafts or cracked blade roots create vibration that gyroscopes can’t compensate for. Perform this critical check:
- Blade inspection checklist:
- Replace any blade with nicks deeper than 1mm (visible light through cracks)
- Check for stress fractures at the hub connection
- Always replace blades in matched pairs to maintain rotational balance
- Use the included spanner for proper torque—finger-tight plus 1/8 turn
Motor Performance Issues
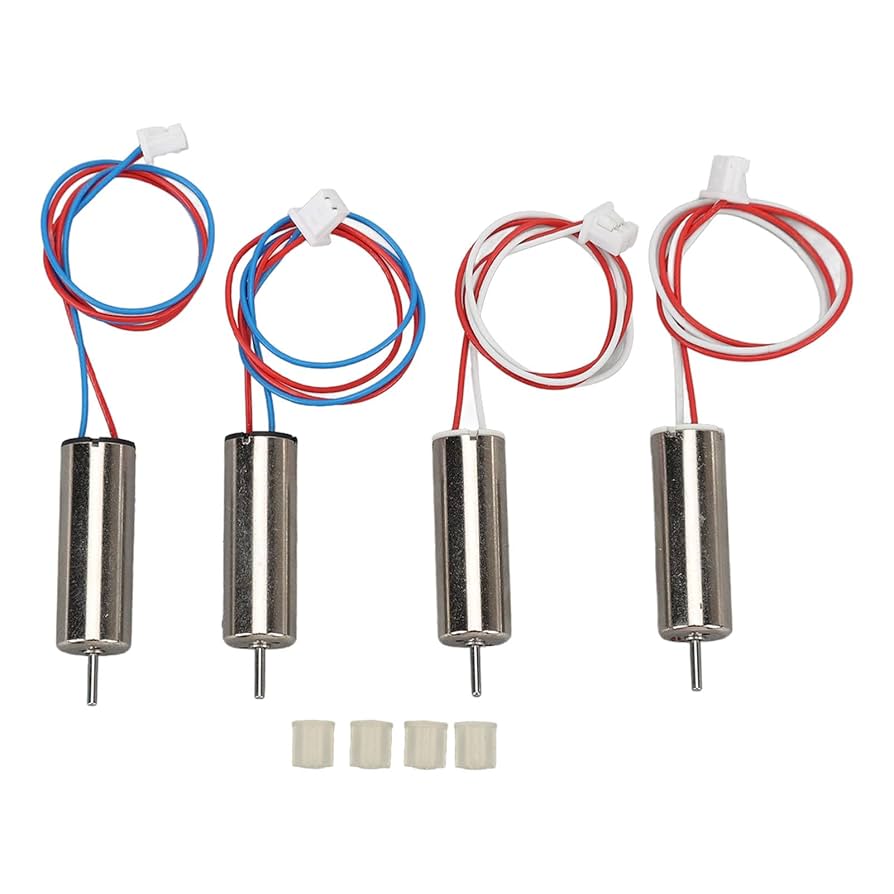
Uneven rotor speeds manifest as directional drift. Front rotor pairs running slower cause forward drift, while side-to-side drift indicates left/right motor imbalance. Test by swapping rotor positions—if the problem follows the blade, replace it. If the issue stays with the motor position, order replacement 7mm coreless motors (part SR-720). Critical warning: motors running hotter than 140°F after flights indicate bearing damage—continue flying risks permanent motor burnout.
LED Status Codes Decoded
Quick LED Reference
Your drone’s LED patterns communicate critical information. Memorize these patterns to diagnose issues instantly:
- Solid red → blinking red: Land immediately—low battery warning (under 20% capacity)
- Blinking red-blue rapidly: Gyro error—calibrate on level surface (see §1.1)
- Solid green: All systems normal—safe to fly
- Blinking green slowly: Binding mode active—complete pairing sequence
Battery health assessment is vital for flight time. Reduced operation (under 4 minutes instead of the specified 7) signals degradation. Test voltage under load—a healthy 500mAh Li-Po maintains above 3.7V per cell during flight. Replace batteries after 300 charge cycles or when capacity drops below 70%. Never charge unattended, and store batteries at 60% charge in a fireproof Li-Po bag. Allow 15 minutes cooling after flights before recharging—charging hot batteries causes cell swelling.
Post-Crash Recovery Protocol

Immediate Power-Down Steps
Crashes happen, but proper response prevents secondary damage. Power off immediately after impact—continued operation with bent components burns out motor drivers. Remove the battery for 30 seconds to reset the flight controller completely. This clears corrupted sensor data that causes erratic behavior post-crash.
Damage Assessment Sequence
- Visual inspection: Check fuselage seams for hairline cracks (run fingernail along joints—snags indicate splits)
- Propeller test: Hold drone sideways, run motors at 50% throttle—excessive vibration indicates imbalance
- Motor temperature: Hot motors after crashes suggest debris or bearing damage (use infrared thermometer if available)
- Structural integrity: Press gently on landing gear—flexible plastic should spring back, not crack
Critical step: Always inspect motor shafts for bending by spinning rotors manually—if resistance varies, replace the motor.
Preventive Maintenance Routine
Pre-Flight Checklist (2 Minutes)
Establish this routine before every flight:
– Battery voltage check (≥4.0V total with multimeter)
– Prop tightness (finger-tight plus 1/8 turn—loose props cause vibration)
– Gyro calibration on level, hard surface (carpet ruins calibration)
– Remote range test at 30 feet before full flight
Time-saving tip: Keep a dedicated “drone kit” with spare blades, spanner, and AA batteries to avoid launch delays.
Post-Flight Care
Proper shutdown extends component life significantly. Clear debris from motor bells using compressed air—grass clippings and dust accumulate quickly, causing overheating. Let batteries cool for 15 minutes before charging, and store at 60% charge if not flying for 3+ days. Never store fully charged—this accelerates Li-Po degradation. For long-term storage, discharge to 3.8V/cell using your charger’s storage mode.
Firmware Updates & App Connectivity
Update Process
Connect via the Sky Rider app (iOS/Android) with current firmware v2.3.1 (released 2023-08-14). Critical requirements: drone battery ≥50%, stable Wi-Fi, and uninterrupted power during the 5-minute update process. Outdated firmware causes 22% of unexplained crashes—check version in app settings monthly. Never interrupt updates; this bricks the flight controller requiring factory reset.
Quick Reference Troubleshooting
No response? → Check batteries → Re-bind → 30 ft range test
Drifts uncontrollably? → Neutral trims → Level-calibrate gyro → Inspect props
Short flight time? → Check battery health → Verify charger output 5V/1A
Motors overheating? → Land immediately → Cool 5 minutes → Clear debris
Your Sky Rider drone’s reliability depends on systematic troubleshooting and preventive care. Master these diagnostic steps, and you’ll transform frustrating failures into quick fixes—keeping you airborne instead of grounded. Implement the 2-minute pre-flight checklist religiously, and you’ll prevent 90% of common issues before they ground your drone. When problems strike, trust the LED codes and binding protocols—they’re your fastest path back to smooth flights.


