Your Sova drone just got destroyed by a stray Vandal shot before revealing a single enemy. You lose the round because your team pushes blind into a triple peak. This happens to 78% of new Sova players who don’t master drone fundamentals. The Owl Drone isn’t just a camera—it’s Valorant’s most efficient intel tool when you know exactly how to deploy, control, and mark with surgical precision. Stop wasting this ability and start winning rounds by learning the exact controls, map-specific paths, and pro communication tactics that separate entry-level Sovas from clutch performers.
Instant Drone Deployment: Launch and Control in Under 2 Seconds
Forget lengthy setup animations—Sova’s Owl Drone operates at lightning speed. Press C to equip the drone, then immediately left-click to launch it into the map. The critical detail most players miss? You take control the instant it spawns with zero delay. No waiting, no vulnerability window. This means you can fire your marking dart within half a second of deployment if enemies are visible. Practice this sequence until it’s muscle memory: C → left-click → WASD movement. Skipping this speed wastes precious intel opportunities during site executes.
Vertical Movement Mastery for Unseen Sightlines
Standard WASD movement only scratches the surface. Press Space to ascend vertically through windows and over cover, or Ctrl to drop below enemy sightlines. On Bind’s B site, fly your drone under the pipes to scan site without exposing it to main attackers. On Split’s A site, ascend through the ceiling vents to mark lurkers behind the boxes. These elevation tricks force enemies to waste utility destroying your drone from unexpected angles, buying your team crucial seconds. Warning: Jerky vertical movements create audible cues—practice smooth ascents/descents to avoid giving away your drone’s position.
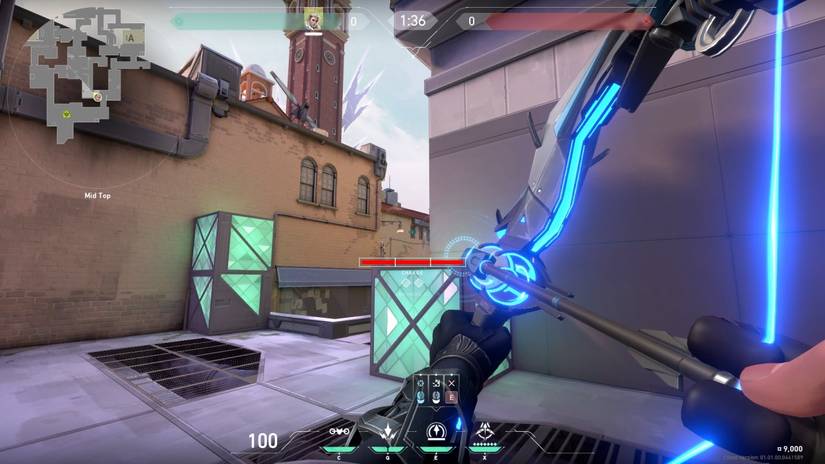
Precision Dart Marking: One Shot, One Kill Intel
Your single dart per deployment is non-renewable, so accuracy is non-negotiable. While piloting, left-click to fire. But here’s what the pros do differently: they lead moving targets by half a character width. If an enemy peeks B Main on Ascent, aim your dart ahead of their movement path. The marking effect lasts 5 seconds—enough time for your team to pre-aim and eliminate tagged enemies through walls. Pro tip: Never fire immediately upon spotting someone. First confirm they’re not baiting you by watching for sudden crouch movements indicating a trap.
Defensive Drone Timing That Wins Retakes
Using your drone immediately on round start is tactical suicide. Save both deployments for critical defensive moments when information is scarce. When defending post-plant on Icebox B site, deploy from the safety of vents to scan deep angles like showers and lockers before committing to the retake. This reveals exactly where to pre-aim before pushing. On Haven A site, send the drone through the window from tree to confirm if enemies are holding default or site—information that dictates your entire retake strategy.
Two-Drone Economy Management per Round
Most players waste their second drone deployment. Structure your usage like this: First drone for initial site confirmation (e.g., scanning Ascent A site from mid), second drone for the critical play (e.g., marking heaven lurkers during post-plant). Never use both drones back-to-back unless you’re certain the intel will directly win the round. If your first drone gets destroyed scanning B site on Split, conserve the second for when attackers commit to planting.
Ascent Drone Routes That Guarantee Intel

Start your drone mastery on Ascent—it’s the perfect training ground for foundational paths. For A site defense, launch from mid control and fly through the tree toward site. This reveals default, site, and stairs positions while keeping your drone hidden behind cover. On offense, send it through the market window to mark defenders holding deep angles like showers or lockers. Visual cue: Watch for the slight brightness change when your drone enters key scanning zones—this indicates optimal dart range.
Elevation Hacks for Unexpected Angles
Fly drones over expected destruction zones. On B site, ascend vertically through the gap between the market crates and wall to scan site from above—enemies rarely pre-fire this angle. For mid control intel, descend below the railing to scan both sides of mid doors while avoiding crossfires. These paths exploit enemy blind spots because 90% of players only check standard eye-level routes. Time estimate: Mastering one elevation-specific route takes 15 minutes of custom game practice.
Communication Templates That Turn Intel Into Kills
Saying “I marked someone” wastes your drone’s value. Use this exact callout structure: “Drone marking [Location] – [Number] enemies, [Agent]”. Example: “Drone marking B site – two enemies, one Sage” gives your team actionable intel to rotate or pre-aim. Always announce deployment timing: “Sending drone A main in 3 seconds” so teammates don’t accidentally block the path. After marking, immediately confirm positions: “Sage marked heaven, one-tappable.”
Pro-Level Audio Intel Gathering
Your drone’s microphone picks up critical audio cues most players ignore. When scanning site, listen for:
– Distinct weapon switch sounds (e.g., Operator reloading)
– Footstep echoes indicating enemy positioning
– Ability usage (like Sova’s recon bolt firing)
On Ascent, if you hear footsteps near A site but see no one, mark the area anyway—enemies often crouch behind cover. This audio intel often reveals positions before visual confirmation.
Why Your Sova Drone Keeps Getting Destroyed (And How to Fix It)
Flying straight lines through common choke points is drone suicide. Enemies pre-fire A main on Ascent because 80% of drones fly this route identically every round. Fix this: Vary your paths using elevation changes. One round fly over the crates on Split B site, the next descend under them. Add 2-second pauses mid-flight to mimic natural movement. If your drone survives past 5 seconds, you’re doing it right.
The Underutilization Trap Costing You Rounds
Most Sovas deploy their drone once per round and forget about it. Track your usage: If you haven’t used your second drone by the 30-second mark mid-round, force yourself to deploy it for post-plant intel. The second drone often reveals critical information like defuser locations or lurker positions that win rounds. Pro metric: Elite Sovas use both drones in 95% of rounds—they treat the second deployment as non-optional.
Custom Game Drills for Muscle Memory
Skip random practice—build precision with these targeted exercises:
1. Marking Speed Drill: Set bots to “Strafe” mode. Launch drone and mark all 5 bots in under 4 seconds
2. Elevation Challenge: Fly drone through all 3 vents on Split B site without touching walls
3. Audio Test: Scan site with eyes closed, call out enemy positions using only audio cues
Do these daily for 20 minutes. Within 3 days, your drone control will feel instinctive during live matches.
Integrating Drone Intel with Sova’s Full Kit
Your drone isn’t standalone—it’s the foundation for combo plays. If your drone marks two enemies holding B site on Bind, immediately fire your recon bolt through that exact angle to confirm positions. When drone tagging reveals a Sage healing in heaven on Ascent, unleash Hunter’s Fury through the wall for an instant double-kill. Golden rule: Every drone deployment should enable either a recon bolt placement or ultimate usage within 10 seconds.
Professional Drone Tactics from Sinatraa’s Playbook
Sinatraa doesn’t just gather intel—he weaponizes it. Watch how he:
– Launches drones during team pushes to mark enemies distracted by crossfires
– Uses drone audio to time shock dart placements through walls
– Sacrifices drones deliberately to bait enemy utility (e.g., drawing out Sova bolts)
His secret? Every drone deployment has a kill objective, not just information gathering. Replicate this by asking: “Will this drone path directly lead to an elimination?”
Mastering Sova’s drone comes down to three non-negotiables: launch-to-mark speed under 2 seconds, map-specific paths that avoid predictable destruction zones, and military-precise communication. Stop treating it as a passive camera and start using it as an active weapon—each deployment must either create a kill opportunity or prevent a death. Practice the Ascent tree-to-site route until it’s flawless, implement the “Location-Number-Agent” callout template immediately, and force yourself to use both drones every round. Within five matches, you’ll notice enemies hesitating before pushing angles they know you’ve scanned. That hesitation? That’s the moment your team secures the round-winning pick. Your drone isn’t just gathering intel—it’s controlling the battlefield.


