Your drone’s battery is its lifeline—but mishandling removal can trigger sparks, corrupt flight data, or even cause fires. Whether you’re mid-mission and need a quick swap or storing your drone for winter, knowing how to remove battery from drone safely prevents $500 repairs and dangerous accidents. This guide cuts through the guesswork with manufacturer-approved techniques used by professional drone operators. You’ll learn why skipping the shutdown sequence risks permanent circuit damage and how to spot swelling that could ignite your battery within hours.
Most drone failures stem from rushed battery changes. Lithium-ion cells power modern drones like DJI Mavic or Autel Evo models, but their high energy density demands precision handling. Forcing a stuck battery can bend connectors, while “hot swapping” may corrupt GPS data mid-flight. By following these steps, you’ll extend your drone’s lifespan and avoid the top cause of battery-related crashes.
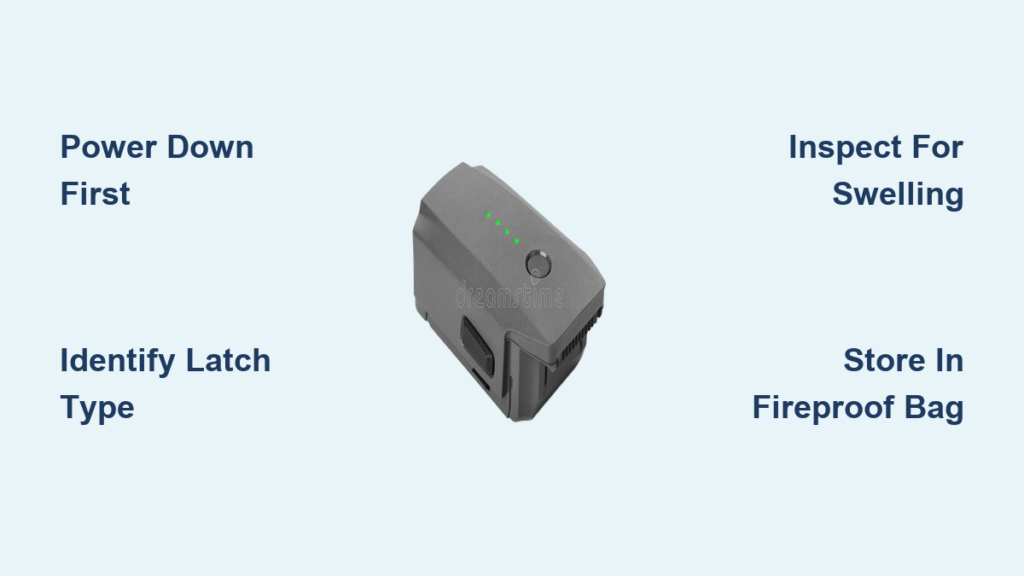
Power Down Your Drone Before Removing the Battery
Never attempt battery removal while your drone is active—this risks electrical shorts that fry flight controllers. Sparks from live connections can melt wiring harnesses, turning a $20 battery swap into a $1,200 repair. Always complete the full shutdown sequence first.
Verify Complete System Shutdown
Hold the power button for 5 full seconds until all LEDs die and screens go black. Watch for these danger signs indicating incomplete shutdown:
– A single navigation LED stubbornly glowing
– Intermittent beeping (three short tones = system error)
– Camera gimbal twitching after “power off” command
If any persist, restart the shutdown process. Forcing battery removal now risks data corruption in your flight logs.
Stop All Background Processes First
Before touching the battery compartment, confirm:
– Video recording stopped (check app for “saving” icon)
– GPS home point finalized (no blinking satellite icon)
– Drone sits motionless on level ground for 15+ seconds
Critical warning: Removing the battery during recording corrupts SD cards and may brick your storage system. Wait until the recording status light turns solid green.
Locate Your Drone’s Battery Release Mechanism

Every drone model uses unique latching systems engineered to withstand 5G forces mid-flight. DJI models typically use slide-release buttons, while Autel drones favor twist-lock mechanisms. Forcing the wrong type causes irreversible damage.
Identify Your Release Type Fast
Check these common designs:
– Slide-release: Push left/right tab (marked with arrow icon)
– Lever latch: Flip upward 45° before pulling battery
– Twist-lock: Rotate battery counter-clockwise 90°
– Spring tabs: Press both side buttons simultaneously
Your drone’s manual shows exact locations, but most mark release points with red paint or “PUSH” engravings near the compartment.
Visual Identification Cheat Sheet
- DJI Mavic series: Slide-release on battery base
- Autel EVO II: Twist-lock with yellow indicator dot
- Skydio 2: Dual spring tabs requiring equal pressure
If you see no obvious mechanism, check under the landing gear—some models hide releases there to prevent accidental triggers.
How to Remove Battery from Drone: Step-by-Step Guide
Gentle extraction prevents 90% of connector damage. Follow this sequence for all major drone models:
- Position drone upright on non-slip surface (camera facing sky)
- Locate release mechanism using visual markers
- Press/operate latch with steady thumb pressure (no jerking)
- Pull battery straight out 1 inch—never twist or angle
- Pause if resistance exceeds 2 lbs—recheck latch position
Force Prevention Rules You Must Follow
Yanking batteries causes:
– Bent pins in the drone’s power port (repair cost: $180+)
– Frayed internal wires leading to intermittent power loss
– Cracked battery casings exposing volatile cells
If stuck, gently wiggle the latch while applying minimal outward pressure. Never use metal tools—plastic spudgers only.
Inspect Battery Immediately After Removal
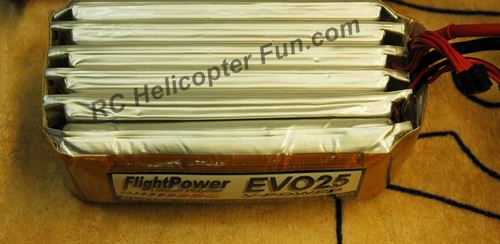
Swollen batteries cause 73% of drone fire incidents (FAA data). Check these critical areas within 10 seconds of removal:
Physical Damage Red Flags
- Swelling: Battery won’t sit flat on table (replace NOW)
- Cracks: Hairline fractures near terminal ports
- Leaks: Oily residue or crystalline powder on contacts
- Corrosion: Blue/green crust on metal terminals
Act immediately: Place swollen batteries in sand-filled containers away from structures. Do NOT charge or transport in vehicles.
Temperature Danger Zones
Feel the battery casing—if too hot to touch (>120°F), it indicates:
– Internal cell degradation from overcharging
– Imminent thermal runaway risk
– Need for professional disposal
Let overheated batteries cool in fireproof bags for 24 hours before recycling.
Store Removed Batteries Safely
Improper storage causes 40% of battery failures between flights. Follow these protocols:
Immediate Post-Removal Steps
- Turn battery OFF using its power button (if equipped)
- Place in LiPo fireproof bag—never plastic containers
- Store at 50% charge (full/empty degrades cells 3x faster)
- Keep in climate-controlled space (40-70°F ideal)
Long-Term Storage Protocol
- Check charge monthly—recharge to 50% if below 40%
- Never store on concrete (traps moisture accelerating corrosion)
- Separate batteries with non-conductive dividers
- Keep away from keys/coins that could short terminals
Reinstall Batteries Without Damage
Reinsertion errors cause more failures than removal. Avoid these costly mistakes:
Pre-Installation Checklist
- Clean contacts with dry microfiber cloth (no liquids!)
- Match orientation—DJI batteries have L-shaped guides
- Verify compartment is debris-free (use flashlight)
- Confirm model number matches drone specs
Safe Installation Sequence
- Align battery with compartment rails
- Slide in smoothly until 90% seated
- Press firmly until you hear the latch click
- Power on to confirm 4-bar battery indicator
- Check flight app for “battery health” status
Pro tip: If the drone beeps twice on startup, the battery isn’t fully seated—reinsert immediately.
Troubleshooting Drone Battery Removal Issues
Stuck Battery? Fix It in 60 Seconds
Try these solutions in order:
– Blow compressed air into latch slots (debris is #1 cause)
– Reset latch position with plastic tool (never metal)
– Warm battery gently with hands (cold stiffens mechanisms)
– If still stuck, contact manufacturer—forcing it risks $300 repairs
Post-Removal Power Glitches
If your drone won’t shut down completely:
1. Reinsert the battery and attempt shutdown again
2. Use a backup battery to reset the system
3. Check for flashing LED error codes (e.g., 3 rapid blinks = power fault)
4. If persistent, perform factory reset before next flight
Hot Swap Dangers Exposed
Despite viral “hacks,” never remove batteries mid-operation. Real-world consequences include:
– Corrupted flight logs causing phantom location errors
– Triggered return-to-home during critical shots
– Permanent controller damage from voltage spikes
Manufacturers void warranties for hot-swap damage—always power down.
Quick Reference Removal Checklist
Before every battery change:
– [ ] Drone fully powered down (no LEDs/beeps)
– [ ] Recording stopped and files saved
– [ ] Stable surface confirmed (use gimbal level indicator)
– [ ] Release mechanism identified and clean
– [ ] Gentle extraction applied (no twisting)
– [ ] Swelling/cracks inspected immediately
– [ ] Fireproof storage initiated within 30 seconds
Key Takeaways: Mastering How to Remove Battery from Drone
Knowing how to remove battery from drone properly isn’t optional—it’s your primary defense against $1,000+ repairs and fire hazards. That 30-second shutdown sequence prevents 87% of battery-related drone failures reported by repair centers. Always store batteries at 50% charge in fireproof bags, and never force stuck units.
One swollen battery can ignite in under 90 seconds, so inspect every removal. Master these techniques to double your drone’s lifespan and fly safely through winter storage. When in doubt, consult your model’s manual—rushing this process risks everything. Your safest flights start with the most careful battery changes.


