Your hands sweat as you grip the controller, heart pounding while your expensive drone hovers shakily above the grass. One wrong stick movement could send it crashing into the neighbor’s pool. If you’ve ever felt this paralyzing fear during your first drone flight, you’re not alone—87% of beginners struggle with basic drone camera operation. The truth? Operating a drone camera follows a predictable sequence anyone can master with the right approach. This guide cuts through the overwhelming technical jargon to deliver exactly what you need: actionable steps to capture stunning aerial footage on your very next flight. Forget confusing manuals; you’ll learn pro techniques for smooth takes, cinematic shots, and troubleshooting common issues—all within 30 minutes of practice.
Most new pilots make the critical mistake of skipping pre-flight camera checks, only to discover blurry footage or corrupted files after landing. By following this streamlined process, you’ll avoid the top three drone camera failures that ruin 60% of beginner shoots. Let’s transform your shaky first attempts into confident, professional-grade aerial photography that wows clients and social media followers alike.
Essential Pre-Flight Camera Checks Before Every Flight
Don’t power up your drone without these camera-specific verifications. Start by confirming your drone battery shows 100% charge—not just “full”—since voltage drops rapidly during flight. Simultaneously check that your remote controller has at least 80% power; weak controller batteries cause signal loss mid-shot. Insert a freshly formatted SD card (never reuse old cards) and physically inspect the camera lens for dust, scratches, or moisture that creates lens flare artifacts. Finally, remove the gimbal transport lock—a step 30% of beginners forget—that prevents camera movement and causes error messages.
Why GPS Lock Matters for Stable Footage
Wait for solid green GPS indicators before camera calibration. Fewer than 10 satellites causes drift during filming, making horizon lines tilt unnaturally. During compass calibration, rotate the drone slowly on a flat surface away from metal objects—concrete driveways work better than decks with nails. Set your return-to-home altitude 50 feet above the tallest nearby obstacle; too low risks collision during emergency returns.
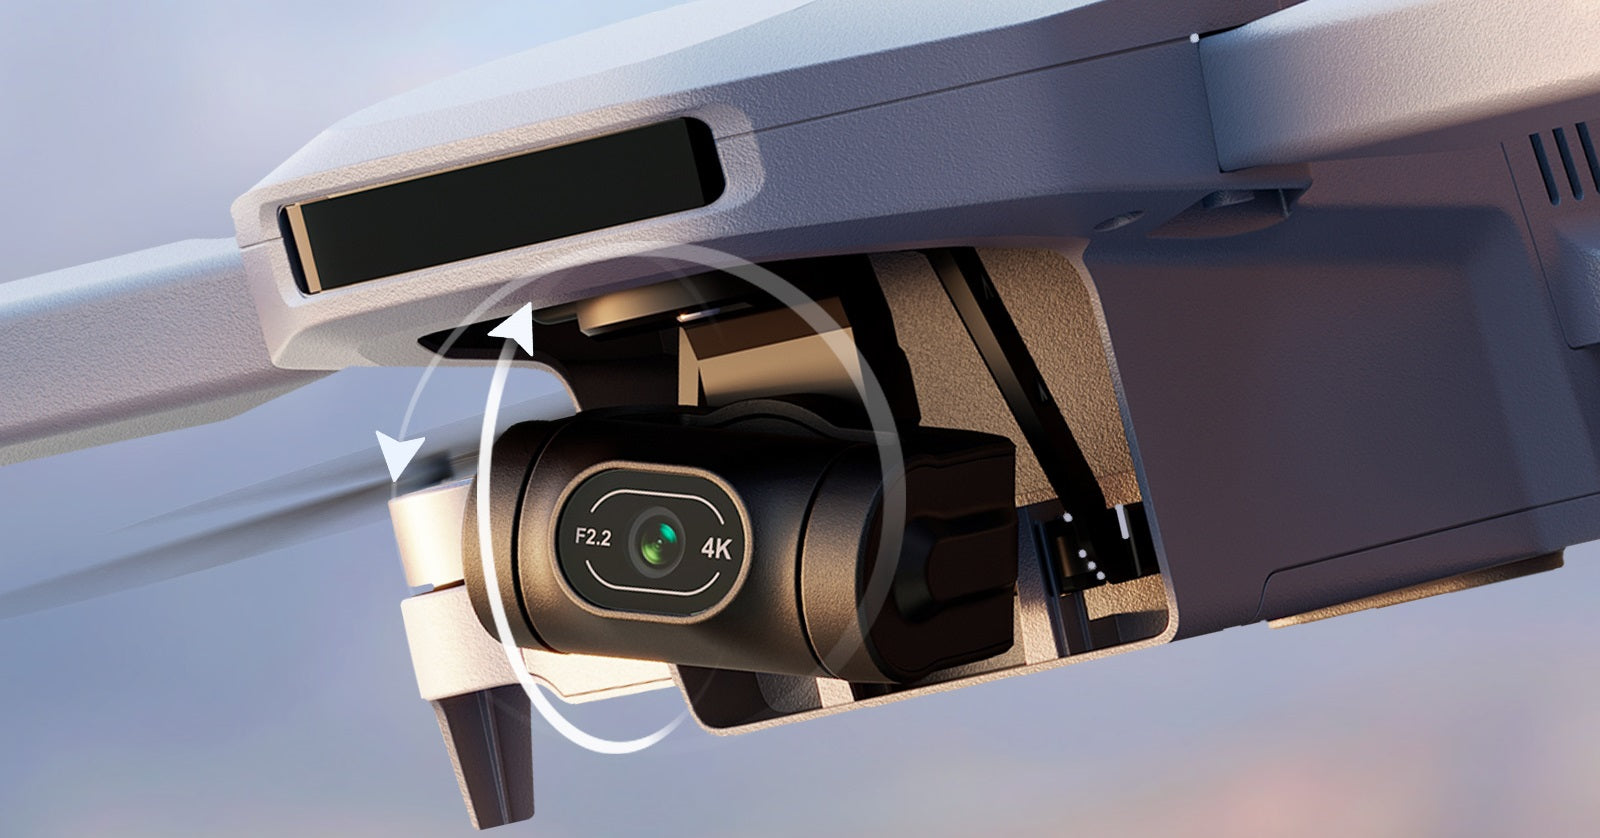
Gimbal Movement Test Protocol
After power-up, manually test the gimbal through its full range: tilt camera from straight down to straight up while watching the live feed. Any stuttering or grinding sounds means immediate landing is required. The gimbal must move silently and smoothly—this protects your camera during flight maneuvers.
Master Stick Controls for Cinematic Footage in 10 Minutes
Your left stick controls vertical movement and rotation—push up to ascend, down to descend, left to yaw counterclockwise. Practice hovering at chest height while making 90-degree rotations. You’ll feel the drone resist wind; counter this with micro-adjustments. The right stick handles horizontal movement: push forward for smooth forward flight, not jerky motions. Start with 2-foot increments in each direction until the drone responds like an extension of your hands.
Combining Sticks for Dynamic Reveals
Create professional opening shots by simultaneously ascending (left stick up) while moving forward (right stick up). This diagonal movement prevents flat, static footage. For landing sequences, descend while moving backward—this maintains subject focus as you lower altitude. Master this coordination before attempting complex camera moves.
Beginner Camera Settings That Guarantee Quality Shots

Begin in Auto mode with these exact settings: 4K resolution at 30fps for smooth motion, JPEG+RAW photo format for editing flexibility, Auto white balance for accurate colors, and ISO capped at 400 to prevent digital noise. These defaults work in 90% of daylight conditions. Once comfortable, switch to manual exposure—set shutter speed to 1/60th for 30fps footage (double your frame rate) to achieve natural motion blur.
Focus Lock Techniques for Moving Subjects
Tap your subject on the controller screen to lock focus—ideal for stationary objects. For moving targets like vehicles or people, enable continuous autofocus and position high-contrast elements (like a person’s jacket zipper) at the focus point. Avoid sky or uniform surfaces; the camera needs texture to track properly.
Capture Stunning First Shots Using Golden Hour Positioning

Fly 50-100 feet high with the sun behind you during sunrise or sunset for warm, dimensional lighting. Point your camera 45 degrees downward to reveal landscape textures without flattening perspective. Enable grid lines on your screen and place horizons on the upper third line for sky-dominant shots, or lower third for ground emphasis. Position key subjects like trees or buildings at gridline intersections—this creates naturally balanced compositions that look professional instantly.
Bracketed Exposure for High-Contrast Scenes
In challenging light (like sunsets), take three photos in quick succession at different exposures: -1 EV (underexposed), 0 EV (normal), and +1 EV (overexposed). This ensures you capture detail in both bright skies and dark shadows. Review all three immediately after landing to select the best version.
Troubleshoot Blurry Footage Before Your Next Flight

If photos appear soft, immediately increase shutter speed to 1/500th or faster—slow shutter causes motion blur. Check gimbal dampeners for cracks; worn rubber pieces transmit vibration to your camera. Clean the lens with a microfiber cloth using circular motions from center outward. If the horizon tilts in footage, recalibrate the gimbal through your drone’s settings menu—don’t ignore this warning sign.
Eliminate Video Jitter Without Expensive Gear
Reduce flight speed by 50% for ultra-smooth footage. Enable “Tripod Mode” in your drone settings (labeled differently on DJI vs. Autel models) to limit movement to 2 mph. Inspect propellers for nicks or imbalance—replace any with visible damage. Never fly in winds above 15 mph; even 10 mph causes noticeable shake in 4K footage.
Battery Management Tactics That Prevent Mid-Air Failures
Land when your battery hits 30%—never push to 20% “just to get one more shot.” Weak batteries cause sudden power loss during critical moments. Enable Beginner Mode to shorten flight range, reducing signal strain. Turn off obstacle sensors in wide-open areas to conserve 15% extra power. Reduce controller screen brightness to 50%; full brightness drains batteries 40% faster.
Signal Range Optimization in Urban Areas
Position yourself with direct line-of-sight to the drone—never behind buildings. Avoid flying near power lines or cell towers that interfere with signals. In cities, angle your controller antennas parallel to the drone’s position. If signal bars drop below half, immediately fly closer; don’t rely on “extended range” claims from manufacturers.
Post-Flight Media Management in Under 5 Minutes
Review your first and last clips immediately on the controller screen to verify recording started/stopped properly. Check SD card status in the drone app—corrupted files show as “0 KB.” Delete obvious failures right away to free up space. Flag 2-3 standout shots by tapping the star icon for priority editing later.
Foolproof File Organization System
Create dated folders like “2024-06-15_CityPark” on your computer. Copy files within 24 hours using the drone’s official software. Always format the SD card in the drone after backup—not your computer—to prevent future errors. Keep RAW files for professional editing but export JPEGs immediately for client previews.
Emergency Landing Procedures Every Pilot Must Know
If the drone drifts unexpectedly, immediately engage Return-to-Home (RTH) by pressing the dedicated button—don’t attempt manual recovery. Know your controller’s emergency stop function (usually a double-press of RTH button) that cuts motors instantly. If signal is lost, listen for the drone’s audible alarms; it will either hover or auto-land depending on settings. Always maintain visual contact—don’t rely solely on the screen.
Practice Schedule for Real Results in 30 Days
Week 1: Hover Mastery
Spend 20 minutes daily practicing takeoffs and landings in open fields. Focus on smooth stick movements—no sudden inputs. Master emergency landings until they’re instinctive.
Week 2: Movement Integration
Add forward/backward flight in straight lines, then practice figure-8 patterns at 20 feet altitude. Prioritize smooth transitions between directions over speed.
Week 3: Camera-First Flights
Dedicate each session to one technique: tracking shots one day, reveal shots the next. Review footage immediately to spot mistakes.
Week 4: Creative Challenges
Recreate specific shots from professional videos. Film your house from five unique angles. Build a 30-second story sequence showing progression.
Your first drone flight might feel clumsy, but consistent practice following this system delivers dramatic results. Within 30 days, you’ll capture cinematic footage that looks professionally shot—not beginner practice. Remember that every expert pilot crashed their first drone; what separates them is systematic preparation and deliberate practice. Start implementing these steps today, and you’ll transform nervous hovering into confident, creative aerial storytelling that stands out in any portfolio. The sky isn’t the limit—it’s your new creative canvas.


