Tired of spending hours hauling heavy sprayers through muddy fields or watching chemical costs eat into your small farm profits? You’re not alone—most small-scale farmers struggle with inefficient application methods that waste both time and money. Learning how to make agriculture drone at home transforms your spraying routine from back-breaking labor into a precise 10-minute operation that targets only what needs treatment. This guide shows you exactly how to build a professional-grade sprayer drone for under $1,100 that delivers commercial results without the $15,000 price tag.
Forget complex engineering degrees—this DIY agriculture drone uses off-the-shelf components you can order online and assemble in a weekend. You’ll create a weather-resistant hexacopter capable of carrying 2 gallons of liquid, covering a 6-foot swath per pass, and automatically resuming missions after battery swaps. Whether you’re spot-treating fence rows, spraying wet fields inaccessible to tractors, or mapping crop stress before visible symptoms appear, this build puts precision agriculture technology within your reach.
Frame and Motor Selection for Maximum Payload Capacity

550mm Carbon Hexacopter Build Specifications
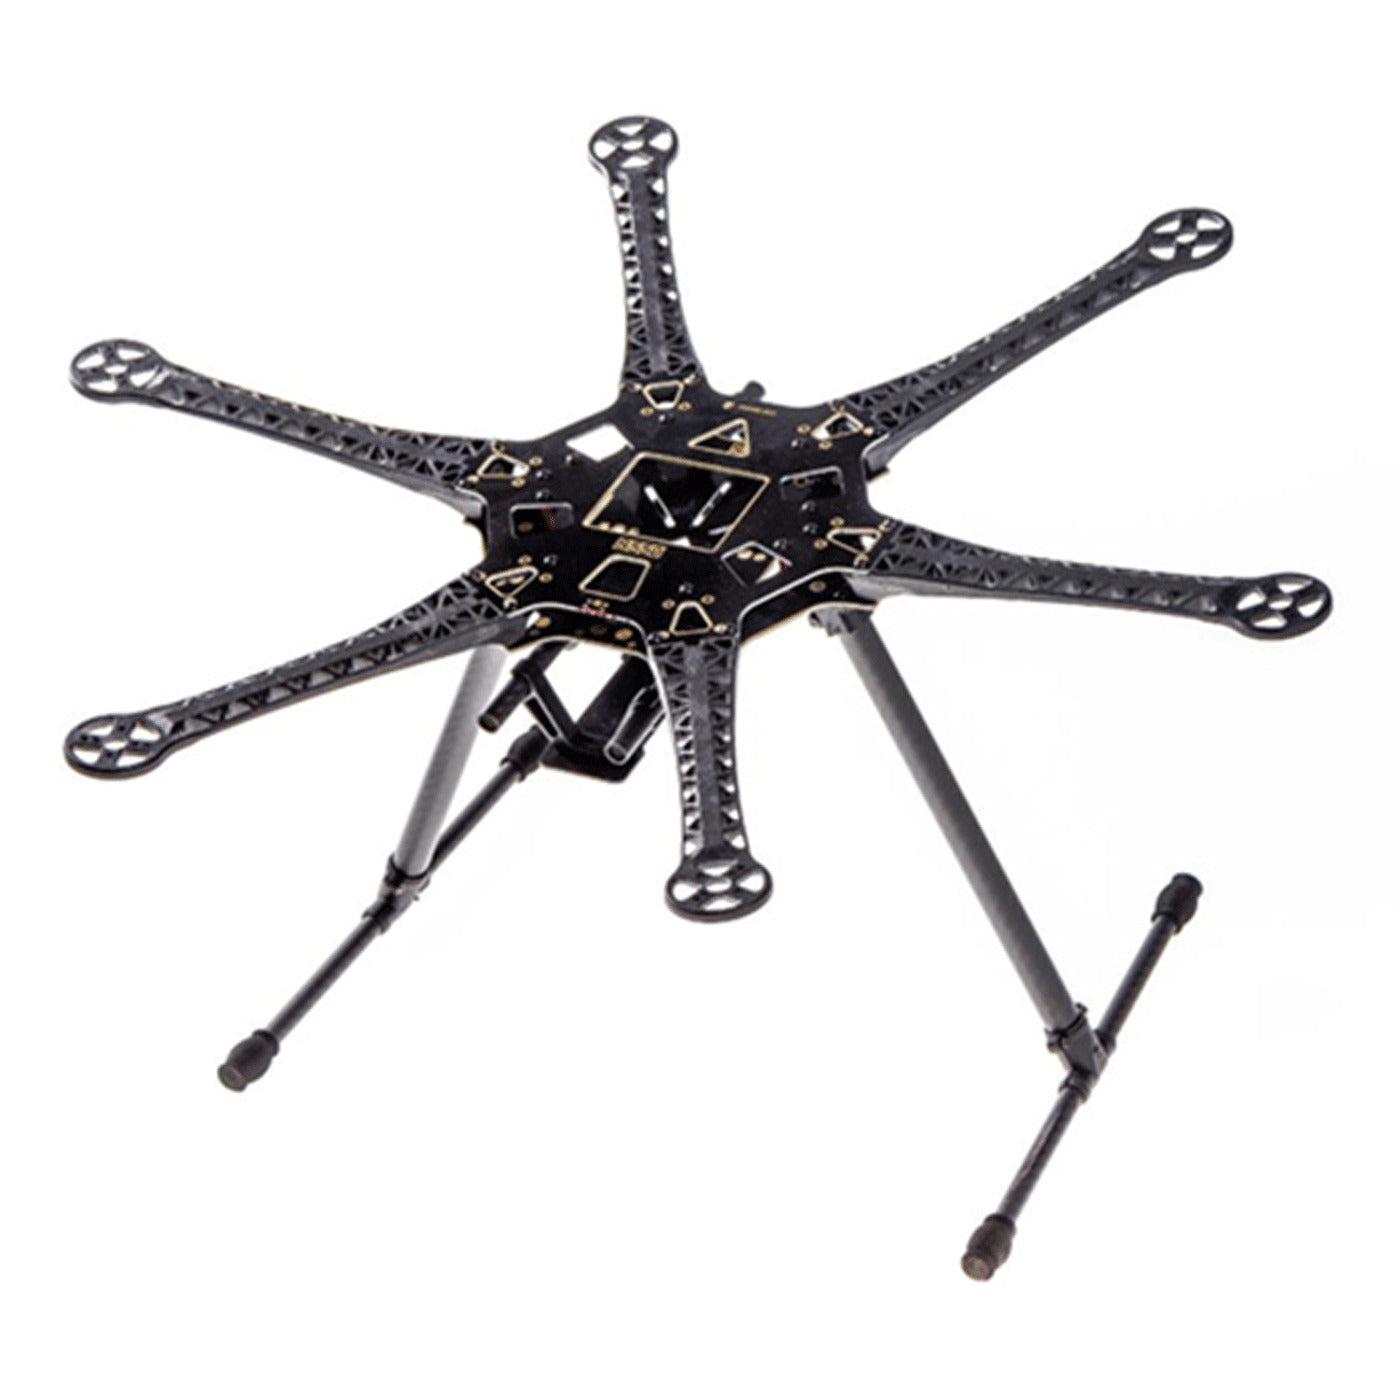
Start with a 550mm carbon fiber hexacopter frame that provides the critical lift margin needed for liquid payloads. The six-arm configuration creates redundancy—if one motor fails, the drone can still land safely while carrying your tank. Carbon fiber resists pesticide corrosion better than aluminum while keeping the bare frame weight under 1.2 kg. Your center plates must include vibration-isolated mounting points to protect sensitive electronics from prop wash vibrations that cause premature component failure.
Motor Thrust Requirements for Reliable Operation
Mount six 400 KV brushless outrunners in standard hex configuration (every 60 degrees) and verify each produces at least 2.5 kg thrust at 50% throttle during bench testing. This delivers 15 kg total thrust—sufficient to hover at 200% of your expected 8 kg all-up weight when fully loaded. Thread-lock every motor screw because prop wash vibrations will loosen fasteners during operation. Use glass-filled nylon props instead of carbon fiber—they withstand chemical exposure better while providing enough durability for agricultural use.
Power System Design That Prevents Mid-Flight Failures

Battery Configuration Math for Real-World Flight Time
Wire two 6S 6000 mAh LiPo batteries in parallel for 12,000 mAh total capacity. At 25C discharge rate, this provides 300A available current—well above the 120A peak your six motors draw during spraying operations. This setup delivers 15-20 minutes flight time when spraying 1 gallon of liquid, dropping to 10 minutes at full 2-gallon capacity. Always weigh your completed build—anything exceeding 9 kg total weight requires motor or battery upgrades to maintain safe flight margins.
Independent Pump Circuit Installation Process
Wire your 12V diaphragm pump through a dedicated 20A ESC powered by a separate 3-cell 2200 mAh Li-ion pack. This critical safety feature prevents brown-outs when the pump activates—situations that cause most DIY agriculture drone crashes when tanks run low. Connect the pump ESC signal wire to Pixhawk AUX OUT 5, and fuse the 12V power line at 10A to protect against electrical faults. Without this independent circuit, pump activation would draw enough current to reset your flight controller mid-mission.
Flight Controller Setup for Precision Spraying
Pixhawk 4 Calibration Sequence
Flash ArduCopter 4.x firmware using Mission Planner, then complete these mandatory calibrations in order:
– Accelerometer (on a perfectly level workbench)
– Compass (away from metal tools or electronics)
– Radio endpoints (with your FlySky i6s transmitter)
– ESC throttle range (for all six motors simultaneously)
Set FRAME_CLASS = 2 for hexacopter geometry in parameters. Enable terrain following with TERRAIN_ENABLE = 1 if you plan to add lidar later—this becomes essential when spraying hilly fields where maintaining consistent height matters.
Sprayer Parameter Configuration Guide
In Mission Planner’s Full Parameter List, configure these critical settings:
– SERVO9_FUNCTION = 10 (relay for pump control)
– SPRAY_ENABLE = 1 (activates sprayer functions)
– SPRAY_PUMP_RATE = 1.0 L/min (matches your nozzle output)
– SPRAY_ACCURACY = 1.0 m (ensures proper coverage overlap)
These settings automatically trigger pump activation at each waypoint during autonomous missions. For variable-rate applications, you’ll later adjust SPRAY_PUMP_RATE based on prescription maps from your crop monitoring flights.
Spray System Assembly for Uniform Coverage
Tank and Boom Mounting Best Practices
Center a 3-liter food-grade tank on the upper frame plate—square tanks strap down more securely than round designs. Run two 20-inch carbon fiber booms under the rear arms with nozzles angled 15° downward to counteract rotor wash turbulence. Install quick-disconnect fittings at boom connections so you can swap nozzles or clean lines in under 30 seconds. Always include a vented cap on your tank to prevent vacuum lock that stops flow mid-mission.
Nozzle Selection That Eliminates Drift Problems
Install yellow air-induction flat-fan nozzles delivering 467 µm droplets at 30 PSI for 90% drift reduction compared to standard green tips. At 8-10 feet flying height, these create a uniform 6-foot swath without overspray hitting neighboring rows. Never exceed 30 PSI—higher pressure creates smaller, drift-prone droplets that waste chemicals and risk off-target damage. Use your pump’s PWM control to maintain exact pressure regardless of battery voltage drop during flight.
Calibration Methods for Optimal Droplet Size

Flow Rate Bench Testing Protocol
Fill your tank with water and run the pump into a graduated cylinder while logging flow at various PWM values. Map 1100-1900 µs PWM linearly to 0-100% flow rate and record exact values for mission scripting. Target 0.1 GPM per nozzle at 30 PSI for standard pesticide applications—this delivers proper coverage without runoff. This calibration step prevents under-application that wastes your mission time or over-application that damages crops.
Spray Pattern Verification with Kromekote Cards
Lay Kromekote cards every foot across an 8-foot transect and fly a test pass at 10 feet altitude and 5 mph forward speed. Even dye distribution across 6 feet confirms correct nozzle angle and pressure—adjust PWM values if streaking appears between cards. Repeat this verification monthly as nozzles wear, since a 10% flow increase from worn tips creates significant over-application across large fields.
Troubleshooting Common DIY Agriculture Drone Issues
Fixing Excessive Drift During Spraying Operations
Immediately switch from green flat-fan to yellow air-induction nozzles and reduce pump PWM until your pressure gauge reads exactly 30 PSI. Higher pressure creates smaller, drift-prone droplets that waste chemicals and risk off-target damage. If drift persists, lower your flying height to 8 feet—this reduces wind exposure while maintaining your 6-foot swath width through proper nozzle overlap.
Solving Erratic Loiter Behavior Near Field Boundaries
GPS multipath interference near tree lines causes position jumps that disrupt spraying patterns. Raise your GPS mast to 30 cm above the frame and enable GPS+GLONASS satellite blending in your flight controller settings. Check for loose compass cable connections—vibrations often work these free during transport to the field. For critical operations near obstacles, maintain manual control until you’ve verified stable positioning.
Maintenance Routine for Long-Term Reliability
Post-Flight Rinse Protocol That Prevents Corrosion
Flush your entire system immediately after spraying with this 4-step process:
1. Completely empty tank contents
2. Fill with clean water and run pump for 30 seconds
3. Spray through nozzles until water runs clear
4. Rinse booms and exterior frame with garden hose
This prevents chemical buildup that corrodes aluminum parts and clogs nozzles between uses. Never store your drone with residual chemicals in the lines—overnight crystallization creates blockages that require complete disassembly to fix.
Battery Care Schedule for Maximum Lifespan
Store LiPos at 3.8V per cell (40% charge) when not in use. Cycle batteries monthly by flying to 20% remaining capacity, then fully recharge. Retire packs after 200 cycles or when capacity drops below 80% of original rating—using degraded batteries causes sudden power loss during missions. Always inspect battery connectors for corrosion after spraying operations and replace any showing signs of pitting.
Cost Breakdown: DIY vs. Commercial Sprayer Drones
Your complete DIY agriculture drone costs approximately $1,120 versus $15,000+ for new commercial units:
| Component Group | DIY Cost |
|---|---|
| Frame + motors + props | $390 |
| Electronics (Pixhawk, ESCs, GPS) | $290 |
| Batteries (2× 6S 6000 mAh) | $260 |
| Spray hardware (tank, pump, nozzles) | $120 |
| RC + FPV gear | $60 |
| Total | $1,120 |
This budget build delivers comparable precision to commercial systems on fields under 10 acres. The modular design lets you upgrade components as needed—add RTK GPS for $400 when you need centimeter accuracy or swap to a multispectral camera for crop monitoring between spraying seasons.
Your DIY agriculture drone now transforms how you manage small plots with precision spraying that saves chemical costs while eliminating back-breaking labor. Start with this $1,100 build and expand functionality as your needs grow—the same frame that sprays today can map crop health tomorrow with simple component swaps. Remember to follow all local regulations for agricultural drone operation, and always prioritize safety with proper pre-flight checks before every mission.


