You’ve probably dreamed of soaring through the skies with your own custom drone, but felt overwhelmed by the technical complexity. Learning how to make a drone from scratch unlocks unparalleled customization possibilities while dramatically reducing costs compared to pre-built models. Forget expensive off-the-shelf options that limit your creative control—building your own FPV quadcopter puts you in command of every component selection and design decision. This guide cuts through the confusion with actionable steps that transform raw materials into a flight-ready machine, whether you’re capturing breathtaking aerial footage or competing in drone racing events.
Select Your Drone Configuration Based on Mission Requirements
Why Quadcopters Dominate DIY Drone Builds
Quadcopters deliver unmatched versatility for first-time builders seeking to make a drone that handles like a professional model. With four motors creating opposing rotational forces, these craft maintain natural balance without complex helicopter mechanics. This configuration excels in applications requiring precise positioning—like crime scene surveillance or agricultural mapping—where hovering capability matters most. Fixed-wing alternatives may offer extended flight times, but their runway-dependent takeoffs and complex landing procedures create unnecessary hurdles for beginners.
Frame Size Selection: The Foundation of Your Build
Your wheelbase measurement dictates performance characteristics and regulatory requirements when you make a drone. Measure from propeller tip to opposite tip to determine your frame classification:
- 200-300mm frames deliver racing drone agility with responsive control
- 350-450mm models balance photography stability with reasonable flight times
- 500mm+ giants handle heavy payloads but require advanced piloting skills
Most FPV builds target the 250mm sweet spot—offering optimal maneuverability without sacrificing too much flight time. Remember that larger frames increase both material costs and regulatory complexity, especially when crossing the 250g weight threshold requiring FAA certification.
Choose Between Carbon Fiber and 3D Printed Frame Construction
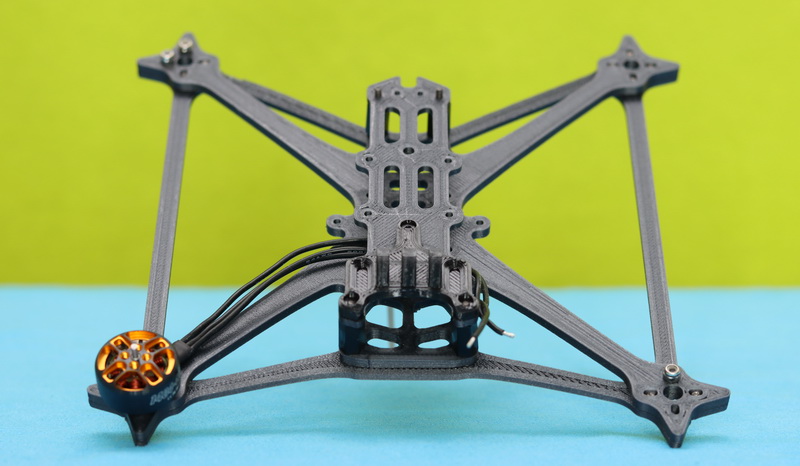
Carbon Fiber vs. Custom 3D Printed Drone Frames
Carbon fiber frames provide professional-grade durability with superior strength-to-weight ratios but limit customization options. These pre-fabricated solutions eliminate design guesswork at the cost of $50-150, making them ideal when you want to make a drone quickly without mastering CAD software. For true customization, 3D printing unlocks unlimited design possibilities through advanced manufacturing techniques.
Advanced 3D Printing Techniques for Functional Drone Parts
SLS (Selective Laser Sintering) printing creates flight-ready components using Nylon 12 Tough Powder for structural elements like arms and component plates. This material withstands crash impacts while maintaining precise mounting tolerances—critical when you make a drone designed for aggressive flying. TPU 90A Powder produces flexible camera mounts and GPS holders that absorb impact energy during crashes.
Follow this printing workflow for reliable results:
1. Print structural components in Nylon 12 Tough Powder (2mm wall thickness)
2. Print vibration-dampening mounts separately in TPU 90A Powder
3. Organize small spacers in grid patterns to prevent post-processing loss
4. Remove unsintered powder using a Fuse Sift system
Configure Critical Design Parameters Before Assembly
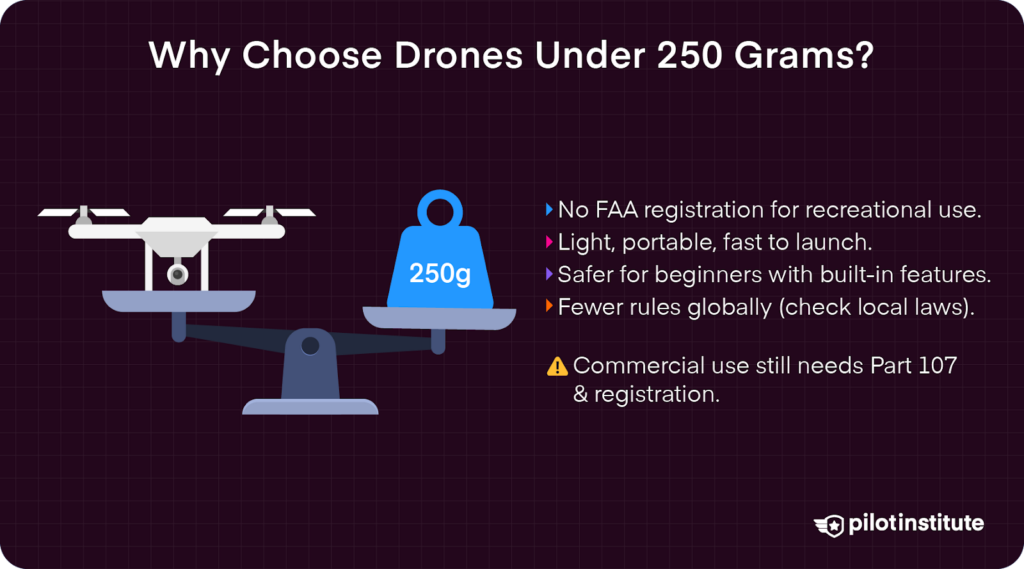
Sub-250g vs. Over-250g Drone Design Strategies
Build under 250 grams to bypass FAA licensing requirements entirely—perfect for recreational flying in residential areas. These ultra-light builds sacrifice battery capacity and camera quality but eliminate $89 Remote ID module costs and the 3-hour study commitment for Part 107 certification. For professional applications requiring HD cameras and extended flight times, prepare to register your drone and pass the FAA knowledge test.
Application-Specific Build Optimization Tactics
Racing drones prioritize minimal weight above all else—strip unnecessary components and use the smallest viable battery to maximize acceleration. Surveillance builds require vibration-dampening camera mounts and extended battery capacity for 30+ minute flight times. Delivery applications demand reinforced frames with powerful motors capable of handling 4+ kg total weight.
Execute Your Drone Assembly with Precision
Required Components for a Complete FPV Quadcopter
Power system essentials:
– HRB 6S Lipo 22.2V 4000mAh battery ($90.99) for 8-12 minute flight times
– Hobbywing XRotor Micro 65A ESC ($89.99) handling peak motor loads
– XT60 connectors and battery straps for secure power delivery
Flight control electronics:
– RADIX 2 HD flight controller ($112.99) with GPS waypoint navigation
– Lumenier SAM-M10Q GPS module ($79.99) for autonomous flight modes
– Dronetag BS V2 Remote ID module ($89.00) for regulatory compliance
Step-by-Step Assembly Sequence
Begin with frame construction by installing printed arms using M3x16mm flanged button head screws. Mount the flight controller first using vibration-dampening standoffs—this central component determines all other placement decisions. Next, solder the XT60 connector to ESC input pads and route power wires through frame arms to minimize interference.
Install propulsion components using M3x10mm screws through arm bottoms into motor bases—apply thread locker to prevent vibration-induced loosening. Mount the HD video transmitter on a vibration-isolated platform and route its antenna cable away from power wires to prevent signal interference.
Avoid Critical Build Mistakes That Cause Flight Failures

Power System Compatibility Checks
Mismatched components destroy drones instantly—always verify battery voltage compatibility with ESC and motor specifications. Using a 6S battery with 4S-rated components creates catastrophic failure. Check motor KV ratings against propeller size—higher KV requires smaller props while lower KV works with larger blades.
Vibration Management Techniques
Frame resonance creates “video jello” and control instability. Test different motor mounting orientations if excessive vibration occurs—sometimes rotating motors 90 degrees eliminates harmonic resonance. Ensure all screws are properly torqued but not overtightened, which can crack carbon fiber or 3D printed components.
Implement Maintenance Routines for Long-Term Reliability
Pre-Flight Inspection Checklist
Spend 2 minutes verifying critical systems before every flight:
– Confirm propeller security and absence of cracks
– Check battery voltage (minimum 3.7V per cell)
– Verify antenna connections are tight
– Ensure GPS has acquired sufficient satellites
Post-Flight Maintenance Protocol
Extend your drone’s lifespan with these 5-minute routines:
1. Remove debris from motors and frame arms
2. Tighten any loose screws identified during flight
3. Store batteries at 3.8V per cell for longevity
4. Backup video recordings before next flight
5. Inspect for structural damage requiring repair
Building your own drone delivers unmatched understanding of flight systems while enabling complete customization. When you make a drone from scratch, you gain the confidence to troubleshoot issues and implement upgrades as your skills develop. Start with proven components following this guide, master the assembly process, then iterate with custom modifications for your specific applications. The satisfaction of flying a drone you built yourself—knowing every component’s purpose and installation—creates a deeper connection to the hobby that pre-built models simply can’t match. Whether you’re capturing cinematic footage or competing in races, your custom-built FPV quadcopter will perform exactly as you designed it to.


