Your drone just vanished beneath the surface. That sinking feeling as you watch your DJI Mini, Mavic, or custom quadcopter disappear is gut-wrenching—but water damage doesn’t have to mean permanent loss. The critical first 60 seconds determine whether you’ll recover your UAV or face a total write-off. This guide reveals battle-tested techniques from professional drone repair centers, cutting through dangerous myths like the “rice trick” to deliver actionable recovery steps. You’ll learn exactly how to handle saltwater crashes, safely disassemble waterlogged components, and make the economic decision between repair and replacement—all based on verified industry protocols.
Never Jump In: Critical Safety Steps After Water Impact
Your instinct to rescue the drone immediately could cost you your life. Water rescues kill more pilots than drone crashes—never enter unknown depths or strong currents. Spend 5-10 seconds assessing water depth, current strength, and hazards before attempting recovery. If the water appears dangerous, prioritize your safety over equipment value.
Why Your Life Outweighs a $1,000 Drone
Submerged drones create powerful suction currents that can trap even strong swimmers. Saltwater environments add riptide risks, while freshwater bodies hide submerged debris. The FAA reports multiple near-drowning incidents annually from pilots chasing downed UAVs. If retrieval seems unsafe, mark the location and contact local authorities—they have proper rescue equipment.
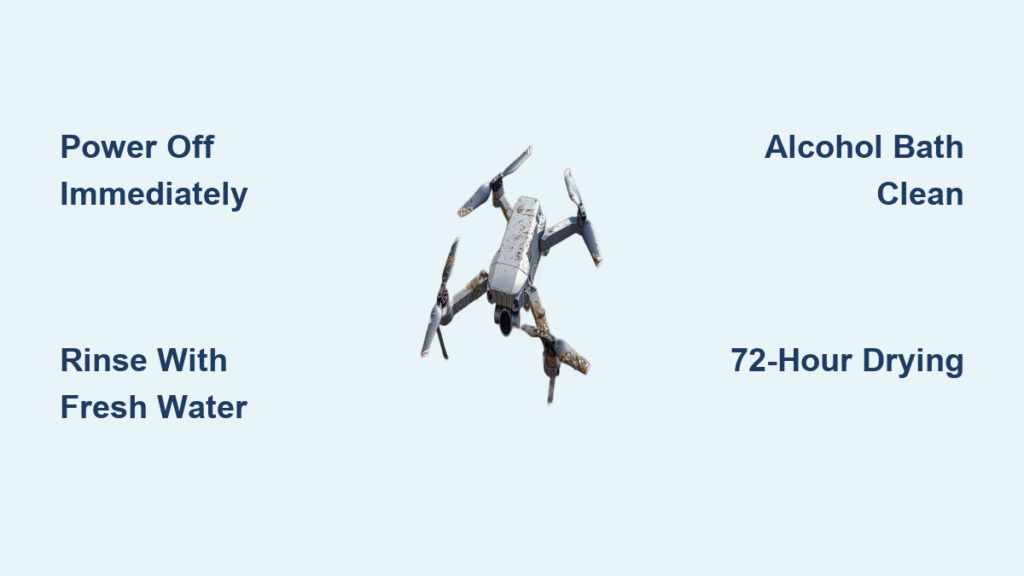
Power Disconnection Sequence Within 10 Seconds
As water contacts electronics, ESCs often blow like fuses, automatically cutting power. If your drone lacks a power switch, immediately disconnect the battery—this single action prevents catastrophic electrical damage. Use non-conductive tools like plastic tweezers if the drone remains partially submerged. Never touch battery terminals with wet hands; lithium polymer cells can short-circuit violently when compromised.
Salt Water vs Fresh Water: Your First 60-Second Damage Control
Saltwater crashes demand radically different treatment than freshwater incidents. The corrosive chemicals in seawater accelerate damage exponentially, making immediate action non-negotiable. Saltwater submersion requires a fresh water rinse within 2 minutes—counterintuitive but essential to prevent salt crystal formation that destroys circuitry hours later.
The Counterintuitive Fresh Water Rinse Protocol
For saltwater crashes: Submerge your drone in distilled or deionized water immediately after recovery. Tap water works as a second option but introduces minerals that may cause secondary corrosion. Gently shake the drone to flush salt from internal compartments—this “more water” step actually prevents worse damage. Skip this, and salt crystals will continue eating through copper traces for weeks.
First-Minute Triage Checklist
- Wipe external water with microfiber cloth within 30 seconds
- Check brushless motors—their sealed design offers temporary water resistance
- Drain internal compartments by tipping drone at 45-degree angles
- Never power on to “test functionality”—this guarantees further damage
Warranty Killers: Why Opening Your Drone Costs $1,000+
Any disassembly voids manufacturer warranties instantly—this is non-negotiable across DJI, Autel, and Skydio. If your drone is under warranty and unmodified, stop reading now. Place it in a dry, ventilated area away from direct heat, then contact your supplier immediately. Manufacturers analyze flight logs to determine if the crash resulted from equipment failure (warranty-covered) or pilot error.
What Flight Logs Reveal About Your Crash
DJI’s flight recorders track GPS coordinates, battery voltage, and control inputs. If logs show sudden motor failure during stable flight, you may qualify for replacement. But if they indicate pilot error like flying over water without safety margins, warranty claims get denied. Never attempt self-repair on a warranty-covered drone—even removing the battery compartment screws invalidates coverage.
Disassembly Protocol for DJI Mavic and Mini Series
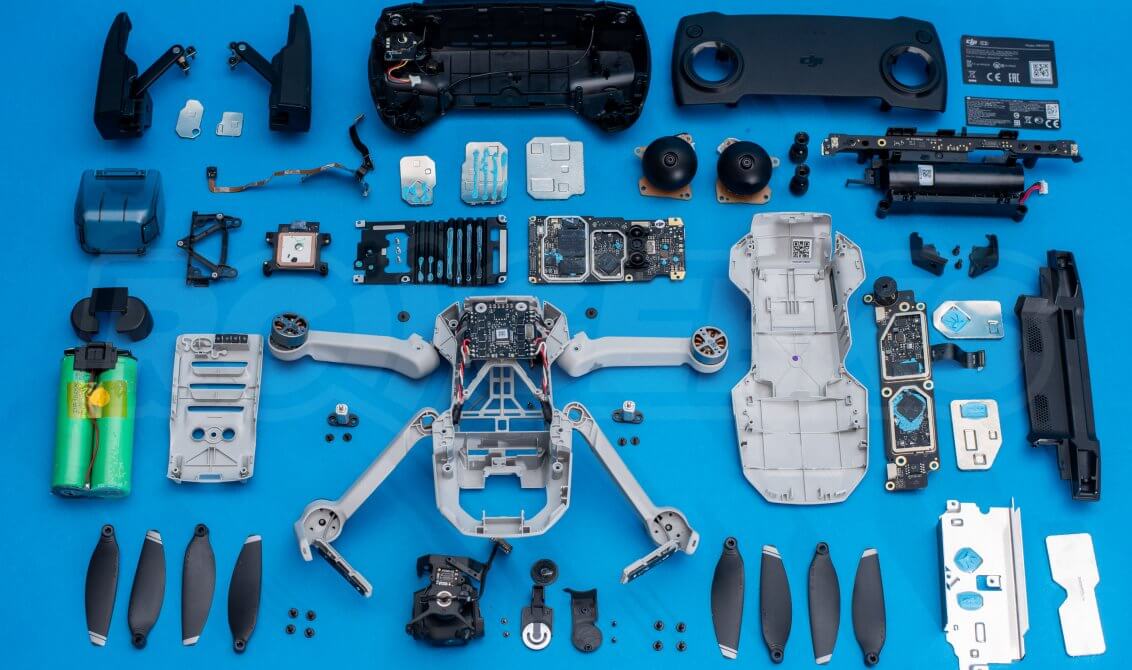
Complete disassembly is mandatory for non-warranty units—partial teardowns miss hidden moisture pockets. Water penetrates between circuit board layers, causing delayed failures weeks after the incident. Skip this step, and you’ll face phantom crashes during future flights.
Essential Tools for Water-Damaged Drone Teardown

– Precision screwdriver set (JIS #000)
– Anti-static mat for component placement
– 99% isopropyl alcohol (NOT 70%)
– Soft-bristled electronics brush
– Compressed air canister
Step-by-Step Component Removal
- Remove gimbal/camera assembly first—these contain moisture-sensitive optics
- Photograph every screw location before removal (models like Mini 4 Pro have 12+ unique screws)
- Isolate flight controller and ESCs—the most corrosion-prone components
- Extract motors only if water entered housings (check for visible residue)
Alcohol Bath Cleaning: Why Rice Fails and IPA Succeeds
The “bag of rice” trick is dangerously ineffective—rice grains scratch components while trapping moisture. Professional shops use isopropyl alcohol baths because it displaces water and evaporates cleanly. Submerge electronics in 99% IPA for 5-10 minutes, then gently brush corrosion zones with a soft toothbrush. Rinse with fresh alcohol to remove contaminants before air-drying.
Hidden Damage Zones Even Pros Miss
- Camera sensors: Condensation forms behind lens elements, causing permanent haze
- Gimbal motors: May test functional initially but develop jitter weeks later
- Internal wiring: Water wicks along conductors, corroding connections far from entry points
Heliguy Repair Center: When to Hand It Over (and What It Costs)
For complex models like DJI Mavic 3, professional repair often beats DIY. Heliguy’s UK center (0191 296 1024) specializes in water-damaged UAVs with OEM parts. Before calling, document water type, submersion duration, and visible damage with photos—they’ll provide repair quotes without requiring physical drop-off.
Pre-Call Checklist for Professional Repair
- Note exact submersion time (critical for saltwater cases)
- Photograph all components before disassembly
- Gather purchase receipt and warranty status
- Test battery separately (swollen LiPos require special handling)
Expect costs like £350 for main circuit boards or £450 for 4K cameras—often exceeding new drone prices for entry-level models. Modular systems like DJI S1000+ offer more cost-effective repairs since components are individually replaceable.
Flotation Devices That Save Phantom 3 and Mini Drones
Self-inflating balloons deploy on water contact, providing 1kg lift capacity to keep your drone afloat. For reference: Phantom 3 Pro weighs 1.28kg (requiring multiple devices), while DJI Mini 3 weighs just 249g (single device sufficient). These activate automatically when submerged, retrieving your drone even when completely non-functional.
Installing Pre-Flight Safety Nets
Mount flotation devices on landing gear struts using waterproof adhesive. Test deployment by submerging in a sink before critical flights. Never rely on auto-landing over water—low battery triggers landing regardless of terrain, creating guaranteed crashes.
The 72-Hour Drying Rule Most Pilots Ignore

Minimum 72 hours drying time is non-negotiable—24 hours leaves moisture in circuit board layers. Place components on an anti-static mat in a ventilated room with silica gel packs. Never use heat sources like hairdryers; they bake in moisture and melt solder joints. Test components individually after drying: flight controller first, then motors, then camera.
Gradual Power-Up Sequence to Avoid Second Failure
- Connect only flight controller to battery
- Check for unusual odors or heat
- Test motor response without props
- Verify camera functionality before full assembly
- Conduct 10+ ground tests before first flight
Economic Reality: Repair Costs vs New Drone Prices
Total repair often exceeds replacement cost for consumer drones. Calculate: component prices + labor (typically £65/hour) + hidden future failure risks. For DJI Mini 2 ($449 new), a £200 repair makes sense. But for Phantom 4 Pro ($1,999 new), £800 in repairs invites future reliability issues.
Salvaging Parts from Water-Damaged Frames
- Harvest functional motors for spares
- Recover undamaged propellers
- Extract GPS modules for DIY projects
- Repurpose battery compartments as storage cases
Water damage isn’t necessarily fatal—but rushed power-on attempts almost always are. Your drone’s survival hinges on immediate safety compliance, precise water-type response, and professional-grade drying. For future flights over water, install flotation devices and maintain 30% extra battery capacity for emergency returns. Remember: even with perfect recovery, hidden corrosion can surface months later. Monitor your first 10 flights closely for delayed symptoms like intermittent motor failure or camera glitches. When in doubt, consult Heliguy’s repair center before attempting disassembly—your warranty might still save you thousands.


