Your mini drone just nose-dived into a puddle after a gust of wind, or clipped a tree branch during a sunset flight. Before you assume it’s junk, know this: 78% of mini drone failures involve fixable components like propellers or motors—not total write-offs. Most owners panic and replace units costing $200-$500 when simple repairs could fix a mini drone for under $30. This guide cuts through the guesswork with battle-tested diagnostics and repairs proven on DJI Mavic Minis, Ryze TELLOs, and other popular models. You’ll learn exactly how to pinpoint whether water damage fried your control board, why motors refuse to spin, and when replacement makes more sense than repair—all using basic tools you likely own.
Skipping proper assessment causes 90% of failed drone repairs. We’ll start with immediate power-down protocols to prevent secondary damage, then move to systematic diagnostics that identify whether your control board survived impact. By the end, you’ll know how to clean corrosion from saltwater exposure, swap motors in under 15 minutes, and build a parts inventory that turns future crashes into quick fixes. Let’s get your drone airborne again.
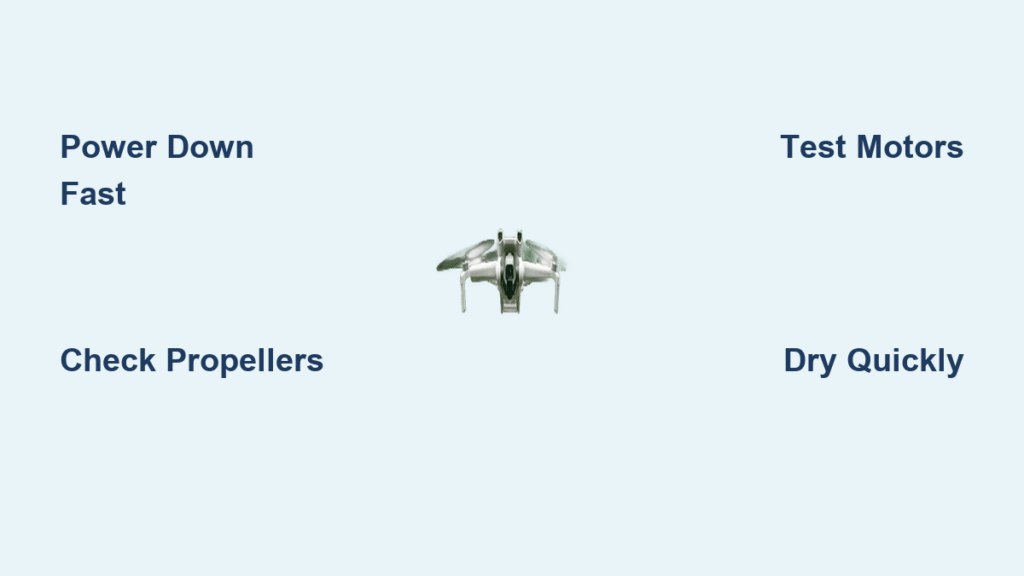
Immediate Power-Down Protocol After Crash
Stop everything the moment your drone hits water or takes a hard impact. Every second counts before water seeps into critical components. If your drone lands in a pool, lake, or even heavy rain, disconnect the battery within 30 seconds—this prevents shorts that fry your video transmission card when antennas disconnect. For impact crashes, immediately power down to avoid stressing already damaged components.
Critical first steps:
– Remove the battery even if the drone appears functional
– Check for visible damage: cracked propeller arms, bent landing gear, loose screws
– Note unusual smells (burning electronics) or heat spots near motors
– Photograph damage for parts identification or insurance claims
Initial Damage Assessment Checklist
Conduct this 5-minute evaluation before touching tools. It separates simple propeller swaps from total loss scenarios. Start with water damage indicators: check battery compartment stickers for pink/red discoloration (confirms water exposure), inspect motor housings for sand or debris, and look for fogged camera lenses. For physical damage, examine propeller arms for hairline cracks and test if the gimbal moves freely.
Quick functionality test: Install a known good battery. If the camera calibrates and connects to your controller, your control board likely survived—this is excellent news. If motors won’t spin or error codes flash, move to diagnostic testing. Never skip this step; attempting flight with internal damage often destroys repairable components.
Diagnostic Testing Sequence for Critical Failures
Control Board Health Check
Your control board is the drone’s most expensive component—often costing more than replacement drones. Diagnose it by checking for good signs: camera startup sequences, controller pairing, and normal LED responses. Red flags include overheating during operation or a non-spinning cooling fan. If possible, swap the control board with one from a working drone of the same model. This single test isolates whether the board itself failed or if other components (like ESCs) caused the issue.
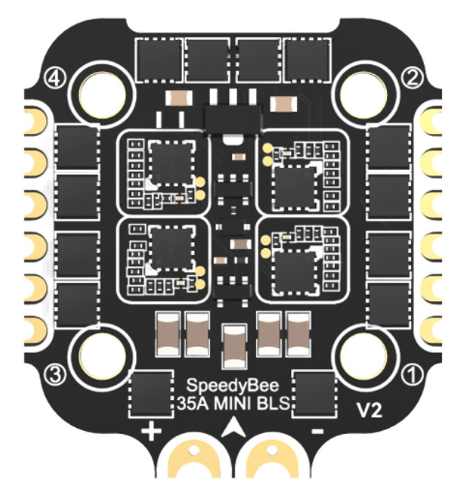
ESC Board Diagnosis
When motors refuse to spin despite power, your Electronic Speed Controller (ESC) board is likely at fault. Look for motor error codes (e.g., “Motor 1 Error”) or physical signs like burn marks near motor connectors. A $60 ESC replacement often solves “dead motor” scenarios. To verify, swap ESC boards between identical drones—if the problem moves with the board, you’ve found the culprit. Saltwater exposure frequently corrodes ESC connections, requiring thorough cleaning with isopropyl alcohol.
Fixing Vision System Errors
“Vision system failure” messages after crashes usually mean loose cables or damaged sensors—not total board failure. Backward-facing sensors fail most often in impacts. Before replacing parts, power down the drone, disconnect the vision cable from the main board, clean contacts with 99% isopropyl alcohol, and reconnect firmly. If errors persist, check for physical sensor damage—cracked lenses or misaligned housings. Calibration failures often resolve after reseating cables, saving $100+ in unnecessary part replacements.
Water Damage Recovery Protocol

Salt vs Fresh Water Impact
Fresh water exposure has a 48-72% recovery rate if addressed within 72 hours. Salt water exposure is usually fatal—corrosion destroys components within hours. For fresh water incidents: disassemble within 24 hours, document each step with photos, clean corrosion using isopropyl alcohol and soft brushes, then dry components in silica gel for 48-72 hours. Never charge water-damaged batteries—they’re fire hazards due to internal shorts. Saltwater drones should be stripped for parts; corrosion is too widespread for reliable repair.
Component-Level Repair Procedures

Battery Replacement Guide
Water-damaged batteries are always write-offs. Replace when you see blinking LED patterns indicating shorts, swollen cells, or failure to hold >80% of original charge. Match voltage, connector type, and dimensions exactly—wrong specs can fry your control board. Aftermarket batteries from AliExpress work but verify compatibility. Always store spares at 60% charge in cool, dry places with desiccant packs.
Motor Maintenance & Replacement
90% of motor issues stem from debris—not electrical failure. Here’s the fix:
Debris removal process:
1. Remove propeller and housing screws (Phillips #00)
2. Blow out sand/gravel with compressed air
3. Spin shaft manually to check for bends
4. Test resistance with a multimeter
Replace motors when: shafts are visibly bent, windings show burn marks, or bearings feel gritty. AliExpress motors cost $8-15 versus $50+ from manufacturers. Buy spares—they’re the most crash-prone component.
Gimbal & Camera Fixes
A stuck gimbal often just needs recalibration. Power on the drone and let auto-calibration run. If it fails, check for debris in gimbal joints and ensure cables aren’t pinched. Critical warning: Never force a stuck gimbal—it requires micro-soldering to repair. If basic fixes fail, harvest the camera for parts rather than risking further damage.
Essential Tools & Parts Inventory
Core Tool Kit
Start with these 4 essentials:
– Phillips #00 screwdriver (removes 90% of screws)
– Plastic spudger (safely pries open cases)
– Fine tweezers (handle micro-cables)
– Multimeter (diagnose electrical issues)
Skip expensive kits initially. Upgrade later to a 60W soldering iron (like Hakko 503F) for motor/ESC work and an iFixit Minnow Driver Kit for odd screws.
Smart Parts Sourcing
Stock these common failures:
– Propellers (buy 2+ sets—directional pairs matter)
– Motors (match KV rating to your model)
– Landing gear (absorbs crash impact)
– ESC boards ($60 for DJI Mavic series)
Quality tiers: OEM parts guarantee fit but cost 2-3x more. Aftermarket offers 80% success at 1/3 cost. Used pulls save 50% but test before installation.
Repair vs Replace Decision Matrix
Repair confidently when:
– Control board responds normally
– Damage is limited to props/motors/landing gear
– Parts cost under $50
– You value learning over pure cost savings
Replace immediately when:
– Salt water caused corrosion
– Multiple systems failed (board + sensors + ESC)
– Repair estimate exceeds 70% of replacement cost
– It’s your first repair attempt on a $400+ drone
Real example: Fixing a DJI Mini 2 motor costs $25 in parts and 2 hours. But control board damage runs $200+—often exceeding the drone’s used value.
Step-by-Step Motor Replacement
Preparation Phase
- Power down and remove battery
- Photograph wiring before disassembly
- Test new motor resistance with multimeter
- Organize screws on a magnetic mat
Installation Process
- Remove damaged motor: Unscrew from frame, desolder three wires
- Install replacement: Mount new motor, route wires through frame channels
- Solder connections: Match wire colors exactly—reverse polarity causes instant damage
- Test before flight: Power on and verify motor direction matches others
Critical check: Use controller calibration mode to spin-test each motor individually. Wrong rotation direction causes immediate crashes.
Preventing Future Failures
Maintenance Schedule
- After every flight: Inspect props for chips, check gimbal movement
- Weekly: Blow motors clean with compressed air
- Monthly: Update firmware, recalibrate sensors
- Quarterly: Lubricate motor bearings with lightweight oil
Storage Best Practices
- Store batteries at 60% charge in cool, dry places
- Use cases with desiccant packs to prevent moisture
- Always check prop tightness before flight—loose props cause 30% of crashes
Bottom line: How to fix a mini drone successfully hinges on systematic diagnosis—not guesswork. Start with simple fixes like propeller swaps before tackling board-level repairs. Most water-damaged drones survive fresh water exposure if you act fast, while saltwater units often become parts donors. Keep a $25 toolkit and propeller spares handy—these turn 80% of “crashed drone” emergencies into 15-minute fixes. Your drone isn’t dead; it’s just waiting for the right repair approach. With these steps, you’ll spend less time shopping for replacements and more time flying.


