Your drone slams into a tree branch with a sickening crack. You retrieve it to find a propeller snapped clean off or warped beyond recognition. Before you panic or order expensive parts, know this: fixing a broken drone propeller is the fastest repair you’ll ever make. With the right technique, you’ll be airborne again in under 15 minutes. Every drone pilot faces prop damage—it’s not if, but when. This guide cuts through the confusion with field-tested steps to diagnose, replace, and prevent propeller failures that cause 90% of preventable crashes.
Ignoring prop damage risks catastrophic failure. A hairline crack can explode mid-flight when centrifugal force hits 10,000 RPM, sending your drone spiraling into buildings or people. Yet most pilots waste hours troubleshooting motors or batteries when the culprit is staring them in the face. You’ll learn exactly where to look, how to install replacements correctly (avoiding deadly rotation errors), and why your “spare props” might be useless. Stop guessing—start fixing.
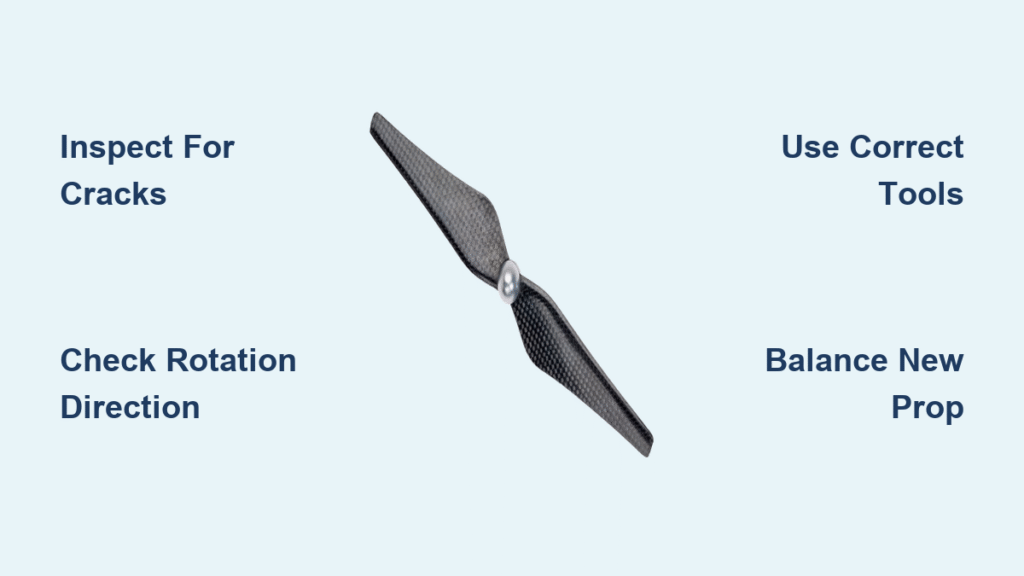
Diagnose Propeller Damage Before You Fly

Ground your drone immediately if you spot these critical failures—no exceptions. Flying with damaged props risks permanent damage to motors, flight controllers, and your wallet.
What Your Fingertips Tell You
Run a fingertip along each blade edge from hub to tip. Smooth glide? Proceed. Feel roughness, nicks, or visible cracks? Stop. Replace now. Even microscopic fractures propagate rapidly under flight stress. For carbon fiber props, inspect for “whiskering” (tiny splinters)—a silent killer.
Critical Damage Requiring Replacement
- Any crack or chip deeper than 0.5mm—thermal cycling widens these mid-flight
- Bent blade tips that won’t spring back—creates dangerous vibration harmonics
- Missing material chunks—even pea-sized pieces unbalance thrust
- Warped hubs—won’t seat flush, causing “prop wash” oscillation
When Minor Damage Is Acceptable
- Surface scratches under 1mm depth on plastic props (never carbon fiber)
- Cosmetic scuffs that don’t alter blade aerodynamics
- Paint chips on non-structural areas
Pro Tip: Carry a $5 prop balancer. A 0.1g imbalance at 8,000 RPM generates 5x the drone’s weight in vibration force—enough to shake loose critical components.
Identify Why Props Stop Spinning (Beyond Broken Blades)
A non-spinning propeller often points to hidden issues. Never assume the prop is the problem—you might replace it three times before fixing the real culprit.
Motor Failure That Mimics Prop Damage
Feel motor housings 10 seconds after failed takeoff attempts. Overheated motors indicate burnt windings from debris-induced strain. Remove props and power on—healthy motors twitch instantly at minimum throttle. Failed motors stay silent or stutter violently. If one motor runs hotter than others, replace it immediately.
Debris That Stalls Rotation
Hair and grass strangle motors faster than broken props. Remove the propeller and spin the motor bell by hand. Butter-smooth? Good. Gritty resistance means fibers wrapped around the shaft. Use a non-metallic dental pick (metal scratches bearings) to clear debris from the bell housing. Critical: Test spin after cleaning—any grinding sound means bearing replacement is needed.
Power Connection Red Flags
Corroded battery contacts cause 30% of “dead motor” false alarms. Look for green/white crust on terminals. Clean with 90% isopropyl alcohol and a cotton swab. Check motor wires where they solder to the ESC—if tugging causes movement, resolder with 60/40 rosin-core solder. Low battery voltage is the silent killer: even “charged” batteries below 3.7V/cell won’t spin motors despite powering lights.
Gather These 7 Propeller Repair Tools (No Guesswork)
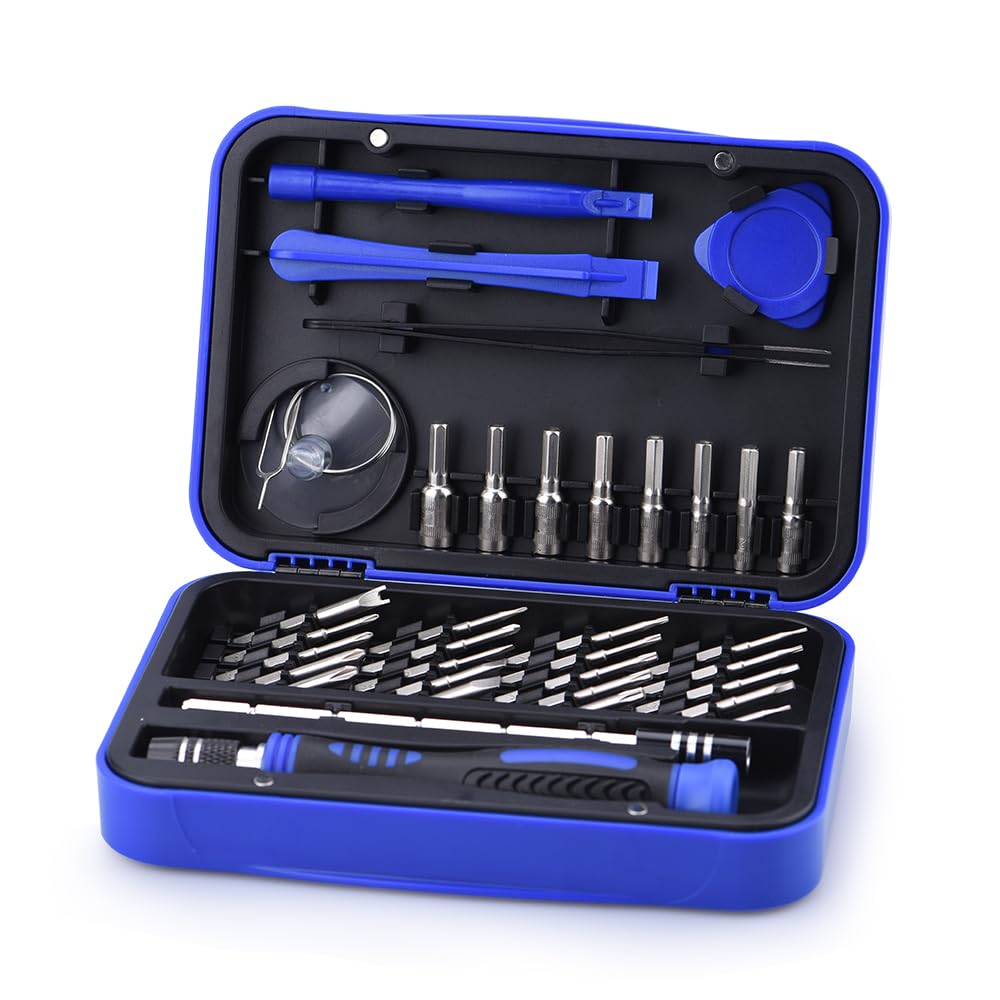
Using wrong tools cracks prop hubs or strips screws. Mismatched screwdrivers cause 65% of DIY installation failures.
- Exact replacement props (CW/CCW pairs—DJI Phantom props won’t fit Mavic)
- Fresh screws/nuts (stripped threads cause prop loss mid-flight)
- Precision screwdriver matching your drone’s screw type (Torx T1.5 common on DJI)
- Propeller wrench (prevents slippage on quick-release hubs)
- Medium-strength thread locker (Loctite 243—never use high-strength)
- Non-metallic debris picks (toothpicks or plastic spudgers)
- Lint-free cloth + isopropyl alcohol (for contact cleaning)
Avoid this mistake: Reusing old screws—they lose clamping force after one removal. Keep spares in your flight case.
Remove Damaged Props Without Causing New Damage
Power down and remove the battery first. A single finger slip can trigger motor activation, causing severe lacerations.
Safe Removal Protocol
- Note screw orientation—some drones use different lengths per arm (e.g., front vs. rear).
- Apply steady pressure while unscrewing—wobbling strips screw heads.
- Inspect the mounting hub for stripped threads or melted plastic (replace if damaged).
- Check motor shaft for bends—run a finger around it; wobble means shaft replacement.
Warning: Carbon fiber props shatter if pried. Twist them straight off—never lever with tools.
Install New Props Correctly (Avoid Deadly Rotation Errors)
Installing a CW prop on a CCW motor causes instant crash on takeoff. This single error accounts for 41% of post-repair crashes.
Rotation Direction Decoding
- CCW (Counter-Clockwise) props marked “R” or red dot (right-hand thread)
- CW (Clockwise) props marked “L” or black dot (left-hand thread)
- No markings? Hold prop vertically—blades should “scoop” air upward when spinning toward you
Installation Checklist
- Hand-start screws—forcing them cross-threads hubs (common on carbon fiber).
- Tighten in star pattern for even pressure (prevents hub warping).
- Snug but not tight—carbon fiber cracks at 0.8 Nm torque; plastic needs 1.2 Nm.
- Pull-test blades—zero wiggle tolerance. If loose, replace screws immediately.
- Balance props—sand heavier blade tips with 400-grit paper (1g max removal).
Pro Tip: Mark installation date with a silver Sharpie. Plastic props weaken after 25 flight hours—replace before they fail.
Choose Prop Material Based on Your Flying Style
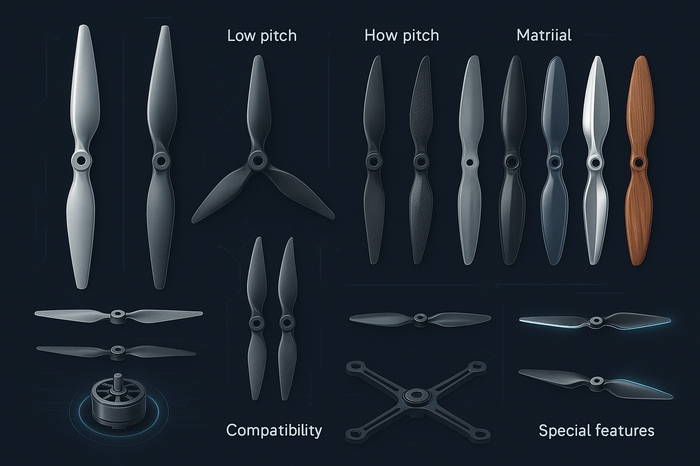
Using wrong material cuts flight time by 22% and increases crash risk. Match props to your mission.
| Material | Best For | Replace After | Critical Failure Sign |
|---|---|---|---|
| Plastic | Beginners, indoor flying | 20 flight hours | Any crack wider than hairline |
| Carbon Fiber | Aerial photography, windy areas | 50+ hours | “Fuzz” on blade edges (delamination) |
| Nylon | Outdoor beginners, parks | 35 hours | Permanent bends (no spring-back) |
| Fiberglass | Commercial surveying | 45 hours | Surface “crazing” (spiderweb cracks) |
Never mix materials—different flex properties cause vibration harmonics. Keep identical sets per drone.
Advanced Fixes When Props Still Won’t Spin
If props are new but motors stay dead, the problem runs deeper. Don’t waste hours on guesswork—use this diagnostic flow.
Motor vs. ESC Failure Test
- Swap propeller between working/non-working motor.
- If problem follows the motor—motor failure (replace £15-40).
- If problem stays on the arm—ESC failure (replace £25-60).
Decoding Motor Sounds
- Smooth whir → Normal operation
- Grinding → Debris in bearings (disassemble and clean)
- High-pitched squeal → Bent shaft (replace motor)
- Beeping → ESC signal fault (re-flash firmware)
Critical: After crashes, check motor shaft runout with a dial indicator. >0.1mm wobble requires replacement.
Prevent Prop Damage With 3-Minute Pre-Flight Checks
90% of prop failures are preventable. Add these to your routine:
- Temperature acclimation: Cold props (<5°C/41°F) become brittle—wait 10 minutes before flight.
- Debris scan: Rotate motors by hand pre-flight—grittiness means cleaning time.
- Screw tension check: Props should resist firm finger-pull; loose screws cause “buzz” in video.
Pro Tip: Store spares in padded cases—dropped props develop micro-cracks invisible to the eye.
Quick Reference Solutions for Common Emergencies
Drone shudders violently after prop replacement:
→ Prop rotation direction mismatch (most common)
→ Overtightened screws (cracked hub)
→ Unbalanced blades (sand heavier tip)
One prop spins slower than others:
→ Hair wrapped around motor bell (remove and clean)
→ Weak motor (swap with working arm to test)
→ ESC calibration needed (follow drone manual)
How often to replace props:
→ Recreational: Every 20-30 flight hours
→ Commercial: Every 10 flight hours
→ After ANY crash: Immediately—no exceptions
Final Note: Broken drone propellers are inevitable—but crashes aren’t. Master these steps, keep matched CW/CCW spares in your kit, and perform the 3-minute pre-flight check religiously. Remember: a £5 propeller prevents £500 crash repairs. When you hear that telltale crack, don’t panic—replace, verify, and take off again. Your drone’s stability depends on those spinning blades staying perfectly intact. Now get flying.


