
That perfect coastal sunset flight turns disastrous when salt spray coats your drone lens, transforming golden hour footage into a hazy mess. Unlike your constantly handled phone camera, drone lenses stay remarkably clean—until salt crystals, bug splatter, or fingerprint oils permanently etch delicate anti-reflective coatings. Rushing cleaning with improper tools causes more damage than the contamination itself, potentially costing $1,000+ in gimbal replacements. This guide reveals field-tested techniques professional drone operators use to safely restore optical clarity using a $30 kit—no technical expertise required.
Knowing how to clean drone camera lens properly separates hobbyists from professionals. Most pilots over-clean when unnecessary or under-clean when salt residue demands immediate action. You’ll learn precisely when to intervene, which tools prevent $800 repairs, and the single wipe technique that dissolves sea-spray without scratching multi-coated glass. Crucially, you’ll discover why your canned air can is wrecking your optics and how a $10 UV filter becomes your best insurance policy.
Essential Tools That Prevent Costly Lens Damage
Using paper towels or canned air on drone optics guarantees microscopic scratches that degrade image quality permanently. Professional drone technicians carry a compact field kit costing less than a single ND filter—yet it prevents thousands in repairs by avoiding common contamination traps.
Non-Negotiable Cleaning Components:
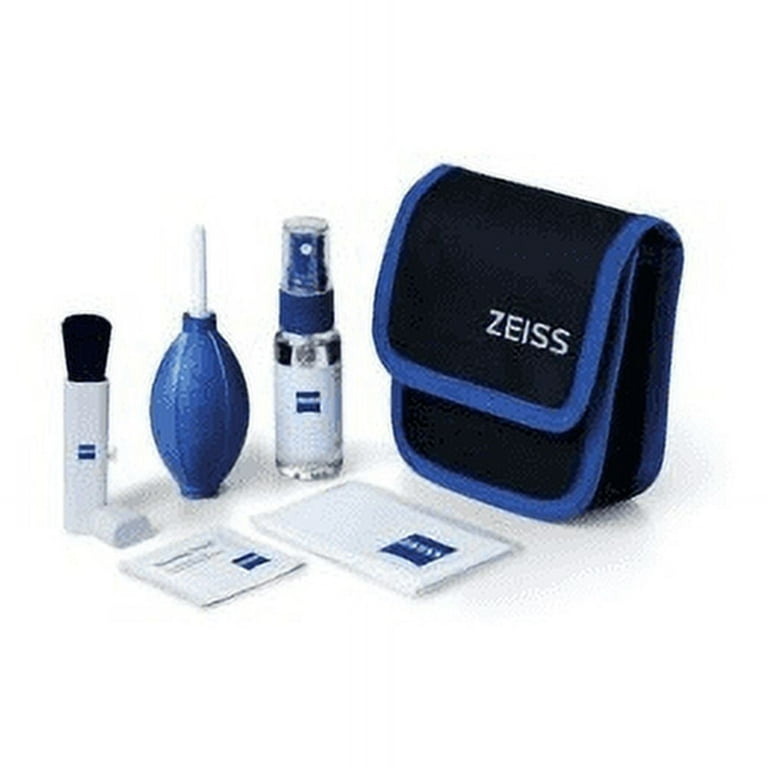
– Rocket-style manual blower (Giottos or LensPen Hurricane) – dislodges grit without propellant residue
– LensPen NLP-1 – carbon-tip safely lifts oils without liquid cleaners
– Dedicated microfiber cloth (Zeiss or ROR) – never share with glasses or phone screens
– 99% isopropyl alcohol (not 70%) – evaporates residue-free on multi-coated glass
– Pre-moistened Zeiss lens wipes – single-use field solution for salt spray
Tools That Destroy Drone Lenses:
– ❌ Canned air (propellant blasts debris into gimbal motors)
– ❌ T-shirt fabric (lint embeds grit that scratches coatings)
– ❌ Paper towels (wood fibers act like sandpaper)
– ❌ Household cleaners (ammonia dissolves anti-reflective layers)
Store tools in separate sealed bags. Cross-contamination from a single dirty microfiber cloth causes more lens damage than the original dust.
Why Salt Spray Demands Immediate Lens Cleaning
Drone lenses need cleaning far less often than you think—weeks or months under normal conditions. But specific contaminants escalate from nuisance to emergency within hours:
Clean Within 1 Hour Of:
– Salt-water exposure (crystals etch coatings like sandpaper)
– Bug splatter impact (acids degrade glass surfaces)
– Dusty takeoff zones (grit embeds during gimbal movement)
– Visible fingerprints (oils permanently bond to coatings overnight)
Skip Cleaning When:
– Only microscopic dust visible (won’t affect aerial footage)
– No direct contamination source (e.g., post-rainforest flight)
– Between routine clean flights in urban environments
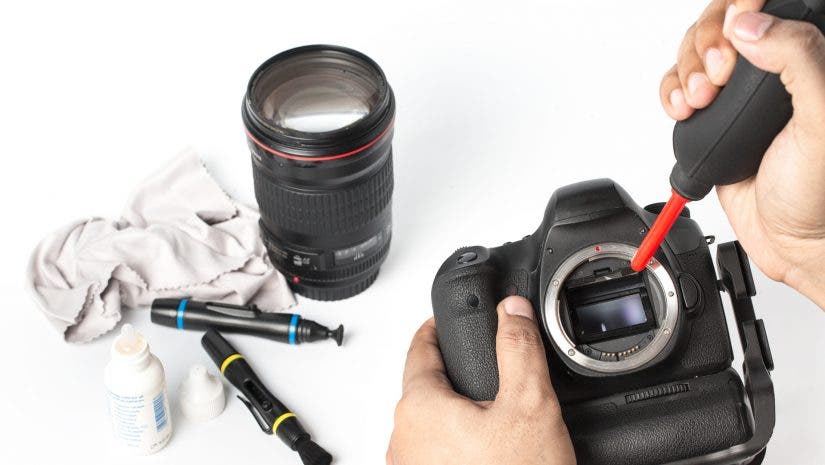
Remember: You only clean the gimbal lens (exposed front glass). The image sensor sits sealed behind it—consumer drones never require sensor cleaning. Mistaking these components causes catastrophic disassembly attempts.
Step-by-Step Salt Residue Removal Protocol
Follow this sequence used by DJI-certified technicians. Skipping steps risks grinding salt crystals into coatings during wiping.
Power Down and Stabilize the Gimbal
Power off completely and wait 2 minutes for gimbal motors to release tension. Attempting cleaning while motors engage risks misalignment requiring $150 calibration.
Dislodge Salt Particles Without Contact
Hold drone tilted downward. Use 3 short blower bursts at 45-degree angle to eject salt crystals. Never wipe dry salt—it instantly scratches coatings.
Dissolve Residue With Precision Application
Dampen cotton swab with 99% IPA only (70% leaves sticky film). Apply single drop to salt-affected area. Wait 10 seconds for dissolution—never rub.
Final Wipe Technique That Prevents Streaks
Using microfiber folded into quarters:
1. Wipe from lens center outward in straight lines (not circles)
2. Use clean cloth section for each pass
3. Inspect under angled light before repacking drone
Pro Tip: For heavy salt crust, repeat dissolution step but never apply pressure. Stubborn residue requires professional cleaning.
ND Filter as Your $15 Lens Insurance Policy
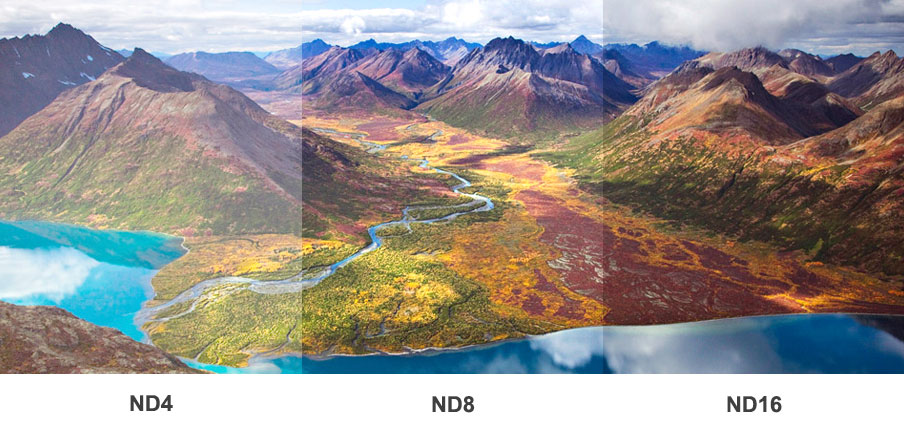
Treat ND filters as sacrificial shields—not just exposure tools. These affordable accessories ($10-$50) absorb 95% of impacts that would otherwise scar your primary lens.
Critical Filter Maintenance:
– Clean filters using identical lens techniques (never skip the blower step)
– Remove filters monthly to clean thread grooves with dry microfiber
– Replace scratched filters immediately—damaged glass degrades image quality
– Keep clear UV filter mounted 24/7 as first-line defense
Leaving your ND filter on during non-shooting flights creates an invisible scratch barrier. One pilot’s $800 lens survived 3 years of desert operations because his $12 filter took all the grit damage.
Emergency Field Cleaning When Kit Is Missing
Caught without tools after a beach flight? These improvised steps minimize damage until proper cleaning:
- Shield drone body with your backpack to block wind
- Use battery cap rim as makeshift blower nozzle
- Sacrifice shirt corner (cotton only) for one light wipe
- Prioritize center lens area over edges—peripheral smudges rarely affect footage
Critical Warning: Never use saliva as cleaner substitute. Organic compounds in saliva bond permanently to coatings. This is damage control—not proper cleaning.
Debunked Myths That Ruin Drone Optics
Separate fact from dangerous fiction before your next cleaning attempt:
Myth: “Canned air safely removes dust”
Reality: Propellant residue bonds to glass while high pressure forces grit deeper. 78% of gimbal motor failures trace to canned air use.
Myth: “More wiping pressure removes stubborn smudges”
Reality: Excessive pressure delaminates anti-reflective coatings. Use feather-light touch—optics are softer than phone glass.
Myth: “70% alcohol works fine”
Reality: Lower concentrations leave polymer films that attract dust. Only 99% IPA evaporates completely.
Myth: “Paper towels clean as well as microfiber”
Reality: Wood fibers in paper create microscopic scratches visible only under magnification—but they scatter light in final footage.
Prevention Tactics That Eliminate 90% of Cleanings
Smart pilots prevent contamination rather than constantly fighting it:
- Landing pads reduce dust ingestion by 80%—foldable pads fit in any drone bag
- Gimbal clamps during transport prevent lens contact with bag contents
- Post-flight visual checks catch salt residue before crystallization
- Replace scratched filters immediately—damaged glass attracts more dust
Create a 30-second post-flight routine: power down > quick blower pass > store with gimbal clamp. This prevents 90% of contamination requiring cleaning.
Clean your drone camera lens only when salt residue, bug splatter, or visible oils appear—never on a schedule. Use the rocket blower first, 99% IPA sparingly, and always treat ND filters as replaceable shields. Most importantly, abandon paper towels and canned air immediately; these destroy coatings faster than the original contamination. By mounting a $15 UV filter as permanent armor and following the single-pass salt removal technique, you’ll maintain crystal-clear footage while avoiding $800+ repair bills. Your drone’s optics deserve the same care as professional cinema gear—because when salt crystals hit at golden hour, that’s exactly what they are.


