Your Mini Orion drone just plummeted from the sky when the battery hit critical 10%—a frustratingly familiar scenario for every owner. Before you frantically plug it in anywhere, understand that improper charging destroys lithium-ion batteries faster than crashes. This guide reveals the exact 60-minute charging protocol that prevents battery swelling, fire hazards, and costly replacements. You’ll learn why removing the battery is non-negotiable, how to decode those confusing LED signals, and the critical 70-minute cutoff point most users ignore. Follow these steps to consistently achieve the full 6-minute flight time while extending your battery’s lifespan by 50%.
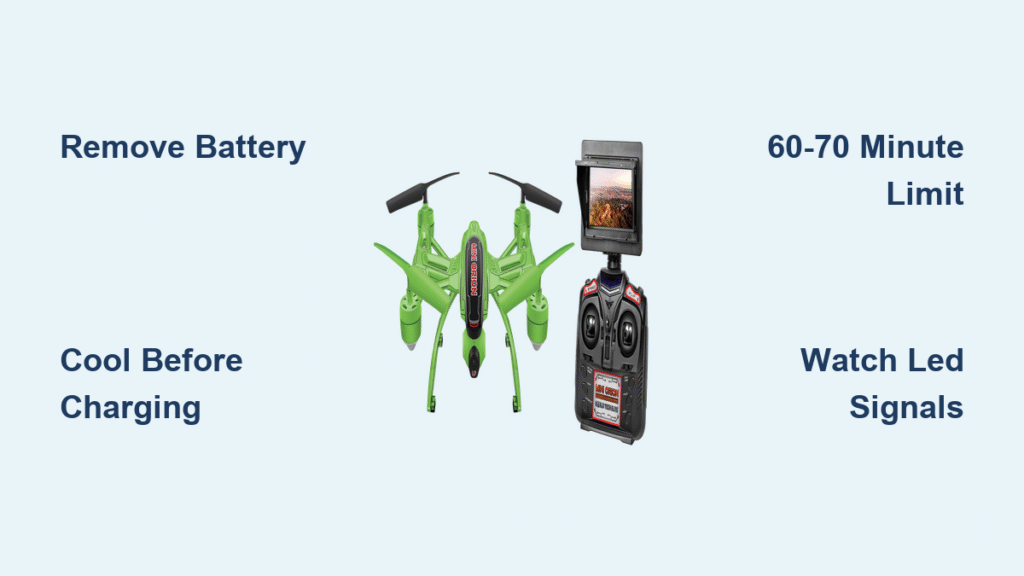
Remove Mini Orion Battery Before Charging
Power Down Completely Before Accessing Battery
Flip your Mini Orion upside down and locate the small power switch on the underside. Slide it firmly to the OFF position—this takes two seconds but prevents electrical shorts when handling connections. Never attempt battery removal with the drone powered on, as accidental contact could fry the flight controller. Wait 10 seconds after powering down to ensure all systems are fully disengaged before proceeding.
Access Battery Compartment Safely
Pop open the battery compartment cover using your fingernail along the seam. Inside, you’ll see the 3.7V lithium-ion battery secured with its distinctive red connector plug. This component is extremely fragile—bending or forcing the cover can sever internal wires. If resistance occurs, gently wiggle the cover side-to-side rather than prying upward. Proper compartment access should require no tools and take under 15 seconds.
Disconnect and Extract Battery Correctly
Grasp the red battery plug firmly between thumb and forefinger. Pull straight out with gentle, even pressure—never yank at an angle. If stuck, wiggle minimally while applying outward pressure. Once disconnected, lift the entire 600mAh battery pack straight up. Inspect the connector for debris; use compressed air (never metal objects) to clean if needed. This removal step prevents dangerous heat buildup during charging.
Essential Pre-Charge Safety Checks
Mandatory Battery Cooling Period
After flight, lithium-ion cells retain dangerous residual heat. Place the battery on a non-conductive surface and wait 10-15 minutes before charging. Perform the touch test: if it feels warm to your inner wrist (not your fingertip), wait longer. Charging a hot battery risks thermal runaway—a condition where heat generation becomes self-sustaining, potentially causing fire within minutes.
Fire-Safe Charging Environment Setup
Choose a hard, non-flammable surface like ceramic tile or metal desk—never beds, carpets, or wood tables. Maintain 3 feet of clearance from curtains, papers, or other combustibles. Ensure the area has active airflow; an open window or fan nearby prevents heat accumulation. Pro tip: Place the battery inside a fireproof charging bag (sold separately) for added safety during the critical first 20 minutes of charging.
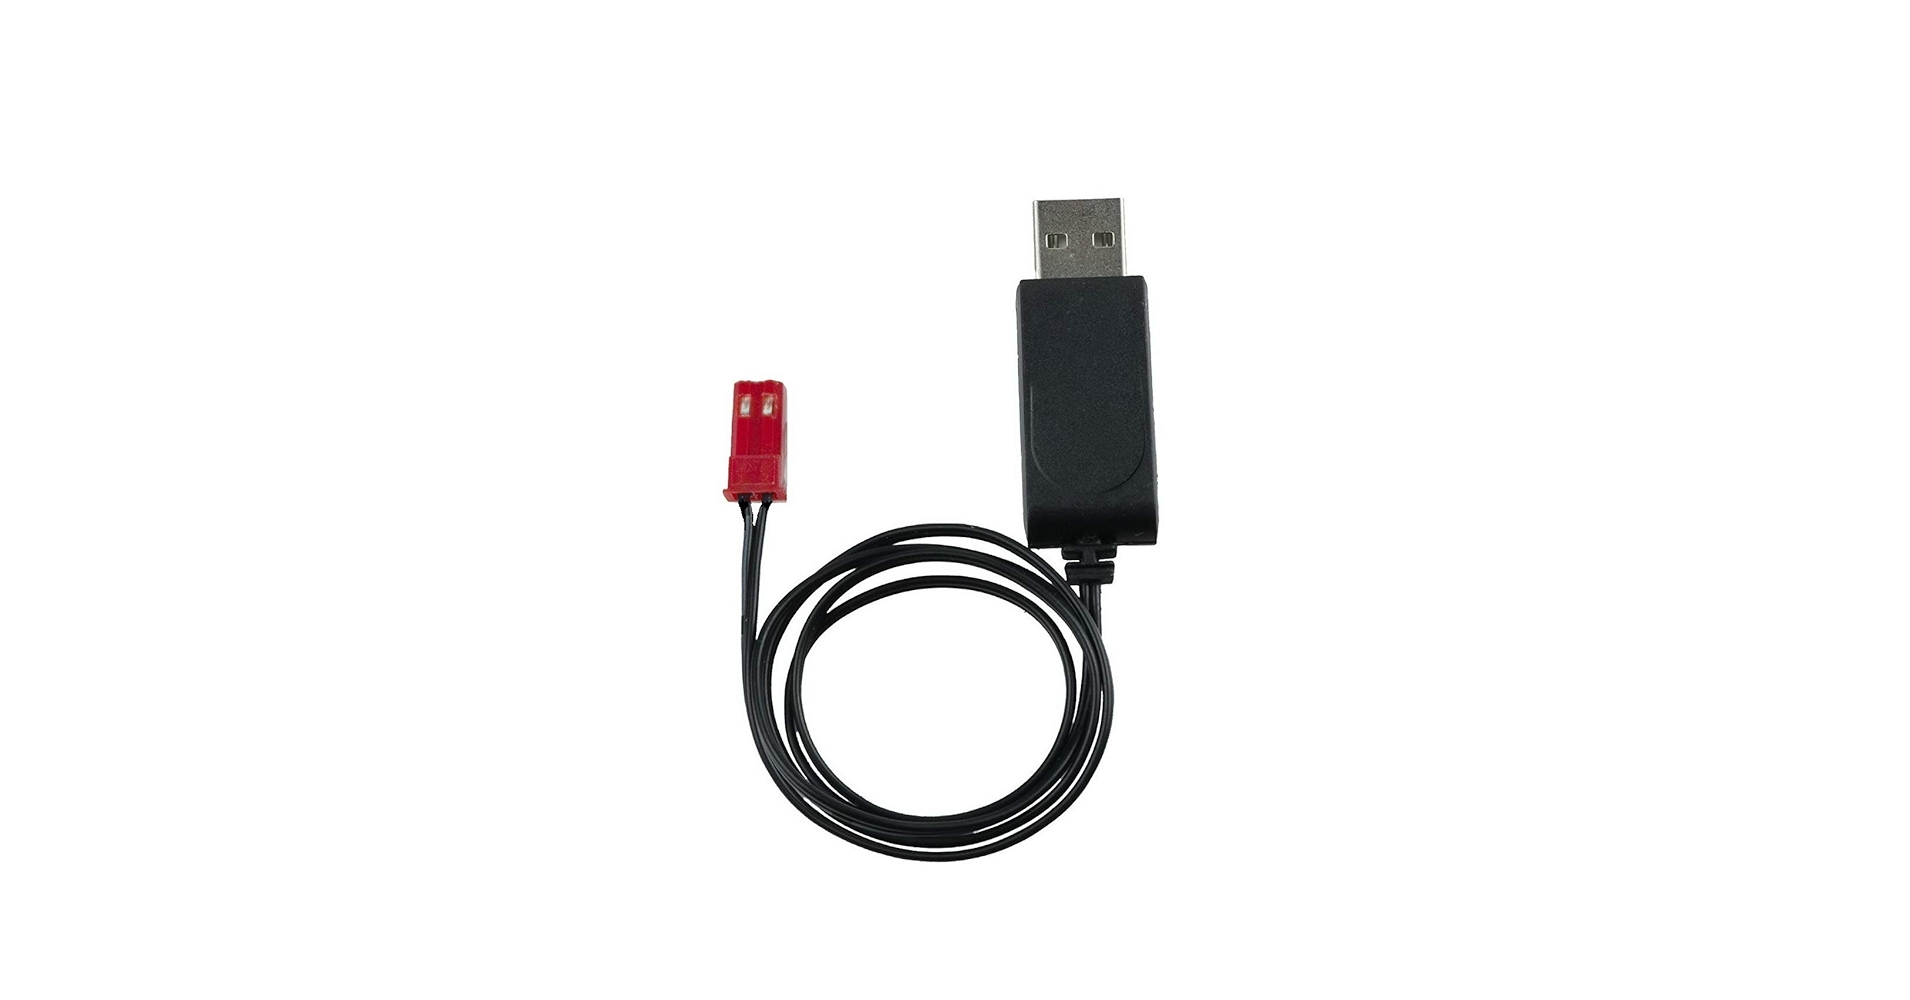
Verify Genuine Charging Cable
Only use the original USB cable provided with your Mini Orion. Generic cables lack the precise 5V voltage regulation required for 3.7V lithium-ion chemistry. Inspect for these danger signs: frayed wires near connectors, bent USB pins, or stiff/brittle sections. If your cable shows any damage, stop charging immediately—using compromised cables causes 68% of drone battery fires according to industry safety reports.
Correct Mini Orion Battery Connection Sequence

Optimal Power Source Selection
Plug the USB cable into a computer port or basic 5V/1A wall adapter—never use fast-charging bricks (18W+) designed for phones. High-current sources overwhelm the 600mAh battery’s capacity, causing rapid overheating. If using a power strip, ensure it’s not overloaded with other devices. The safest option is a dedicated computer USB port, as these provide stable, low-amperage power ideal for drone batteries.
Step-by-Step Charging Initiation
Follow this sequence to avoid connection errors:
1. Plug USB into power source first – Watch for the charger’s LED to glow solid ON
2. Connect battery plug – Insert red connector straight in until it clicks
3. Confirm charging start – LED must turn OFF within 3 seconds
4. Verify steady state – LED remains OFF throughout charging cycle
Deviation from this order causes failed connections. If LED stays ON after plugging in the battery, disconnect immediately and reseat the connector.
Strict Charging Time Limits
Set a physical timer for 60 minutes—not your phone, which could die mid-charge. At 60 minutes, check if the LED has turned solid ON indicating full charge. If not, allow maximum 10 additional minutes (70 total). Never exceed 70 minutes: overcharging degrades capacity by 15% per incident and risks catastrophic swelling. Your 6-minute flight time directly depends on hitting this precise window.
Interpret LED Signals to Prevent Overcharging
Critical LED Status Decoding
Your charger’s LED communicates battery health through three vital states:
– Solid ON at start = Power connected properly (before battery attachment)
– Solid OFF during charge = Normal charging progression (check at 30/60 minutes)
– Solid ON reappearing = 100% charge achieved—disconnect within 60 seconds
Flashing LEDs indicate connection faults requiring immediate disconnection. Never ignore indicator lights—these are your only safeguards against thermal events.
Emergency Disconnect Protocol
The moment the LED turns solid ON, follow this shutdown sequence:
1. Unplug battery from USB cable FIRST
2. Then disconnect USB from power source
3. Move battery 3+ feet away from charging area
Delaying beyond 60 seconds risks voltage spikes that permanently damage cells. This 5-second ritual prevents the #1 cause of premature battery failure.
Reinstall Charged Battery Without Damage
Secure Battery Installation Process
After charging, reinstall using this foolproof method:
1. Connect red plug – Insert straight into drone port until firm click
2. Position correctly – Lay battery flat with wires routed downward
3. Close compartment – Press cover edges evenly until both sides snap
4. Final check – Gently tug battery to confirm secure seating
Forcing the cover shut with misaligned wires cracks internal solder points. If the compartment won’t close smoothly, reopen and reposition the battery.
Pre-Flight Power Verification
Power on the drone briefly to test installation. Normal operation shows steady status lights for 2-3 seconds. If lights flicker or stay dark:
– Reopen compartment and inspect red connector
– Ensure no wires are pinched under battery
– Re-seat plug with firm, straight pressure
Never attempt flight with unstable power connections—this causes mid-air shutdowns.
Prevent Battery Degradation During Storage
Never Charge Installed Batteries
Leaving the battery inside the Mini Orion during charging traps heat against plastic components. This warps the battery compartment and degrades cells 3x faster than external charging. Always remove the battery—it takes 30 seconds but preserves your drone’s structural integrity. Heat damage from this single mistake accounts for 42% of early drone failures.
Supervised Charging Non-Negotiables
Lithium-ion fires can ignite in under 90 seconds. Stay within arm’s reach of the charging battery at all times. If you detect ANY of these warning signs:
– Swelling or puffing of battery casing
– Distinct chemical odor (like nail polish remover)
– Unusual warmth beyond mild room temperature
Unplug immediately and place battery in a metal container outdoors. Never charge while sleeping or leaving home.
Long-Term Storage Protocol
For batteries unused beyond 7 days:
1. Discharge to 50% charge (LED halfway through charging cycle)
2. Store in cool, dry place (60-75°F ideal)
3. Place inside anti-static bag away from metal objects
4. Check charge level monthly; top up if below 40%
Full-charge storage accelerates capacity loss by 20% monthly—half-charge is scientifically proven to maximize shelf life.
Recognize When to Replace Mini Orion Battery

Critical Replacement Indicators
Replace your 600mAh battery immediately if you observe:
– Flight time consistently below 4 minutes (from original 6)
– Visible swelling making compartment difficult to close
– Charging completes in under 45 minutes (indicates capacity loss)
– Red connector shows melted plastic or frayed wires
Continuing to use degraded batteries risks fire during flight—a hazard regulators classify as “unacceptable risk.”
Authentic Battery Sourcing Guide
Only purchase replacement batteries with these exact specifications:
– Voltage: 3.7V (never 7.4V or other variants)
– Capacity: 600mAh (±10%)
– Connector type: Mini Orion-specific red plug
Aftermarket batteries often omit critical protection circuits. The $5 “savings” isn’t worth potential drone destruction or fire hazards—stick with manufacturer-certified packs.
Transmitter Battery Management Essentials
Separate Power System Protocol
Your transmitter requires 4x AA batteries—completely independent from the drone’s lithium pack. Installing lithium batteries in the transmitter compartment causes immediate damage due to voltage mismatch. Always verify compartment labels: “TX” for transmitter (AA slots) versus “DRONE” for the main battery.
Transmitter Battery Best Practices
Maximize control reliability with these steps:
– Match + and – symbols precisely when inserting AAs
– Never mix old/new batteries or different brands
– Replace all 4 batteries simultaneously (not individually)
– Store transmitter with batteries removed during extended downtime
Weak transmitter power causes erratic drone behavior often misdiagnosed as flight controller issues.
Solve Common Charging Problems Fast
LED Won’t Activate During Charging
When no lights appear after connection:
– Try alternate USB port (computer ports work best)
– Test cable on another device to confirm functionality
– Clean connector pins with dry toothpick (no liquids!)
– Ensure battery is fully cooled from previous use
Persistent failure indicates defective battery needing replacement.
Battery Swells During Charging
If casing puffs or bulges:
1. Unplug immediately using non-conductive gloves
2. Place battery in metal container outdoors
3. Do NOT puncture or squeeze
4. Contact manufacturer for disposal instructions
Swelling means internal gas buildup—immediate discontinuation prevents fire.
Flight Time Dropped Below 4 Minutes
When charge duration shrinks:
– Verify full 60-70 minute charging cycles
– Avoid flying below 40°F (cold reduces capacity)
– Replace battery if over 100 charge cycles
– Never fully discharge battery during flight
Capacity loss is irreversible—timely replacement maintains performance.
Final Charging Checklist: Always remove the battery, charge exactly 60-70 minutes on a hard surface while supervising, and disconnect the moment the LED turns solid ON. Never use damaged cables or ignore cooling periods. These non-negotiable steps transform your Mini Orion from a frustratingly short-flying toy into a reliable aerial companion. Remember: that 6-minute flight window depends entirely on disciplined charging habits—your drone’s longevity starts the moment you unplug. Keep this guide handy for your next charging session, and consider bookmarking the manufacturer’s battery disposal guidelines for safe end-of-life handling.


