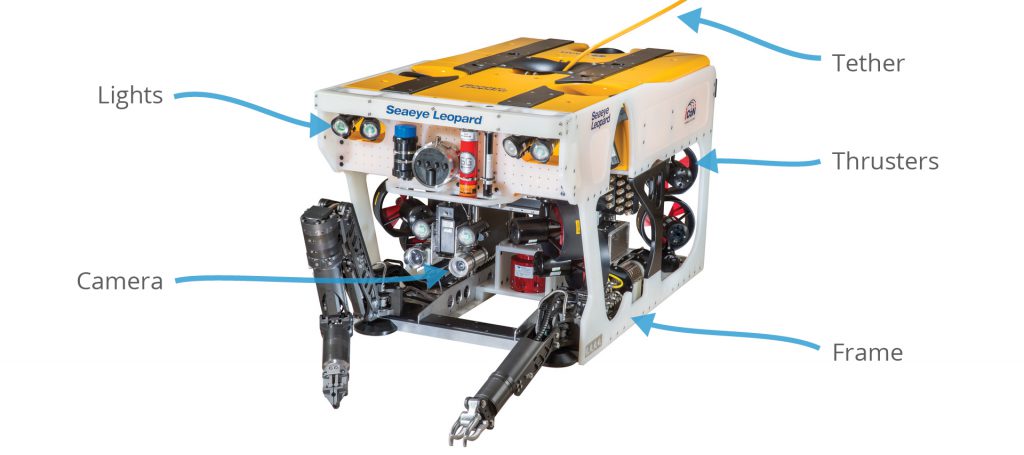
Imagine lowering your custom-built ROV into crystal-clear water, watching live HD footage as it glides 50 feet below with precise 6-directional control. Building an underwater drone delivers this thrilling experience, but requires careful planning. This guide details exactly how to build an underwater drone capable of 70-foot dives for $900-$1,100—less than half the cost of commercial units.
Most beginners underestimate the multi-disciplinary skills needed: 3D printing, electronics, waterproofing, and firmware configuration. Expect a 3-6 month build cycle with weekend work, not a quick weekend project. By following this roadmap, you’ll avoid common pitfalls that sink first-time builders and create a reliable ROV ready for exploration.
Required Skills and Realistic Timeline for Your DIY Underwater Drone Build
Skip the frustration by honestly assessing your capabilities before purchasing parts. Building an underwater drone isn’t just assembly—it’s integrating multiple complex systems that must function flawlessly under pressure.
Critical skills you can’t skip:
– 3D CAD design: Create watertight thruster mounts and pressure vessel components
– Basic machining: Drill acrylic tubes precisely for penetrators without cracking
– Electronics expertise: Solder delicate connections that won’t fail when submerged
– Firmware configuration: Flash ArduSub and tune parameters for stable underwater operation
Pro tip: Start with a surface RC boat project to master waterproofing fundamentals before tackling depth-rated builds. This single step prevents 80% of first-time builder failures according to community forums.
Why Most DIY ROV Projects Fail Early
Three critical mistakes doom underwater drone builds before they reach water:
1. Underestimating sealing requirements: A single nicked O-ring or improperly torqued end cap causes catastrophic flooding
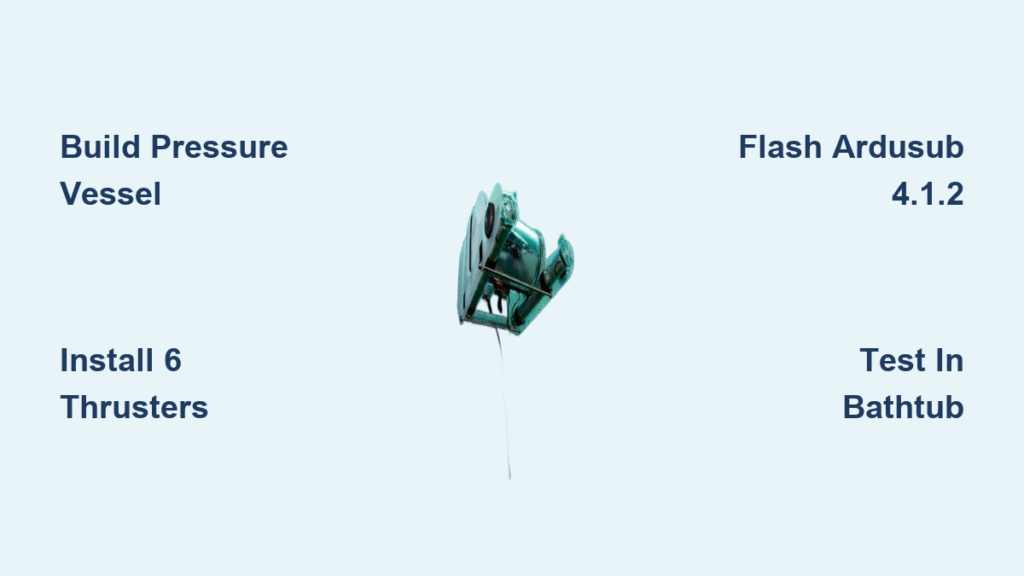
2. Using incompatible firmware: ArduSub 4.5.x has known issues with Pixhawk1-1M boards—stick with stable 4.1.2
3. Skipping progressive testing: Jumping straight to open water without bathtub and pool testing guarantees failure
Essential Components for a $900-$1,100 Underwater Drone Build
Your component choices determine whether your ROV reaches 70 feet or floods at 10 feet. Focus on proven, hobbyist-tested parts rather than cutting corners.
Pressure Vessel That Won’t Collapse at Depth
For recreational diving (70 feet/21 meters), use:
– 250mm acrylic tube: 110mm outer diameter with 5mm wall thickness ($45 from Tap Plastics)
– End cap options:
– CNC aluminum with O-ring grooves (professional but expensive)
– 3D printed PETG flanges with epoxy-sealed penetrators (cost-effective for beginners)
Critical sealing points:
– Main O-ring: 110mm ID × 3mm cross-section
– Penetrator O-rings: 6mm × 2mm for each cable pass-through
– Vent plug: Allows pressure equalization during assembly
Six-Thruster System for True 6-DOF Control
Must-have propulsion components:
– 6× Blue Robotics T200 thrusters ($129 each) – total $774
– 30A Afro Slim ESCs pre-flashed with BlueRobotics firmware
– 75mm 3-blade ABS propellers (keep spare set)
Mounting configuration that works:
– Four horizontal thrusters at 45-degree angles for surge, sway, and yaw
– Two vertical thrusters amidships for heave control
– Position horizontal thrusters 15 degrees downward for optimal thrust vectoring
Wiring Your Underwater Drone Electronics Without Signal Interference

Electrical noise from motors can crash your ROV mid-dive. Proper wiring prevents this common failure point.
Power Distribution Layout That Works
Follow this sequence to avoid voltage drops and noise issues:
1. Main battery → 30A inline fuse → power distribution board
2. ESCs connect to 12V rail with common ground star configuration
3. Separate 5V UBECs for Pixhawk and Raspberry Pi (never share power rails)
4. LED drivers on switched 12V with PWM control
Noise reduction techniques:
– Twist motor wires with ground return wires to cancel EMI
– Add ferrite cores near ESC connections to suppress high-frequency noise
– Conformal coat all circuit boards for saltwater protection
– Separate analog and digital grounds at the power supply
Flashing ArduSub 4.1.2 and Configuring Critical ROV Parameters
Using the wrong firmware version is the #1 cause of “bricked” Pixhawk controllers. Follow these exact steps.
Step-by-Step Firmware Installation
- Connect Pixhawk via USB to your laptop
- Open QGroundControl and navigate to Firmware tab
- Select “ArduSub V4.1.2 stable” (avoid 4.5.x for Pixhawk1-1M)
- Click “OK” to flash and wait for automatic reboot
- Immediately calibrate accelerometer and compass
Essential Parameters for Six-Thruster Control
FRAME_CONFIG = 2          # Vectored 6-thruster configuration

SERVO1_FUNCTION = Motor1  # Front right horizontal

SERVO2_FUNCTION = Motor2  # Front left horizontal

SERVO3_FUNCTION = Motor3  # Rear left horizontal

SERVO4_FUNCTION = Motor4  # Rear right horizontal

SERVO5_FUNCTION = Motor5  # Vertical front

SERVO6_FUNCTION = Motor6  # Vertical rear

SERVO9_FUNCTION = LED     # Lights on AUX OUT 1

RC9_OPTION = 58           # RC control for LED brightness
Warning: Incorrect SERVOx_FUNCTION assignments cause flipped thrusters that make your ROV uncontrollable. Verify motor directions during bench testing.
Progressive Testing Protocol to Prevent Costly Failures
Never skip these testing phases—each builds confidence in your underwater drone’s reliability.
Phase 1: Dry Bench Testing (0 hours depth)
- Test all thrusters individually at 25% power
- Verify correct rotation directions match SERVOx_FUNCTION assignments
- Check LED brightness control via RC9
- Confirm depth sensor readings match atmospheric pressure
Phase 2: Bathtub Testing (0.5m depth)
- Submerge ROV body without thrusters for 30 minutes
- Check for leaks at all penetrators and end caps
- Run motors at 25% power for 5 minutes while monitoring for water ingress
- Test emergency surface procedure (all vertical thrusters upward)
Phase 3: Pool Testing (2m depth)
- Practice precise maneuvering in controlled environment
- Test depth hold function with pressure sensor
- Log all telemetry data for analysis
- Perform emergency surface procedure with tether tension
Troubleshooting Common Underwater Drone Failures
Even experienced builders encounter these issues—know how to fix them before your dive.
Pixhawk Not Recognized After Firmware Update
- Symptom: QGroundControl shows no connection to flight controller
- Cause: Incompatible ArduSub 4.5.x firmware with Pixhawk1-1M silicon
- Fix: Roll back to ArduSub 4.1.2 stable version immediately
Missing Video Recordings After Dive
- Symptom: No video files found on Raspberry Pi SD card
- Cause: Recordings save to topside computer by default
- Fix: In QGroundControl → Application Settings → Video → Set correct save location
LED Flicker in Recorded Video
- Symptom: Visible banding across footage
- Cause: PWM frequency mismatch with camera frame rate
- Fix: Increase LED PWM frequency to minimum 20kHz or sync camera exposure settings
Post-Dive Maintenance Routine to Extend Your ROV’s Lifespan
Saltwater is brutal on electronics—follow this routine after every dive.
Immediate post-dive actions:
– Rinse entire system with fresh water
– Inspect all O-rings for nicks or displacement
– Check propeller balance and security
– Log battery cycles and performance metrics
Every 10 dives:
– Replace main hull O-rings (110mm × 3mm)
– Inspect penetrator O-rings (6mm × 2mm)
– Test leak sensor battery (CR2032)
– Check ESC temperature logs for overheating
Essential spares to keep on hand:
– 2 spare ESCs pre-flashed and tested
– Complete O-ring kit for your hull size
– Spare propellers and motor shafts
– Backup Raspberry Pi SD card with BlueOS image
Where to Start Building Your Underwater Drone Today
Begin with these actionable steps to avoid common beginner mistakes:
- Download the CPS 5 3D models and review component compatibility
- Order basic electronics first (Pixhawk, Raspberry Pi) to begin firmware familiarization
- Build a surface RC boat to master waterproofing before attempting depth-rated builds
- Join the 500+ member CPS community forum for real-time troubleshooting support
Remember: Every expert underwater drone builder started with failed seals and flipped thrusters. Your first successful dive—watching live footage from beneath the surface—will make every hour of troubleshooting worthwhile. Start small, test often, and keep detailed build logs; these become invaluable when you’re ready to tackle advanced features like autonomous navigation or manipulator arms. The underwater world awaits your exploration—begin your build today.


