That moment when your first racing drone takes flight after hours of careful assembly—it’s pure magic. Building your own racing drone transforms you from a spectator to a creator, giving you intimate knowledge of every component that makes these machines scream through the air at 80+ mph. This hands-on experience directly translates to better piloting skills and quicker troubleshooting when things go wrong mid-race.
Learning how to build a racing drone properly separates casual hobbyists from serious competitors. You’ll avoid costly mistakes that destroy expensive components and gain the confidence to customize your machine for specific racing conditions. Whether you’re preparing for your first local race or optimizing for tight gate navigation, this guide delivers exactly what you need to construct a reliable, high-performance racing drone from scratch.
Choosing Performance-Optimized Racing Drone Components
Your racing drone’s capabilities start with selecting the right components that work together seamlessly. Don’t just grab random parts—each element must complement the others while meeting your specific racing goals.
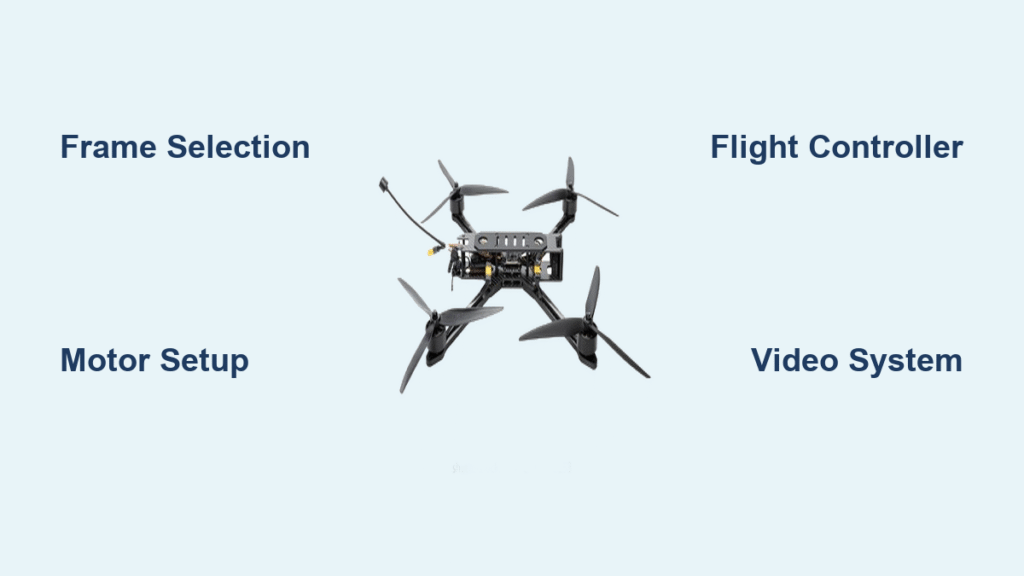
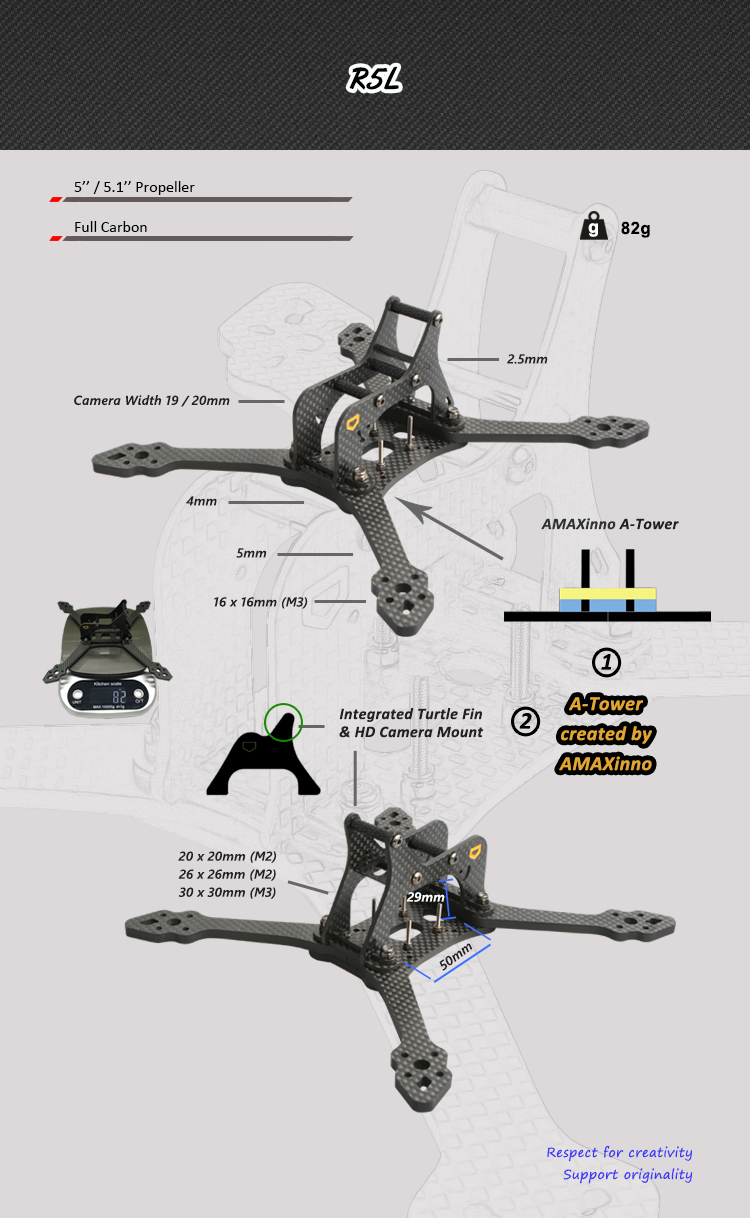
Frame Selection for Speed and Durability
Carbon fiber frames dominate competitive racing for their unbeatable strength-to-weight ratio. For most beginners, 5-inch frames deliver the ideal balance between speed and maneuverability—large enough for solid speed but small enough for tight turns. Look for frames with 4mm carbon thickness and replaceable arms, which save you money when crashes inevitably happen. True-X configurations offer predictable handling, while stretch-X designs provide better straight-line speed but require more pilot input for turns.
Motor Power That Matches Your Racing Style
Select motors based on your desired flight characteristics—2300-2600 KV ratings work best for 5-inch propellers on 4S batteries. Higher KV motors accelerate faster but drain batteries quicker, while lower KV provides more torque for punchy exits from corners. Always check the thrust-to-weight ratio; your motors should produce at least four times your drone’s weight for aggressive racing maneuvers. Quality motors from reputable brands maintain consistent performance even after multiple crashes and hard landings.
Flight Controller Processing Power
Modern F4 or F7 flight controllers process inputs significantly faster than older models, making them essential for competitive racing. Choose models with built-in OSD (On-Screen Display) and blackbox logging capabilities for post-flight analysis. Ensure compatibility with Betaflight firmware, the industry standard for racing drones. Verify that your flight controller matches your ESC protocol—DShot600 provides reliable communication between components without signal dropouts during high-G maneuvers.
Setting Up Your Drone Building Workspace Properly

A well-organized workspace prevents frustration and protects delicate components during assembly. Many first-time builders rush this step, only to strip screws or damage circuit boards through poor ergonomics.
Essential Tools for Professional Results
Invest in a temperature-controlled soldering iron set between 650-700°F—cheap irons cause cold solder joints that fail under vibration. Use 63/37 rosin-core solder rather than lead-free varieties, which require higher temperatures and create brittle connections. Quality wire strippers, flush cutters, and a helping hands tool with magnifying glass make precise work possible. Never skip the digital multimeter—it prevents costly polarity mistakes before they happen.
Workspace Organization That Prevents Costly Mistakes
Set up bright, shadow-free lighting so you can see tiny solder points clearly. Work on a non-static silicone mat that prevents small parts from rolling away during assembly. Keep isopropyl alcohol and cotton swabs nearby for cleaning flux residue that can cause electrical shorts. Organize screws and tiny components in labeled containers—mixing M2 and M3 screws during assembly leads to stripped threads and component damage.
Frame Assembly: Building a Solid Foundation
Proper frame assembly ensures your components mount correctly and minimizes vibration issues that plague many first-time builds.
Mounting Arms and Plates Without Warping
Begin by dry-fitting all frame components before applying threadlocker. Tighten arm screws gradually in an X-pattern to prevent carbon fiber warping—rushing this step creates misaligned motor mounts that cause vibration. Apply blue threadlocker only to metal-to-metal connections that won’t require frequent removal. Always test-fit your component stack before final tightening; most frames use standard 30.5×30.5mm mounting patterns, but verify spacing matches your specific flight controller and ESC.
Standoff Installation for Vibration Control
Install standoffs finger-tight first, then gently snug with appropriate tools—over-tightening aluminum standoffs strips threads permanently. Use nylon standoffs for flight controllers to absorb vibration, but avoid them for high-stress areas like motor mounts. Double-check that the distance between top and bottom standoffs matches your component stack height; even 1mm gaps cause vibration that affects flight performance and blurs your FPV feed.
Wiring and Soldering: Clean Connections for Reliable Performance
Professional wiring separates race-ready builds from amateur attempts. Plan your wire routes before cutting anything to avoid the “rat’s nest” that plagues many first builds.
Power Distribution Wiring Done Right
Solder XT60 connectors directly to your 4-in-1 ESC for the cleanest power delivery—avoid pigtail connections that add resistance. Use 14AWG wire for main battery connections on 5-inch builds to handle 80+ amp current draws during racing. Twist positive and negative wires together to minimize electromagnetic interference that causes video noise. Always leave service loops in wiring for future maintenance; cutting wires too short creates headaches when replacing components.
Signal Wire Management for Clean Operation
Keep signal wires short but not stretched between components—2-3 inches of slack prevents stress during crashes. Use color-coded 28-30AWG wire for receiver connections and 26AWG for camera/VTX signals. Solder joints should be shiny and smooth; dull or blobby connections indicate cold joints that fail under vibration. Test every connection with a multimeter before applying heat shrink tubing—this simple step prevents 90% of “no power” issues during first power-up.
ESC and Motor Installation: Power Delivery That Performs

Your Electronic Speed Controllers translate stick inputs into immediate motor response—critical for racing where milliseconds matter.
Mounting ESCs to Prevent Signal Noise
Mount your 4-in-1 ESC on vibration-damping gummies to reduce noise in your flight controller signals. Ensure adequate airflow around the ESC—racing builds generate significant heat during aggressive flying sessions. Install provided capacitors to smooth voltage spikes from rapid throttle changes that cause “brownouts” mid-race. Verify ESC orientation matches your flight controller’s motor mapping; most use clockwise motor order starting from front-right.
Testing Motor Direction Before Final Assembly
Test motor direction before soldering wires permanently to your ESCs. Reverse any spinning the wrong direction by swapping two of the three motor wires. Many pilots prefer digital direction reversal through ESC configuration software rather than physical wire swapping. Secure motor wires with zip ties to prevent prop strikes, but leave enough slack for arm movement without stressing connections during crashes.
Flight Controller Configuration: Tuning for Race-Ready Performance
Proper flight controller setup determines whether your drone responds precisely to your inputs or fights you in the air.
Betaflight Setup for Reliable Operation
Flash the latest Betaflight firmware matching your specific flight controller model through Betaflight Configurator. Verify gyro orientation matches physical mounting—this critical step prevents inverted flight behavior. Configure failsafe settings so motors stop immediately when transmitter signal is lost—a safety must for racing environments. Set arm switch to a momentary switch configuration so crashes don’t accidentally restart your motors.
Basic PID Tuning for Responsive Handling
Start with stock PID settings for your frame size—most modern flight controllers fly well out-of-box. Increase P-gain gradually until oscillations appear, then back off 10-20% for stability. Adjust I-term to control drift compensation; too high causes bounce-back after stick inputs. Set D-term to dampen oscillations without sacrificing responsiveness—most racers find lower D-values work better for tight courses.
Video System Installation: Clear Feed for High-Speed Racing
Your FPV system determines whether you see gates clearly or crash into obstacles at racing speeds.
Optimal Camera and VTX Placement
Mount your FPV camera at 25-45 degrees depending on preferred speed—steeper angles work better for slower, technical courses. Secure with flexible TPU mounts that absorb crashes rather than rigid metal brackets. Route camera wires away from ESCs and power wires to reduce video noise that obscures gates during races. Position your video transmitter with adequate ventilation—overheating causes signal dropouts at critical race moments.
Antenna Positioning for Maximum Signal Strength
Mount antennas on flexible TPU arms that bend rather than break during crashes. Keep VTX antennas at least 2cm away from ESC power wires to prevent interference that causes video static. Test video range before racing—weak signals cause crashes at critical moments. At race events, coordinate channel selection with other pilots to avoid interference that could cause mid-race flyaways.
First Flight Testing: Avoiding Costly Maiden Flight Crashes
Your first flight determines whether months of building pays off or ends in expensive repairs. Follow this systematic testing protocol.
Pre-Flight Safety Checks That Save Components
Verify prop direction matches motor spin before every flight—reversed props cause immediate crashes. Test failsafe by turning off transmitter—motors should stop immediately for safety. Start with short hover tests in large open areas away from trees and obstacles. Always bring tools and spare props to maiden flights—first flights often result in broken props even with careful piloting.
Progressive Flight Testing Approach
Begin testing in angle mode to verify basic functionality before attempting acro mode. Gradually increase rates and expo settings based on comfort level—rushing this step causes crashes. Record blackbox logs during initial flights to identify vibration issues or tuning problems invisible during normal flying. Most flight issues show up clearly in log analysis, saving hours of guesswork troubleshooting.
Avoiding Costly Building Mistakes That Destroy Drones
These common errors destroy more racing drones than actual crashes—learn from others’ expensive lessons.
Wiring Errors That Release the Magic Smoke
Reversing battery polarity instantly destroys ESCs and flight controllers—double-check with a multimeter before first connection. Install “smoke stoppers” (current limiters) for initial power-up to prevent component destruction during shorts. Crossed signal wires cause erratic behavior that’s difficult to diagnose later—label everything during the build process.
Weight Distribution Issues That Ruin Flight Performance
Excessive weight destroys racing drone performance—every gram matters when accelerating through gates. Balance your battery position for neutral handling; poor center of gravity causes constant drift requiring stick input to maintain hover. Use lightweight components where possible, but don’t sacrifice reliability for minor weight savings—a slightly heavier reliable build beats a light one that fails mid-race.
Building your racing drone transforms from intimidating to exhilarating once you complete your first successful flight. The skills you develop troubleshooting and tuning translate directly into better racing performance. Start with proven component combinations, take your time with assembly, and you’ll have a competitive machine ready for the track. How to build a racing drone properly separates those who crash from those who dominate the racecourse—your journey starts with the first careful solder joint.


