You’ve dreamed of capturing cinematic aerial footage but dread expensive pre-built drones that turn into paperweights after one crash. Building your own camera drone solves this—and you don’t need prior electronics experience. Within a weekend, you’ll assemble a rugged 5-inch FPV quadcopter capable of carrying HD cameras like the DJI O4 Pro. This guide cuts through the confusion, using only proven beginner-friendly parts that cost less than most store-bought models. By the end, you’ll understand every component’s role and fix issues yourself instead of paying repair fees.
Why 5-Inch Frames Dominate First Builds
Skip tiny indoor drones requiring surgical soldering precision. The 5-inch class (220mm frame size) delivers the perfect balance for beginners: strong enough to lift HD cameras, affordable parts, and massive community support. At 4mm arm thickness, frames like the GEPRC Vapor absorb minor crashes while carbon fiber construction handles 6S battery power. Crucially, this size uses standardized 7mm screws for 5mm arms—avoiding the winding-damaging mistakes beginners make with incorrect hardware. You’ll find endless tutorials for troubleshooting motor issues or tuning flight characteristics, turning inevitable crashes into learning opportunities instead of dead-end repairs.
Essential Parts Checklist (2024 Budget Build)
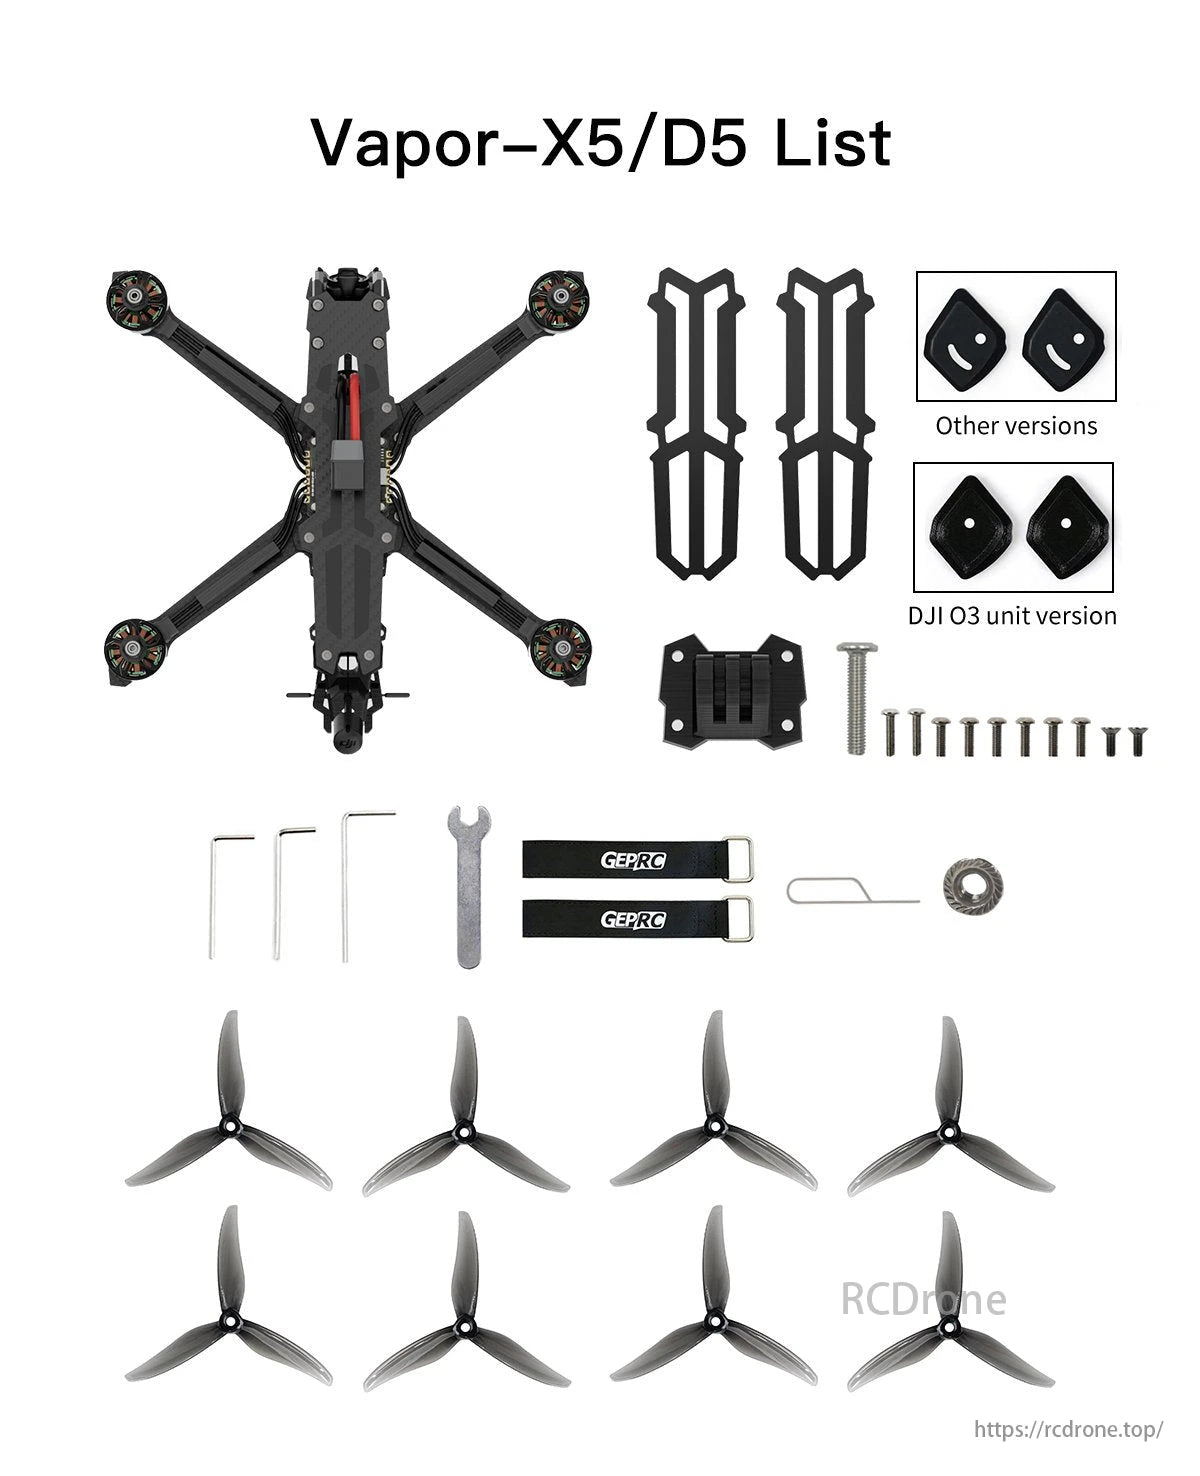
Frame: GEPRC Vapor 5″ ($80-$100)
Why it matters: Its 4mm carbon arms survive hard landings, while TPU camera mounts isolate vibrations. Skip frames without integrated VTX/camera dampers—your footage will look shaky.
Motors: EMAX ECO II 2207 1900KV ($14-$16 each)
Critical detail: Install precisely per Betaflight’s X layout—Rear-right (CCW), Front-right (CW), Rear-left (CW), Front-left (CCW). Use all four 7mm screws per motor; skipping screws causes arm cracks.
ESC/FC Stack: SpeedyBee F405 V4 60A ($90-$110)
Pro tip: This all-in-one unit eliminates messy wiring. Verify it includes Bluejay ESC firmware for smooth 48kHz operation—avoid older BLHeli_S versions.
FPV System: DJI O4 Pro ($230-$250)
Game-changer: Single 8-pin cable connects to your flight controller. Start with 15° camera tilt; increase to 25° for racing. Never power it without antennas attached—this fries the video transmitter.
Receiver: BetaFPV ELRS Nano ($15-$20)
Must-do: Bind it before final assembly. Hold the bind button while powering the receiver, then match your radio model in OpenTX. Test failsafe by turning off your transmitter—motors must stop instantly.
Tools That Actually Save Your Build
Forget expensive “pro” kits. You only need six items:
1. 60W temperature-controlled soldering iron (400°C setting for ESC pads)
2. 0.6mm leaded solder + flux pen (critical for cold-joint prevention)
3. 2mm/2.5mm hex drivers (stripping carbon threads is the #1 beginner mistake)
4. Multimeter (test for shorts before connecting batteries)
5. Smoke stopper (light-bulb limiter—it saved my third build from melted ESCs)
6. Blue thread-locker (Loctite 243; red is permanent for beginners)
Skip “helping hands” stands—tape your ESC to the table instead. And never use pliers to tighten prop nuts; M5 prop nut tools cost $5 and prevent stripped threads.
Frame Assembly: Avoid Carbon Fiber Stripping

Start by dry-fitting all components. Hand-tighten screws only to check alignment—carbon strips easily with over-torquing. Apply blue thread-locker to every metal-to-metal connection (motor screws, standoffs), but skip carbon-carbon threads. Crucially, leave the top plate off until wiring is complete. You’ll thank yourself when debugging ESC connections later. Pro builders pre-thread all screws to avoid cross-threading; try this trick: insert screws upside-down first to create clean threads.
Motor Wiring & Critical Safety Tests
Solder motor wires to the ESC in any order—direction gets fixed in software later. But never skip these power tests:
1. Set multimeter to continuity mode; touch probes to XT60 terminals. No beep should occur. If it beeps, you have a short circuit.
2. Connect battery through your smoke stopper. Expect three ESC startup beeps and slight motor twitches.
3. If the smoke stopper trips, disconnect immediately. Check capacitor polarity (stripe = negative) and motor wire insulation.
Warning: Never perform these tests with props attached. A single wiring error can spin propellers at full speed during bench testing.
Betaflight Configuration: Avoid Common Pitfalls
Flash SPEEDYBEEF405V4 firmware first—older versions lack DJI O4 Pro support. Then tackle these non-negotiable settings:
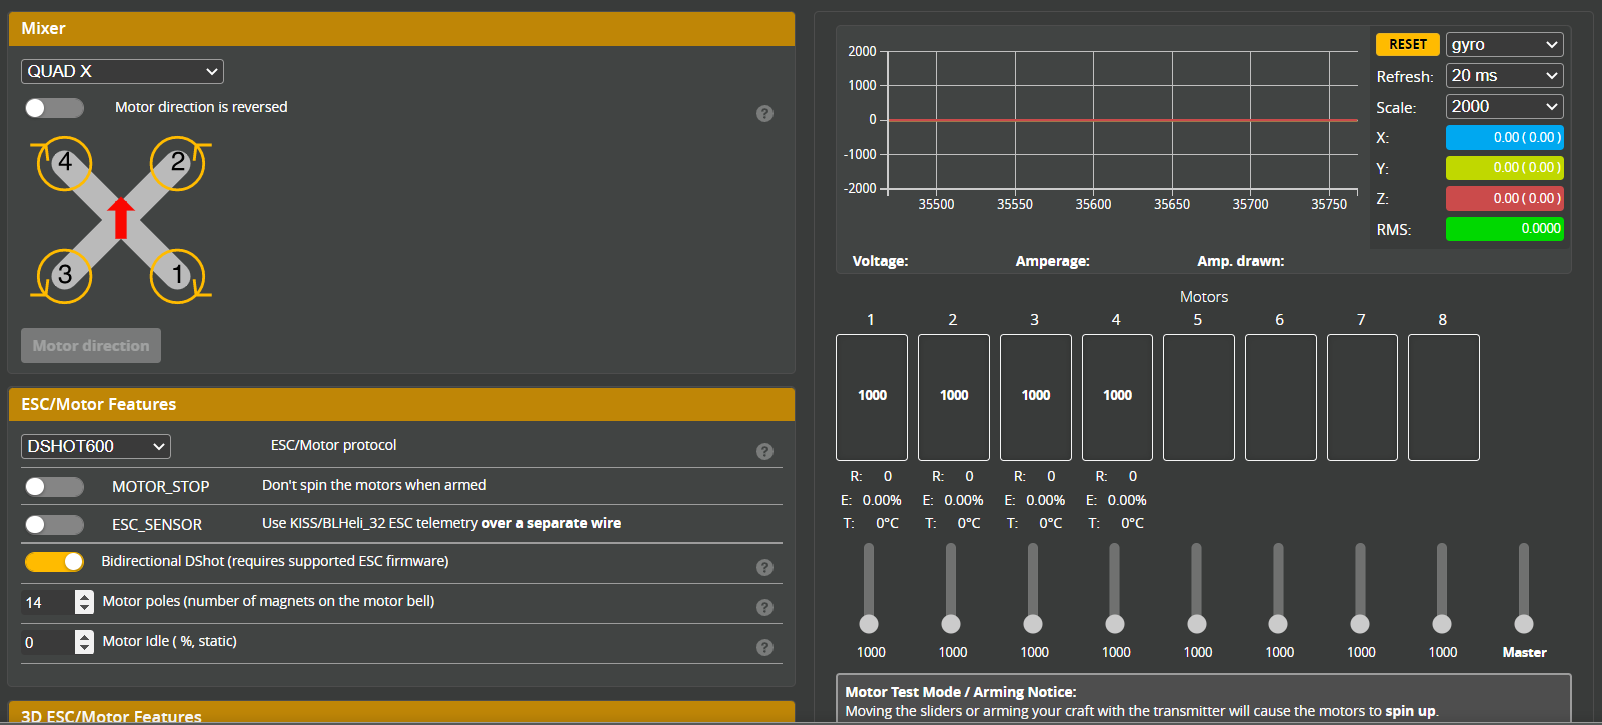
– Motor direction: Use the Motor tab sliders to verify spins match your layout. Reverse any motor by swapping two wires.
– ESC protocol: Select DShot300 with bidirectional DShot enabled (RPM filtering requires this).
– Failsafe: Set “Drop” mode after 1 second signal loss. Test by turning off your radio—motors must cut instantly.
– OSD elements: Enable RSSI (signal strength), voltage, and mAh consumed. Low RSSI below 30% causes video dropouts.
Time-saver: Enable “Auto Profile Switch” in Betaflight. It shifts from ANGLE mode (self-leveling) to ACRO mode (full control) when you flip a switch—no menu diving mid-flight.
Maiden Flight Checklist: Don’t Skip These
Your drone will flip violently on takeoff if you miss these:
– ✅ Center of gravity balanced: Lift the quad at its midpoint; it should hang level. Slide the battery forward/backward until it does.
– ✅ Prop orientation correct: CW props (marked “R”) on motors 2 & 4; CCW props on 1 & 3.
– ✅ Flight area clear: Minimum 50x50ft space, zero people/animals, no overhead wires.
– ✅ Camera tilt verified: 15° for cinematic shots, 25° for racing. Higher angles cause blurry footage.
Start in ANGLE mode for your first hover—this auto-levels the drone if you over-correct. Only switch to ACRO mode after 10 stable flights.
Troubleshooting Flips, Beeps & Video Dropouts
Problem: Drone flips violently on takeoff
Fix: Check propeller markings against motor directions. If props are correct, reverse motor wires in Betaflight’s Motor tab.
Problem: No ESC startup beeps
Fix: Verify 5V power from ESC to flight controller. Miswired RX/TX pins (should be FC TX → RX pad) cause this 90% of the time.
Problem: Grainy video beyond 50m
Fix: Ensure both drone and goggles use RHCP antennas (90° apart). VTX power must be ≥200mW—DJI O4 defaults to 25mW for FCC compliance.
Budget Breakdown: Real 2024 Costs
| Component | Cost | Where to Save |
|---|---|---|
| Frame + Electronics | $200 | Buy GEPRC Vapor without motors |
| DJI O4 Pro | $230 | Skip if using GoPro (add $40 mount) |
| Batteries (4x 6S) | $100 | CNHL 1300mAh = $25 each |
| Total | $530 | vs. $800+ for pre-built equivalent |
This beats paying $300 for a single arm replacement on a DJI drone. And when you crash (you will), you’ll replace a $15 motor—not a $200 integrated module.
Next Steps: Beyond Your First Flight
After nailing basic hover control:
1. Add GPS: Solder a BN-880 module to UART for return-to-home (critical for lost drones).
2. Upgrade antennas: Circular polarized models boost range by 30%—just ensure matching RHCP/LHCP.
3. Practice in simulators: Liftoff’s real-world physics prevent $200 crash lessons. Fly 5 hours in sim before pushing limits.
Building your own camera drone transforms you from a passive user into a pilot who understands every beep, vibration, and flight characteristic. That moment when you recover from a near-crash because you know your drone’s limits? Worth every soldered joint. Grab your iron—your custom aerial cinema rig awaits.


