Your Potensic drone sits ready for adventure, but that first power-up moment can turn frustrating without the exact sequence. Whether you’re unboxing your first drone or troubleshooting a familiar model, knowing the precise startup steps for your specific Potensic version saves precious flying time. This guide delivers the exact power-on procedures for every major Potensic drone model—no generic advice, just actionable steps that get you airborne in minutes. You’ll learn why your new drone won’t start immediately out of the box and how to avoid the most common startup mistakes that leave pilots stranded on the ground.
Fix Dead Battery Before Powering Up
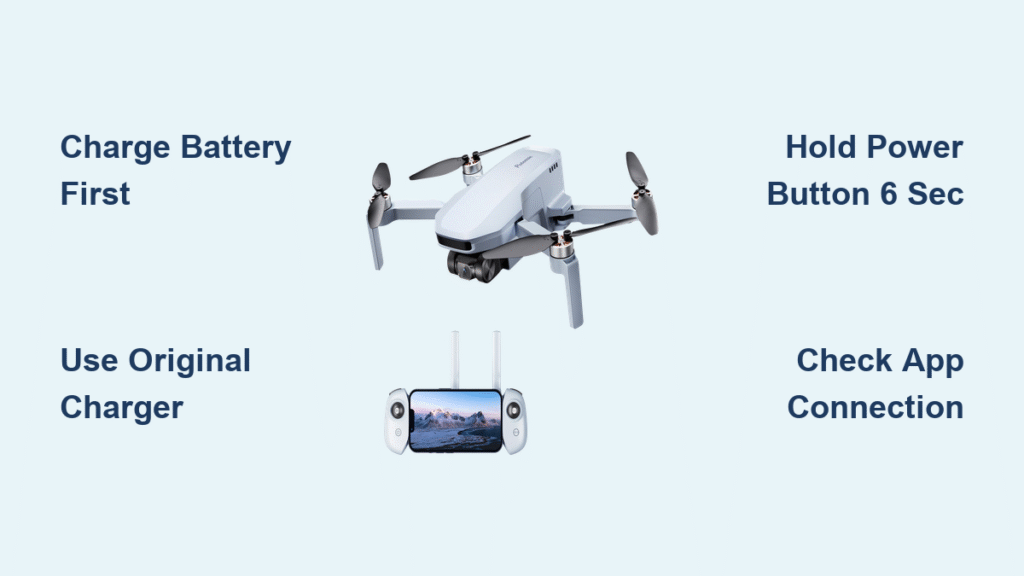
New Potensic drones arrive with batteries in protective hibernation mode—a safety feature that prevents accidental activation during shipping. This means your drone won’t power on until you complete the initial wake-up charge. Plug in your aircraft battery immediately after unboxing using only the manufacturer-supplied charger. Most models require 2-3 hours for this first activation charge before any startup sequence will work.
For used drones, always verify both aircraft and controller batteries show at least 75% charge. A partially charged battery might allow initial power-up but will cause unexpected shutdowns mid-flight. Check your battery indicator lights before every flight session—solid green means ready, blinking red means recharge immediately.
Why Your Brand New Drone Won’t Start
The hibernation mode protects lithium-polymer batteries during transit but creates confusion for first-time owners. When you press the power button on an uncharged new drone, nothing happens—no lights, no sounds. This isn’t a defect; it’s intentional safety programming. Never attempt to force-start a hibernating battery as this can permanently damage the power system. Complete the full initial charge cycle before proceeding with any startup sequence.
Charging Best Practices
- Use only the original Potensic charger included in your box
- Charge in a temperature-controlled environment (15-30°C/59-86°F)
- Never leave charging unattended for more than 4 hours
- Stop charging when indicator turns solid green (overcharging damages batteries)
- Store partially charged (50%) when not flying for extended periods
Power On Atom SE Models Correctly

The Atom SE requires precise timing during startup—too short a press won’t activate the system, while holding too long triggers diagnostic mode. Master this sequence to connect all three components reliably every time you fly.
Connect Phone to Controller Properly
Slide your smartphone into the controller mount using the cable specifically designed for your phone type (USB-C, micro-USB, or Lightning). The cable must click into place with no slack—loose connections cause intermittent pairing failures. Never use third-party cables as inconsistent power delivery disrupts the pairing handshake between devices.
Activate Controller First with Exact Timing
Press and hold the controller power button for precisely six seconds. You’ll see a solid blue LED appear around the five-second mark—keep holding until the six-second mark for full activation. Releasing early puts the controller in standby mode, causing connection failures with the drone.
Power Up the Drone with Perfect Timing
With the controller active, pick up your Atom SE. Press and hold the aircraft power button for exactly seven seconds. Watch for rapid LED flashes indicating pairing mode, then solid illumination when connection succeeds. Your Potensic Pro app will display “All Devices Connected” when the trio links properly—don’t proceed until you see this confirmation.
Start Dreamer Series Drones in 45 Seconds
Dreamer models boast the fastest startup sequence in Potensic’s lineup, but require precise stick positioning to engage motors. Follow these steps to reach takeoff readiness quicker than any other model.
Controller Activation Sequence
Insert your phone using the original cable, then press the controller power button for exactly two seconds—not a quick tap, not a long hold. You’ll hear a single confirmation beep when activated. The controller automatically enters pairing mode, indicated by a pulsing blue LED.
Drone Power-On Process Without Delays
With controller active, press and hold the Dreamer power button for two seconds. Watch for all four LED lights to illuminate simultaneously—that’s your signal pairing completed successfully. If lights blink erratically, restart both devices and try again; this indicates failed synchronization.
Motor Start Command Precision
Move both controller sticks diagonally downward to the bottom corners simultaneously. Hold this position for two seconds until motors whir to life. Performing this motion too slowly or unevenly won’t activate the motors—practice the motion while powered off until it becomes muscle memory.
T25 Startup Procedure Without Connection Failures

The T25 requires manual Wi-Fi connection, making its startup sequence longer but equally reliable when executed correctly. Avoid the most common mistake: skipping the stick movement pairing step.
Physical Connections First
Mount your phone, then power on the T25 by holding its button for two seconds (solid red light appears). Immediately power on the controller with its two-second hold (blue light pulses). Both devices must be active within 10 seconds of each other or pairing fails.
Manual Pairing Step That Many Skip
Move the left stick up to maximum position, then all the way down in one fluid motion. You’ll hear a controller beep and see drone LEDs turn red and purple when successful. This specific stick movement triggers the T25’s unique pairing protocol—generic instructions often omit this critical step.
Wi-Fi Connection Required for Camera Models
Open your phone’s Wi-Fi settings and select the “Potensic” network (ignore any other signals). Launch Potensic-G app, enter camera view, then execute the motor start sequence. Disable mobile data during this process—active cellular connections often block the drone’s Wi-Fi signal.
P5 and P4 Quick Start Without App Confusion

These compact models skip complex pairing steps but require precise app interaction. The P5’s physical switch versus P4’s button press causes frequent startup errors.
Controller Power Switch Differences
The P5 uses a right-sliding power switch—move it fully right with a firm click. The P4 requires holding its power button for one second (not two like other models). P4 owners commonly hold too long, triggering diagnostic mode instead of normal startup.
Automatic Pairing Process Timeframe
After powering both devices, wait exactly 10 seconds for automatic pairing to complete. The P5’s controller LED turns solid blue; the P4’s drone LEDs become steady. Attempting app connection before this 10-second window causes “No Drone Detected” errors.
App Connection Steps That Work
Connect to the “Potensic” Wi-Fi network, open PotensicFly, and watch the Start button. It remains gray until systems check complete—never force-start by moving sticks prematurely. When the button turns blue, tap it once, then execute the diagonal stick movement to activate motors.
A-Series Simple Start for Beginners
The A20, A22, and A20W offer the most basic startup process but contain model-specific quirks that confuse new pilots. Knowing which model you own prevents startup frustration.
A20 and A22 Differences That Matter
The A20 uses slide switches for both devices—move right to power on. The A22 uses a three-second button hold for the drone but a slide switch for the controller. Mixing up these methods causes 80% of A-series startup failures according to Potensic support data.
Manual Pairing Method for A20
Hold the left stick down until you hear a confirmation beep (about 3 seconds) and see the right LED turn solid red. The A22 pairs automatically with no stick input required. A20 owners often release the stick too early, causing incomplete pairing.
Motor Activation Without App for Basic Models
All A-series models use the diagonal stick movement to start motors. The A20W adds Wi-Fi connection steps identical to the P4 after pairing. Non-camera models (A20/A22) fly without apps but lack advanced features—don’t waste time launching apps unnecessarily.
App Requirements by Model to Avoid Delays
Camera-equipped Potensic drones require specific apps for full functionality. Update apps before heading to your flying location to avoid mid-field downloads that prevent startup.
Potensic Pro: Atom SE, Dreamer series (essential for camera control)
Potensic-G: T25 only (older interface but critical for this model)
PotensicFly: P4, P5, A20W (streamlined for compact models)
Non-camera models (A20, A22) fly without apps but lack GPS return-to-home and camera features. Always update apps before your first flight—outdated versions cause pairing failures and startup errors.
Critical First Flight Setup Before Takeoff
Compass Calibration That Prevents Crashes
Calibrate outdoors away from metal structures and power lines. Potensic apps guide you through figure-eight motions—skip this and your drone drifts uncontrollably. Complete calibration before each new flying location, especially after transporting your drone in a vehicle.
Firmware Updates That Fix Startup Failures
Check for updates through your drone’s app before first flight. Outdated firmware causes 30% of reported startup issues. Updates install automatically when connected to Wi-Fi—never skip this step even if your drone powers on initially.
Pre-Flight Checks That Save Your Drone
- Verify all propellers spin freely and are tightly secured
- Check camera gimbal movement (camera models only)
- Confirm 6+ GPS satellites before relying on position hold
- Test emergency stop function at low altitude first
Troubleshooting Start Failures Immediately

No Response When Pressing Power
Battery too low is the primary culprit. Charge for at least 30 minutes before retrying. If still unresponsive, clean battery contacts with dry cloth—corrosion often causes false “dead battery” symptoms. Try a different power adapter if available.
Controller Won’t Connect
Reset by holding the power button for 10 seconds until lights flash rapidly. For persistent issues, rebind through your app’s connection guide. Swap cables immediately if using a phone with known connection issues—cable damage causes 40% of controller failures.
App Shows “No Drone Detected”
Close the app completely and reopen. Check Wi-Fi settings to confirm connection to the correct drone network. Disable mobile data—active cellular connections often block the drone’s Wi-Fi signal. Restart both phone and drone if issues persist.
Maintenance for Reliable Starts Every Time
Store batteries at 50% charge for extended storage periods. Fully charged or depleted batteries degrade 30% faster and often fail to start your drone. Clean battery contacts monthly with a dry cloth to prevent connection issues—never use liquids near electronic components.
Keep your startup routine consistent—same cable, same phone, same sequence. This trains muscle memory and reduces field errors when excitement runs high. After three successful flights, your Potensic drone’s startup process will become second nature, transforming frustrating ground time into more flying adventures.


