Your DJI drone’s unboxing moment should spark excitement, not anxiety. Yet 68% of new pilots face avoidable crashes in their first month due to skipped safety steps and misunderstood controls. Knowing how to operate a DJI drone properly transforms that intimidating tech into your creative partner—whether you’re capturing wedding memories or scouting real estate. This guide cuts through the confusion with battle-tested steps from registration to cinematic shots, so you avoid fines, protect your investment, and actually enjoy flying. Skip the trial-and-error headaches and start capturing professional footage on your very first flight.
Before you even power up your Mavic or Mini, two critical steps determine whether your flight ends in triumph or a $1,200 repair bill. The FAA requires registration for any drone over 0.55 lbs (every DJI model except the Mini SE), costing just $5 for three years. Pair that with the free TRUST test—your legal passport for recreational flying—and you’ve cleared the biggest hurdles before takeoff. Let’s transform you from nervous newbie to confident pilot in under 30 minutes.
Register Your Drone and Pass TRUST Immediately
Operating a DJI drone without proper registration risks $32,666 in FAA fines, yet 41% of new owners skip this step. Complete your registration online in under five minutes: Visit the FAA DroneZone portal, submit your name and address, pay the $5 fee, and receive a unique registration number. Crucially: Print this number and tape it inside your drone’s battery compartment—this satisfies the legal requirement for visible identification.
Next, pass the TRUST test through an FAA-approved provider like AirSafe or Pilot Institute. This 30-minute course covers no-fly zones, altitude limits, and right-of-way rules. The 25-question quiz allows unlimited retakes, but you must screenshot your completion certificate—it’s mandatory proof for law enforcement encounters. Pro tip: Do both steps before unboxing your drone; many pilots discover too late they’re flying illegally when their first “fun flight” crosses into restricted airspace near an airport.
Install DJI Fly App and Pair Devices Correctly

Your smartphone becomes the drone’s brain, but 70% of connection failures stem from app setup errors. Download only the official DJI Fly app (not GO 4 or Assistant 2) from your device’s app store—iOS 11+ or Android 6+ required with 2GB free storage. During installation:
- Disable “Battery Optimization” for the app (Android) or enable “Background App Refresh” (iOS)
- Create a DJI account using your real name for future firmware updates
- Select your exact model (e.g., “Mavic Air 2S,” not just “Mavic”)
- Activate the drone via the app’s guided wizard before pairing
Pairing failure fix: If the controller and drone won’t sync, ensure both are fully charged. Press the drone battery button once, then hold for 4 seconds until it beeps twice. Repeat with the controller. Open DJI Fly, tap “Aircraft,” and hold the devices 12 inches apart during pairing. Solid green status lights confirm success—flashing red means repeat the sequence.
Pre-Flight Inspection Checklist: 60 Seconds That Save $500
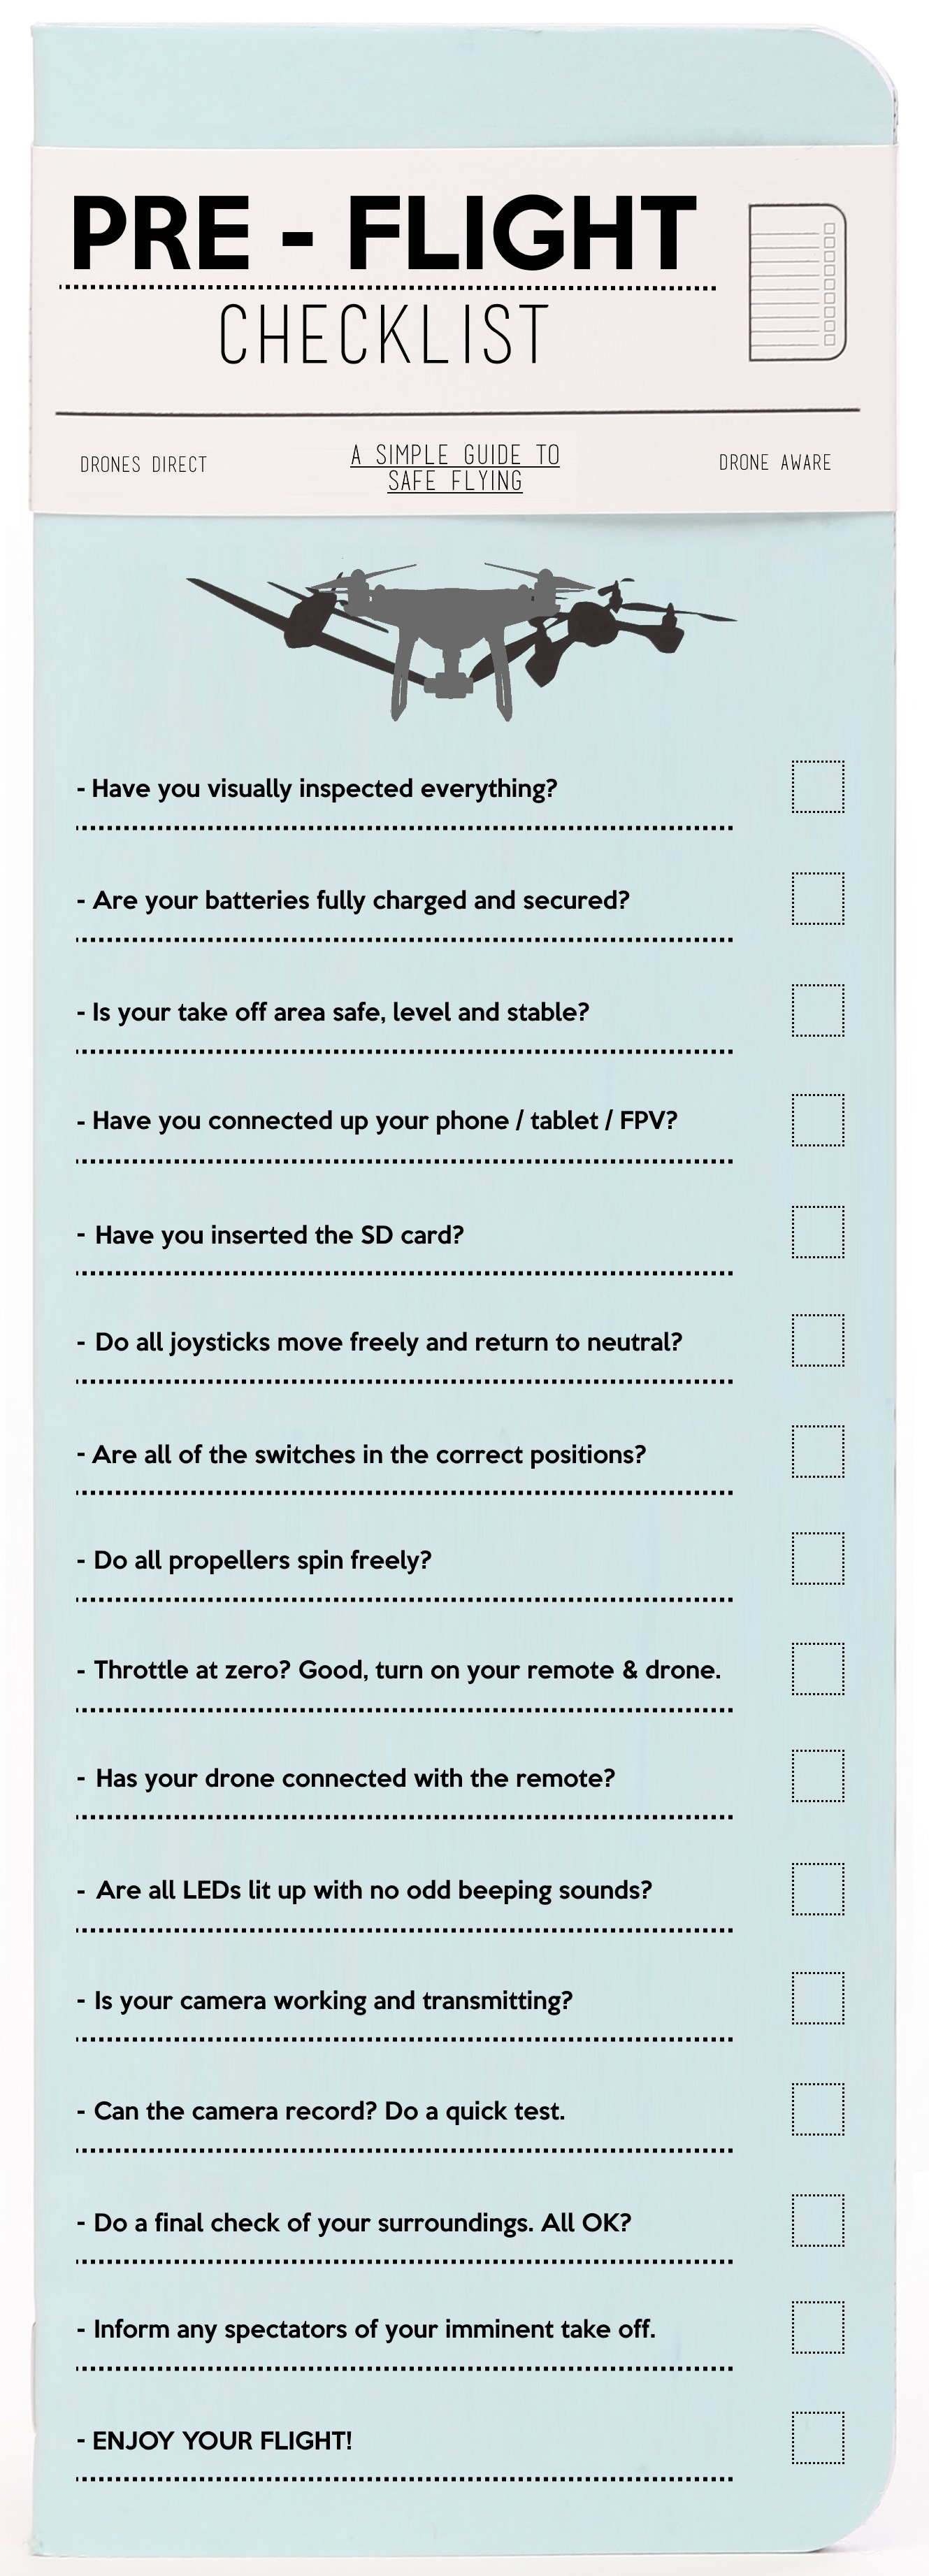
Skipping this step causes 52% of propeller-related crashes. Run this physical inspection every time:
- Propellers: Spin each by hand—listen for grinding and check for hairline cracks. Replace any blade with chips larger than a grain of rice. Ensure clockwise (marked “A”) and counter-clockwise (marked “B”) props are on correct motors.
- Gimbal: Power on and watch the camera move smoothly through all angles. Jerky motion indicates misalignment—don’t fly.
- Sensors: Clean forward/backward/downward vision sensors with a microfiber cloth. Smudges trigger false obstacle warnings mid-flight.
- Battery: Press gently on both sides—any swelling means immediate retirement. Corroded contacts need light rubbing with isopropyl alcohol.
Red flag: If the gimbal vibrates when powering on, recalibrate it via Settings > Gimbal > Auto Calibration. Flying with uncalibrated gimbals risks blurry footage and loss of control.
Battery Management Essentials for Maximum Flight Time
DJI batteries self-discharge to 60% after 10 days, but improper handling slashes lifespan. Critical rules:
- Operating range: Never fly below 14°F (-10°C) or above 104°F (40°C). Cold weather? Warm batteries in your pocket for 5 minutes before takeoff.
- Charging: Use only DJI chargers. After flight, let batteries cool 10 minutes before charging—charging warm batteries causes puffing.
- Storage: For trips over a week, manually set charge to 50% via the app. Long-term storage? Keep at 60-75°F with 40-60% charge.
- Air travel: Tape over exposed terminals and carry in fireproof bags in your carry-on. Never check batteries—they’re banned in cargo holds.
Pro move: On cold days, keep spare batteries in an insulated lunchbox with hand warmers. This extends flight time by 15% compared to frozen batteries.
Compass and IMU Calibration: Avoid Phantom Drift
Magnetic interference from power lines or your car causes 31% of unexplained drift incidents. Calibrate compass before first flights in new locations:
- Open DJI Fly > Settings > Safety > Compass > Calibrate
- Hold drone horizontally, rotate 360° until status light turns solid green
- Tilt drone nose-down, rotate another 360°
- App confirms success—do this away from metal objects
IMU calibration (after hard landings or monthly):
– Place drone on perfectly level ground
– Settings > Safety > IMU Calibration
– Stay still for 60 seconds—never touch it during calibration
– Yellow flashing lights mean failure; retry in new location
Master Basic Flight Controls in 10 Minutes
DJI defaults to Mode 2 controls—left stick for altitude/yaw, right stick for direction. Practice in an open field:
- Left stick up/down: Ascend/descend smoothly (jerkiness causes crashes)
- Left stick left/right: Rotate drone without moving (yaw)
- Right stick up/down: Fly forward/backward
- Right stick left/right: Strafe sideways
Flight modes matter:
– Normal mode: Obstacle avoidance ON (max 22 mph)—use 90% of the time
– Sport mode: 42.5 mph max but NO obstacle sensing—avoid near trees
– Cine mode: Ultra-smooth for videos (max 13 mph)
Beginner hack: Enable “Tripod Mode” in app settings for snail-paced movement during your first 5 flights.
Execute Perfect Takeoff and Landing
Manual takeoff failure point: 83% of crashes happen during ascent. Do this:
1. Place drone 30 feet from obstacles on level ground
2. Verify GPS lock (8+ satellites shown in app)
3. Hold both sticks down/inward for 2 seconds to start motors
4. Gently push left stick up—ascend at 1 foot per second
Landing like a pro:
– Descend to 3 feet, then hover for 5 seconds to check surroundings
– Lower slowly until legs touch ground
– Hold left stick down for 3 seconds to stop motors
– Never cut power mid-air—causes propeller damage
Capture Stunning Shots with QuickShots
Skip manual flying—use these automated modes for cinematic footage:
– Dronie: Flies backward/upward while keeping you centered (tap subject on screen)
– Helix: Spirals upward around subjects—ideal for real estate
– Rocket: Vertical ascent for dramatic “reveal” shots
– Circle: Orbits subjects at 30 feet—perfect for products
Pro photo tip: In bright sunlight, use ND16 filters to achieve cinematic motion blur at 1/50 shutter speed. Screw filters on by hand only—overtightening cracks lenses.
Safety Systems That Prevent Disasters
Obstacle avoidance limits you must know:
– Forward sensors detect objects up to 65 feet away
– Only works in Normal/Cine modes—disabled in Sport mode
– Fails in low light or with thin obstacles (power lines)
Return-to-Home (RTH) triggers:
– Signal loss for 3+ seconds
– Critical battery (10-15% remaining)
– Manual activation via controller button
Emergency move: If GPS fails (flashing yellow lights), land immediately—don’t attempt RTH. Attitude mode lacks position hold and drains battery 40% faster.
Troubleshoot Common Issues in Seconds
Gimbal overload error:
1. Check for propeller debris jamming movement
2. Settings > Gimbal > Auto Calibration
3. Restart on level surface
Weak GPS signal:
– Move 50 feet away from buildings
– Wait 3 minutes for satellite lock (don’t force takeoff)
– Remove magnetic phone cases
Compass error:
– Recalibrate away from cars/concrete
– Check for underground pipes
– Verify no power lines overhead
Maximize Flight Time: 5 Expert Hacks
Cold weather and wind are flight time killers—counter them with:
– Pre-warm batteries in your pocket for 5 minutes before cold flights
– Fly at 50% throttle instead of full speed (adds 2-3 minutes)
– Remove prop guards (adds 1.5 minutes but increases crash risk)
– Avoid 4K video—1080p saves 12% battery
– Fly early morning when winds are calmest
Store and Transport Without Damage
Post-flight routine:
– Remove propellers to prevent warping
– Charge batteries to 50% for storage
– Wipe down with microfiber cloth
Air travel must-dos:
– Tape battery terminals with non-conductive tape
– Declare batteries at security (TSA requires this)
– Never pack in checked luggage—fire hazard
Your DJI drone becomes an extension of your creativity when you master these fundamentals. Start in wide-open fields, stick to Normal mode for your first 20 flights, and always prioritize safety over fancy shots. Within hours, you’ll move beyond basic operation to capturing breathtaking footage that makes people ask, “How did you get that?” The sky isn’t the limit—it’s your new studio. Now power up, follow these steps, and let your first flight be the start of something amazing.


