Picture this: you’re standing on the beach, watching your drone carry your bait 1,500 feet out to sea—far beyond where any surf cast could reach. Minutes later, you’re reeling in a sailfish from a drop-off you couldn’t access any other way. This isn’t science fiction; it’s drone fishing, and you can build your own setup for a fraction of commercial alternatives. Learning how to make a fishing drone unlocks entirely new fishing opportunities without requiring expensive specialized equipment.
Whether you’re targeting cobia during spring runs or dropping chum near artificial reefs, turning your drone into a fishing machine opens up previously inaccessible waters. Most anglers never reach the 500-foot drop-offs where trophy fish patrol because they lack a boat. With the right modifications, your existing drone becomes a precision bait delivery system that outperforms traditional casting methods. This guide walks you through building a bulletproof fishing drone that won’t sacrifice your expensive quadcopter to the depths.
Why Your Fishing Drone Must Fail Safely (Not Your Wallet)
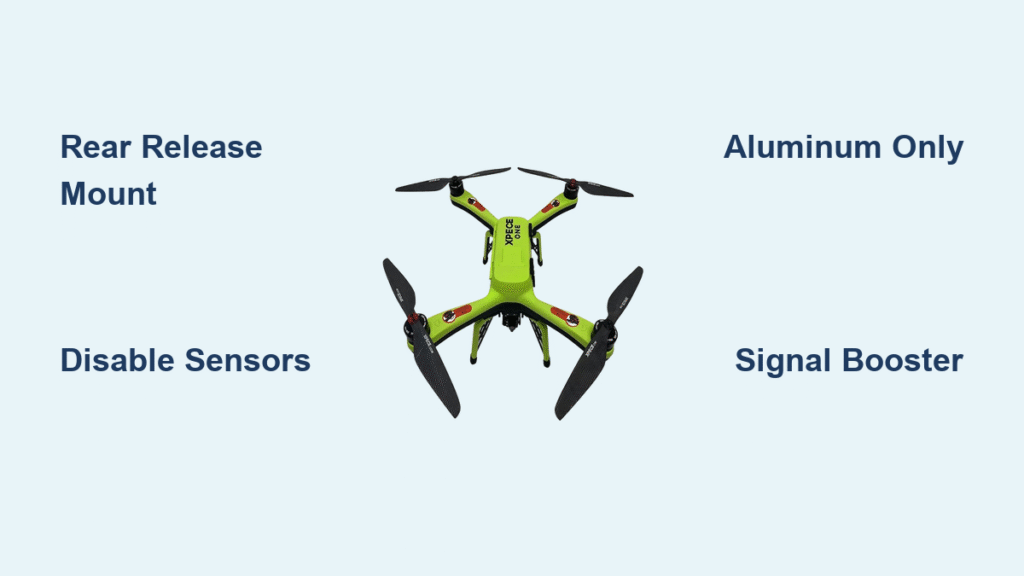
Rear-Mounted Release System Prevents Costly Losses
Your fishing drone’s survival depends on one critical feature: a fail-safe release mechanism that detaches your line when snagged. Mounting the line attachment at the rear of the drone creates physics-based protection—any snag causes the line to flip backward and release automatically. Never position line attachments forward; one underwater snag and your $1,000 drone becomes permanent reef structure.
Disable Proximity Sensors Before Water Flights
DJI drones and similar models come equipped with proximity sensors designed for obstacle avoidance. These sensors malfunction over water surfaces, causing erratic flight behavior that can send your drone crashing. Before your first fishing trip, disable all downward-facing sensors through your drone’s app settings. Your drone will fly smoother and respond better without these sensors trying—and failing—to “see” the water below.
Aluminum Components Only: Avoid Compass Disaster
Why Magnetic Materials Ruin Your Drone’s Navigation
Your drone’s compass and GPS systems are incredibly sensitive to magnetic interference. Using steel or iron components in your fishing rig will send your drone spinning in circles or cause complete navigation failure. Aluminum is the only safe metal for fishing drone modifications—it provides structural integrity without interfering with critical flight systems.
Essential Aluminum Parts Checklist
- Aluminum paint stick (main mounting arm that won’t interfere with compass)
- Aluminum pop rivets (4-6 pieces for secure, non-magnetic fastening)
- Small zip ties (for initial positioning before permanent installation)
- Epoxy adhesive (optional for saltwater environments to seal joints)
How to Build Your Fishing Drone Mount in 15 Minutes
Precise Aluminum Arm Construction Steps
- Measure and cut your aluminum paint stick to match your drone’s width plus two inches
- Mark mounting points 2 inches from each end using a permanent marker
- Drill pilot holes using a 1/8″ bit specifically for aluminum pop rivets
- Sand all edges to create smooth surfaces that won’t abrade your fishing line
Secure Mounting Installation Process
Position your bracket on the drone’s underside, centered between landing gear. Temporarily secure with zip ties and conduct a test flight to verify balance. If the drone flies level, replace zip ties with pop rivets. For saltwater use, apply epoxy to rivet joints to prevent corrosion—this simple step extends your rig’s lifespan by years.
Line Release Mechanism: The Make-or-Break Component
Creating a Reliable Automatic Release System
The rear end of your aluminum arm needs a smooth, rounded surface where your line can slide freely. Wrap electrical tape around the tip to create a non-abrasive release point, or sand the metal until completely smooth. Test your release mechanism with a 2-pound weight before actual fishing—this simulates snag conditions without risking your drone.
Angle Testing for Perfect Release Action
Adjust your release point until the line detaches cleanly when pulled from below but stays secure during normal flight. The ideal angle creates just enough friction to hold your baited line during flight but releases instantly when snagged. Conduct five test releases before your first fishing trip to verify consistent performance.
Drone Range Limits and Signal Boosting Techniques
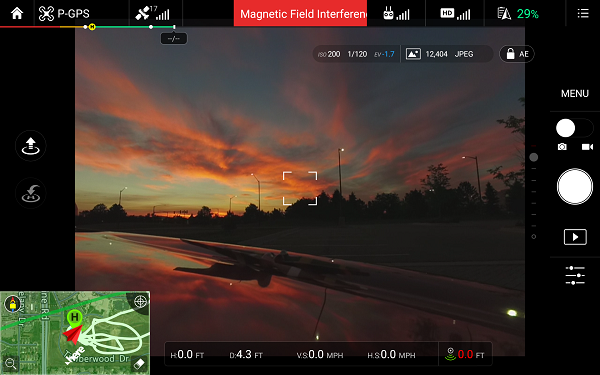
Why Your Drone Loses Control at 600 Feet
DJI Phantom 3 Standard drones experience signal degradation at 600 feet during automated mapping sessions—well short of the 1,500+ feet needed for effective fishing. This limitation stems from factory signal restrictions designed for safety compliance, not fishing applications.
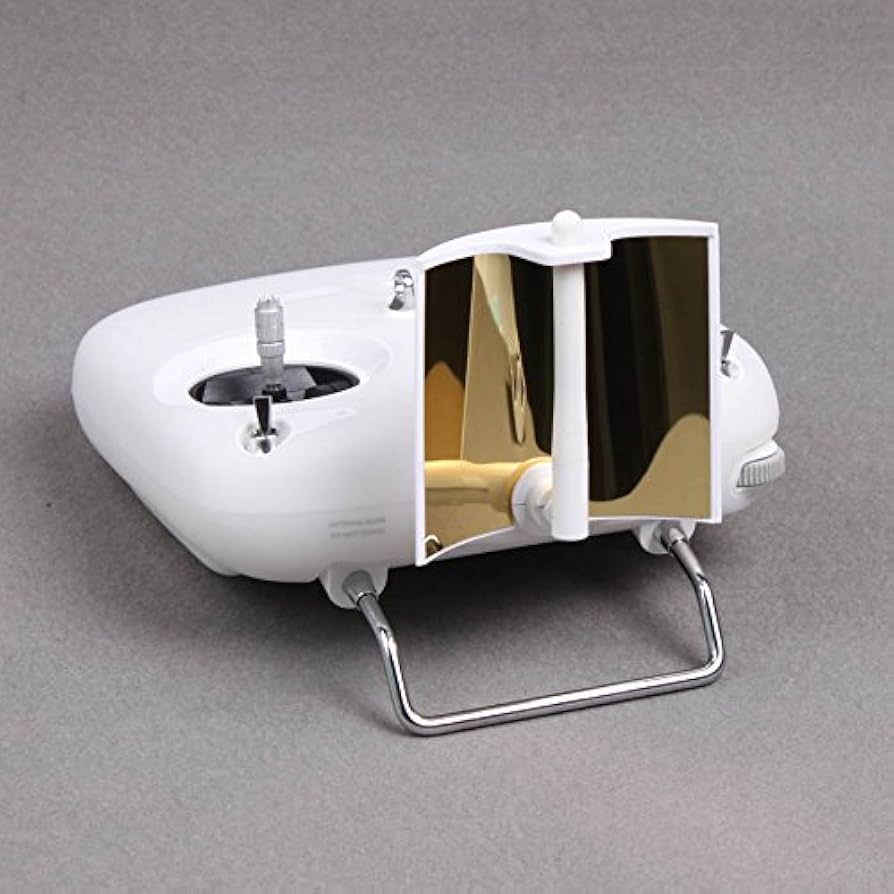
DIY Signal Enhancement That Doubles Your Range
Attach a parabolic reflector to your remote controller for as little as $15. These simple add-ons focus your controller’s signal toward the drone, effectively doubling your range to 1,200+ feet. Aim the reflector directly at your drone during flight for maximum effectiveness—this modification transforms your P3S into a serious fishing tool.
Fishing Drone Flight Techniques for Success
Optimal 45-Degree Flight Trajectory Method
Fly your drone at a consistent 45-degree angle from horizontal when deploying bait. This angle provides optimal line tension while keeping your drone safely above wave action. Always face the brace rearward during flight—this orientation ensures the line release mechanism functions correctly if snagged.
Depth Mapping Before You Cast
Download bathymetric charts for your fishing area before heading out. Identify specific underwater structures like the 500-foot drop-off at Panama City Beach where cobia gather during spring runs. Pre-planning transforms random bait drops into precision strikes on productive fishing zones.
Legal Requirements Every Drone Angler Must Know
Fishing License Rules Apply to Drone Fishing
Game wardens increasingly recognize drone fishing as a legitimate method, but they enforce the same regulations as traditional angling. Always carry your valid fishing license—you’ll need it whether casting from shore or deploying bait by drone. One angler reported a positive interaction with a wildlife officer who was curious about the technology but insisted on seeing his license.
Beach-Specific Drone Restrictions
Check local regulations before flying—some beaches restrict drone use during peak hours or in certain zones. When in doubt, visit a local tackle shop first; these establishments know the current rules and often welcome drone anglers who expand fishing opportunities.
Saltwater Drone Maintenance Checklist
Post-Fishing Rinse Protocol That Saves $1,000
Rinse your entire setup with fresh water immediately after every saltwater session. Pay special attention to pop rivets and mounting points where salt crystals hide and cause corrosion. This 30-second ritual prevents the slow deterioration that turns a functional rig into scrap metal.
Pre-Flight Inspection for Safety
- Check all rivets for tightness before each flight (loose rivets cause imbalance)
- Inspect release mechanism for wear or line abrasion (replace tape as needed)
- Verify compass calibration away from metal objects (critical for safe flight)
- Confirm GPS lock before heading over water (minimum 10 satellites)
Pro Tips from Successful Drone Anglers
Four Consecutive Deployments Without Failure
One verified angler completed four successful deployments (twice at beach locations, twice from marinas) with zero equipment failures. His secret? Meticulous pre-flight checks and patience during the build process. He also reported a game warden who was fascinated by the setup rather than confrontational—a testament to proper preparation.
Most Common Beginner Mistakes to Avoid
- Rushing the build: Take time with measurements and test fits—your drone’s life depends on it
- Skipping epoxy: In saltwater environments, permanent joints prevent gradual failures
- Ignoring wind conditions: Always check forecasts; gusts over 15 mph make precision flying impossible
Ready to Transform Your Shore Fishing?
Your DIY fishing drone is ready for action after following these precise steps. Start with short 300-foot drops in calm conditions, then progressively increase distance as you gain confidence. The 500-foot drop-off at Panama City Beach where sailfish hunt awaits—and now you can reach it from shore without a boat.
Remember that every successful drone angler started exactly where you are now. With your fail-safe release system installed and saltwater protection in place, you’ve eliminated the two biggest risks that sink beginners. Tight lines and safe flying as you explore how to make a fishing drone work for your specific needs—those cobia aren’t going to catch themselves!


