Your Phantom 4 drone sits ready on the grass, controller in hand, but that first flight can feel intimidating. Learning how to fly a Phantom 4 drone doesn’t require pilot school—just understanding the essential controls that transform you from nervous beginner to confident operator. This guide cuts through the complexity with precise instructions that match exactly what DJI engineers designed into your remote controller. Within 30 minutes of practice using these techniques, you’ll move beyond basic hovering to executing smooth cinematic movements that capture professional-quality footage.
Phantom 4 Controller Setup and Connection
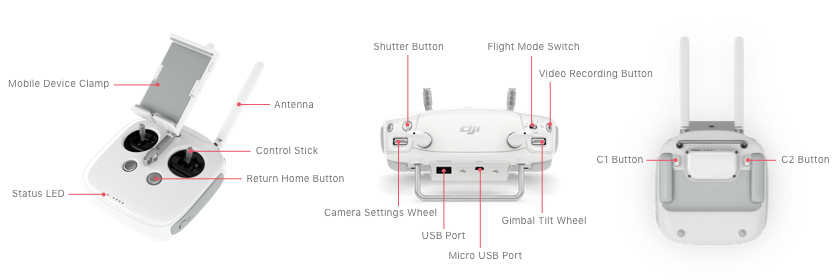
Before your first flight, proper controller preparation prevents frustrating connection issues that derail new pilots. Power on your remote controller first, ensuring it’s fully charged—DJI recommends connecting to power when the battery indicator shows two bars remaining. The Phantom 4 Pro pairs automatically when both devices power up within range, but verify connection by checking for steady green status lights on both the controller and aircraft.
Establishing Aircraft Communication
Your controller’s status screen provides critical connection feedback you must check before takeoff. Look for the “Ready to Fly” indicator in the DJI GO 4 app rather than relying solely on visual lights. If you see “No Aircraft Connected,” power cycle both devices and ensure you’re in an open area away from Wi-Fi routers or cell towers that cause signal interference. Proper communication between controller and drone is non-negotiable for safe flight operations.
Stick Mode Configuration
Confirm your Phantom 4 uses Mode 2 configuration—the industry standard where left stick controls altitude and rotation while right stick handles directional movement. Check this in DJI GO 4 settings under “Controller” before your first flight. Changing modes mid-practice creates dangerous control reversals that lead to crashes. Most beginners achieve faster progress with Mode 2, which places critical altitude control on your left thumb where fine motor skills provide better precision.
Essential Pre-Flight Safety Verification
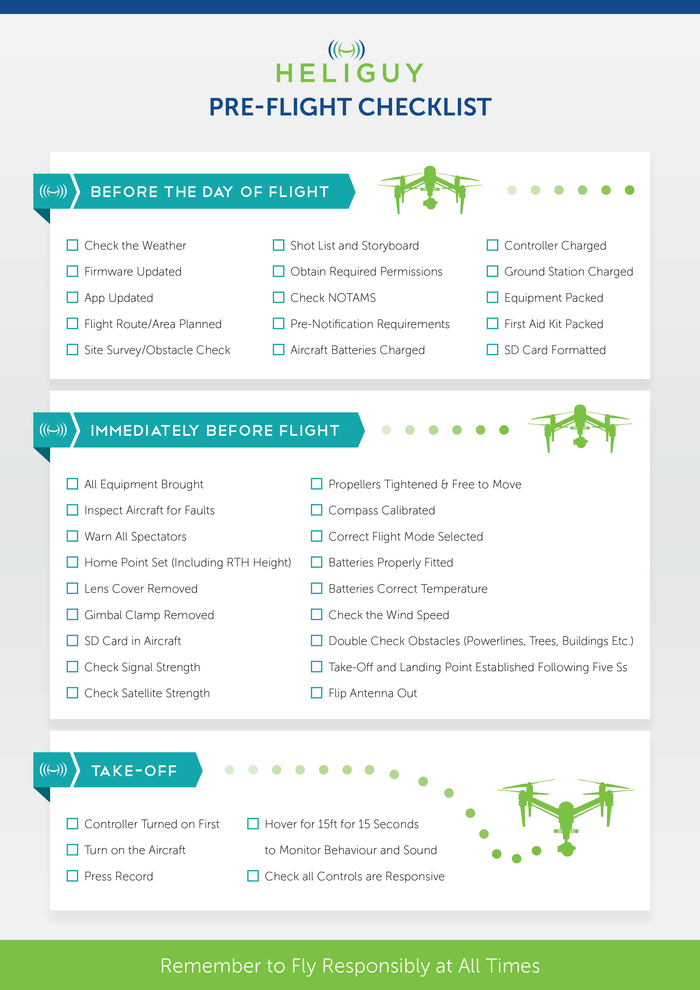
Skipping proper pre-flight checks causes 70% of beginner drone crashes according to DJI’s incident reports. Begin with a 360-degree visual sweep of your launch area, checking for overhead power lines, trees, and people within a 50-foot radius. The Phantom 4 Pro’s obstacle sensors work effectively but require clear line-of-sight—never fly toward solid objects even with sensors active.
Propeller Inspection Protocol
Examine each propeller blade under good lighting, looking for hairline cracks invisible in shadows. Spin each propeller manually to verify smooth rotation without wobble—any vibration indicates imbalance that stresses motors during flight. DJI specifies replacing propellers after three hard landings or any visible damage, as compromised blades create dangerous flight instability. Keep spare propellers in your carrying case for immediate replacement when needed.
Environmental Assessment Checklist
Wind affects your Phantom 4 more than you realize—what feels like a gentle breeze at ground level becomes turbulent at 30 feet. If leaves rustle constantly or you feel wind on your face, postpone flying. The DJI GO 4 app displays real-time wind speed data; never fly when readings exceed 15 mph with the Phantom 4 Pro. Also check for potential magnetic interference from underground pipes or overhead power lines that disrupt compass calibration.
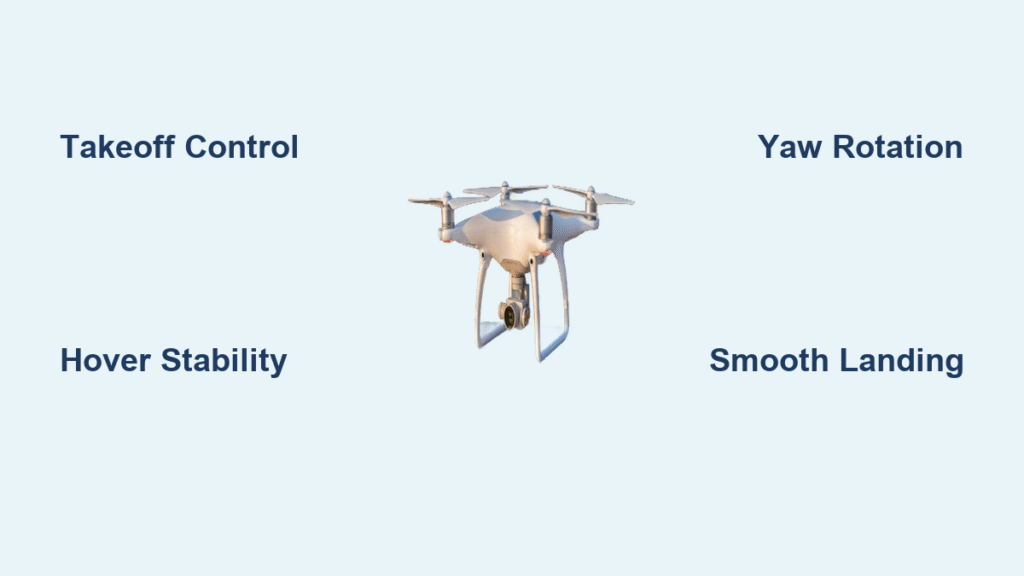
Precise Takeoff Execution Techniques
Your Phantom 4 offers two distinct takeoff methods, each with specific advantages depending on conditions. For complete control in open areas, use manual takeoff by gently pushing the left stick upward until the drone lifts 3-4 feet off the ground. Maintain this hover for 15 seconds while observing stability—any drifting indicates compass issues requiring immediate landing and recalibration.
One-Touch Auto Takeoff Procedure
In confined spaces or when learning stick sensitivity, activate the DJI GO 4 app’s one-touch takeoff feature. Tap the aircraft icon, then select “Auto Takeoff” to initiate a controlled ascent to 4 feet. This method eliminates initial stick input errors but creates dependency—limit auto takeoffs to your first five flights while developing manual control confidence. Never use auto takeoff near obstacles as the drone ascends straight up without obstacle detection.
Hover Stabilization Critical Steps
Achieving a stable hover represents your first major milestone in learning how to fly a Phantom 4 drone. Watch the aircraft’s movement relative to stationary ground objects—any drift requires subtle stick corrections. Practice maintaining position for increasing durations: start with 15 seconds, then build to 60 seconds without correction. This foundational skill prevents the over-correction that causes most beginner crashes during directional movement.
Mastering Left Stick Altitude and Yaw Control
Your left stick handles two mission-critical functions that separate novice from skilled pilots. Pushing upward increases altitude smoothly—practice climbing at 2-foot increments while maintaining position. For descent, apply gentle downward pressure; never drop the stick abruptly as rapid descents create dangerous ground effect turbulence. The key is feather-light inputs that feel more like hovering your thumb than pressing a button.
Yaw Rotation Precision Techniques
Rotating your Phantom 4 without changing position (yaw) creates dramatic cinematic pans. Begin with small left and right movements of the left stick, rotating just 30 degrees at a time. Focus on smooth, continuous motion rather than jerky inputs that cause wobble in your footage. Practice keeping a specific object centered in your camera view throughout rotation—this builds the muscle memory needed for tracking moving subjects.
Combined Altitude-Yaw Coordination
Advanced flying requires simultaneous left stick inputs. While maintaining stable altitude, add slow yaw rotation to create spiral ascent or descent patterns. Start with 10-foot diameter circles, gradually tightening the pattern as control improves. This compound movement trains your brain to separate altitude and rotation inputs—a skill essential for avoiding obstacles during complex flights.
Right Stick Pitch and Roll Movement Mastery
Forward and backward movement (pitch) forms the backbone of directional flight. Push the right stick forward gently to move away from you, maintaining constant altitude. Beginners often pull back too aggressively when bringing the drone home—practice slow, controlled returns that end precisely over your launch point. Always keep the drone within visual line-of-sight; losing sight creates dangerous orientation confusion.
Sideways Roll Technique for Cinematic Shots
Roll movements create those smooth lateral slides seen in professional footage. Move the right stick left or right while maintaining altitude, sliding the Phantom 4 parallel to your position. Start with 5-foot movements, watching how the drone responds to different input pressures. Perfect roll control allows you to track subjects moving perpendicular to your position—essential for dynamic storytelling.
Diagonal Flight Pattern Practice
Combine pitch and roll inputs to create diagonal flight paths that form the basis of complex maneuvers. Push the right stick forward-left to move diagonally away while maintaining camera orientation. Practice flying large squares using only diagonal movements, which builds the coordination needed for figure-8 patterns and other advanced techniques. These combinations feel unnatural at first but become instinctive with deliberate practice.
Professional Landing Sequence
Landing represents the highest-risk phase of any flight. Begin your descent from at least 10 feet altitude, applying steady downward pressure on the left stick. Watch the ground approaching your drone’s perspective through the live feed—never look at your controller during landing. Slow your descent rate significantly when within 3 feet of the ground to prevent bounce-back from hard surfaces.
Controlled Descent Rate Management
Aim for a descent speed of 1-2 feet per second during final approach. Faster descents create destabilizing air currents between the drone and ground. If you detect sideways drift during descent, immediately climb 5 feet, re-center over your target, and restart the landing sequence. This abort-and-retry method prevents tip-overs that damage propellers and motors.
Motor Shutdown Protocol
The moment your Phantom 4 touches ground, reduce throttle to zero—continuing downward pressure can flip the aircraft. Once landed, hold the left stick down for 2 seconds to stop motors completely. Power down the controller before the aircraft to prevent accidental stick inputs during shutdown. This sequence protects your investment and establishes professional habits for every flight.
Next-Level Practice Progression Plan
After mastering basic hovering and directional flight, progress to compound movements that build cinematic skills. Start with large figure-8 patterns—50-foot diameter circles that combine all directional controls in a single fluid motion. These patterns develop the coordination needed for professional tracking shots while keeping your Phantom 4 within safe visual range.
Altitude Integration Practice
Combine directional movement with altitude changes to create dynamic flight paths. Fly forward while climbing, then reverse direction while descending to form a continuous loop. These compound movements prepare you for advanced features like ActiveTrack and TapFly while dramatically improving your spatial awareness. Always maintain visual contact—never rely solely on the screen during these exercises.
Building Flight Confidence Systematically
Dedicate your first 10 flights to mastering these fundamentals within a 100-foot radius. Resist the urge to explore further until you can consistently execute smooth takeoffs, stable hovers, and controlled landings. This disciplined approach transforms how to fly a Phantom 4 drone from an intimidating challenge into an intuitive extension of your creative vision. Each successful flight builds the muscle memory that makes advanced techniques feel effortless.
Mastering how to fly a Phantom 4 drone requires consistent practice of these fundamental techniques rather than technical expertise. Your ability to execute smooth, controlled movements separates amateur footage from professional results. Return to these basics whenever adding new equipment or flying in challenging conditions—this foundation determines your success with every flight. The Phantom 4 Pro’s incredible capabilities shine brightest when piloted with precise control developed through deliberate practice of these essential maneuvers.


