Your drone’s camera suddenly delivers shaky, blurry footage, or worse—it shows a black screen after a minor crash. Don’t rush to replace your entire drone just yet. Knowing how to change drone camera modules can save you hundreds of dollars and get you back in the air within hours. Whether you’re troubleshooting a DJI FPV’s dead sensor or installing a Runcam Orange 5 on a Tello, this guide covers every practical scenario. You’ll learn factory replacement protocols, weight-sensitive modding tricks, and critical safety checks that prevent costly mistakes during your camera swap.
Why Your Drone Camera Needs Replacement Now
Physical Damage Signs You Can’t Ignore
Cracked lenses, bent gimbal arms, or torn ribbon cables demand immediate camera replacement. Persistent purple streaks across your footage or complete signal loss after firmware updates indicate hardware failure—not software glitches. If recalibration apps fail to restore image clarity during multiple test flights, your camera module requires physical replacement. Ignoring these symptoms risks further damage to vibration-sensitive components like the IMU.
Confirming Hardware vs. Software Failure
Before disassembling your drone, eliminate software causes: update firmware, recalibrate gimbal settings in the DJI Fly app, and test in varied lighting conditions. If problems persist across three consecutive flights with fresh batteries, hardware replacement becomes necessary. Temporary fixes like factory resets only mask underlying physical damage—especially after impact incidents where internal flex cables fray.
Must-Have Tools for Precision Camera Replacement
DJI-Specific Tool Kit Essentials
Gather these before starting: T6 Torx screwdriver for canopy screws, Phillips #000 for IMU components, ESD-safe pry tool to avoid scratching casing, and fine-tip tweezers for ribbon cable handling. A magnetic screw tray prevents losing microscopic fasteners, while high-resolution step photos serve as your reassembly roadmap. Skipping ESD protection risks frying $500 electronics with static discharge—always wear a wrist strap.
Time-Saving Pro Techniques
Work under bright LED lighting to spot hidden adhesive points. Label cable connections with colored tape matching their ports. Heat stubborn adhesive joints with a hairdryer at 60°C for 20 seconds before prying—this prevents ribbon cable tears. Keep isopropyl alcohol and microfiber cloths nearby to clean sensor surfaces during reassembly.
DJI FPV Camera Replacement: Step-by-Step Walkthrough

Critical Pre-Disassembly Safety Protocol
Power down completely and remove propellers and battery—this prevents accidental motor activation during disassembly. Place the drone on a non-slip ESD mat with the nose facing away from you. Verify no LEDs illuminate before proceeding; residual power in capacitors can short circuits.
Canopy and Internal Access Sequence
Step 1: Remove four T6 Torx screws (two per side) securing the canopy. Step 2: Insert your plastic pry tool at the rear seam and gently lift counterclockwise, working toward the front. The canopy clicks free when released from all retention points. Underneath, locate the camera/gimbal assembly at the drone’s nose section, connected via three ribbon cables to the main board.
Camera Module Extraction Process
Step 1: Remove the metal IMU cover using two Phillips #000 screws. Step 2: Lift the IMU board after unscrewing three micro-fasteners. Step 3: Disconnect all flex cables using tweezers to flip locking tabs upward—note cable orientations for reassembly. Step 4: Release vibration isolation mounts securing the camera assembly. Step 5: Gently peel the cooling fan from its adhesive base and disconnect its micro-connector. Your old camera module now lifts straight out.
Post-Replacement Verification Checklist
Cable Connection Integrity Test
Before resealing, verify every flex cable clicks audibly into its port. Wiggle connections gently—if cables slide out easily, reseat them until locking tabs engage. Loose HDMI or power connections cause intermittent video loss mid-flight, which is harder to diagnose than complete failure.
Mandatory Gimbal Calibration
Power on the drone and launch the DJI Fly app. Navigate to Camera Settings > Gimbal Calibration. Allow 3 minutes for full calibration—do not touch controls during this process. Test gimbal movement by tilting the drone; smooth panning without stuttering confirms success. Always perform a 60-second hover test at eye level before full flight.
Third-Party Camera Integration Guide

Weight and Compatibility Thresholds
Your drone’s thrust-to-weight ratio determines viable upgrades. The Tello’s stock camera weighs 8g—replacing it with a 92g GoPro HERO12 (stripped) requires 11.5x more thrust, causing unstable flight. For FPV builds, prioritize cameras under 15g like the 5g Runcam Orange 5. Always calculate total added weight: camera + mount + wiring + power converter.
Video Output and Power Matching
Verify your drone provides required voltage: Tello outputs 3.8V while GoPros need 5V. Use buck-boost converters (>90% efficiency) for voltage mismatches. For video transmission, match output types—HDMI from action cameras must connect to compatible VTX hardware. The Caddx Ant Lite succeeds on Tello because its 25×25mm mount fits stock mounting points and uses identical 8-pin wiring.
Tello-Specific Camera Replacement Protocol
Diagnosing Common Failure Points
Tello cameras typically fail at the 8-pin micro-coax connector during motor repairs. Bent pins or torn ribbon cables appear as vertical lines in footage. After crashes, check if the sensor lens has detached from the PCB—this causes concentric blur patterns. Source OEM modules using part number CP.PT.00000100.01 ($18-$25 from verified sellers).
Streamlined Installation Process
Remove two Phillips screws securing the front camera plate. Disconnect the ribbon cable by flipping its locking tab upward. Install the new module by reversing these steps. Crucially, maintain the 8g weight limit—any deviation affects flight stability. Rewire third-party cameras like the Caddx Ant Lite by matching pinouts: VCC (red), GND (black), Video (yellow).
Power Management for Modified Setups
Voltage Conversion Essentials
Directly connecting a 5V camera to Tello’s 3.8V battery causes brownouts. Install a step-up converter rated for 2A burst current between the drone’s PDB and camera. Bench-test current draw: the Runcam Orange 5 pulls 0.15A at 5V, requiring 0.2A from Tello’s 3.8V system. Exceeding 0.3A risks overheating the drone’s power circuit.
Noise Filtering Tactics
Motor electrical noise creates video “snow.” Solder LC filters (10µH inductor + 100µF capacitor) between power leads and cameras. Position filters within 2cm of the camera’s power input. This simple mod reduces interference by 70% based on FPV community testing—critical for clean 1080p footage.
Vibration Damping Mounting Solutions

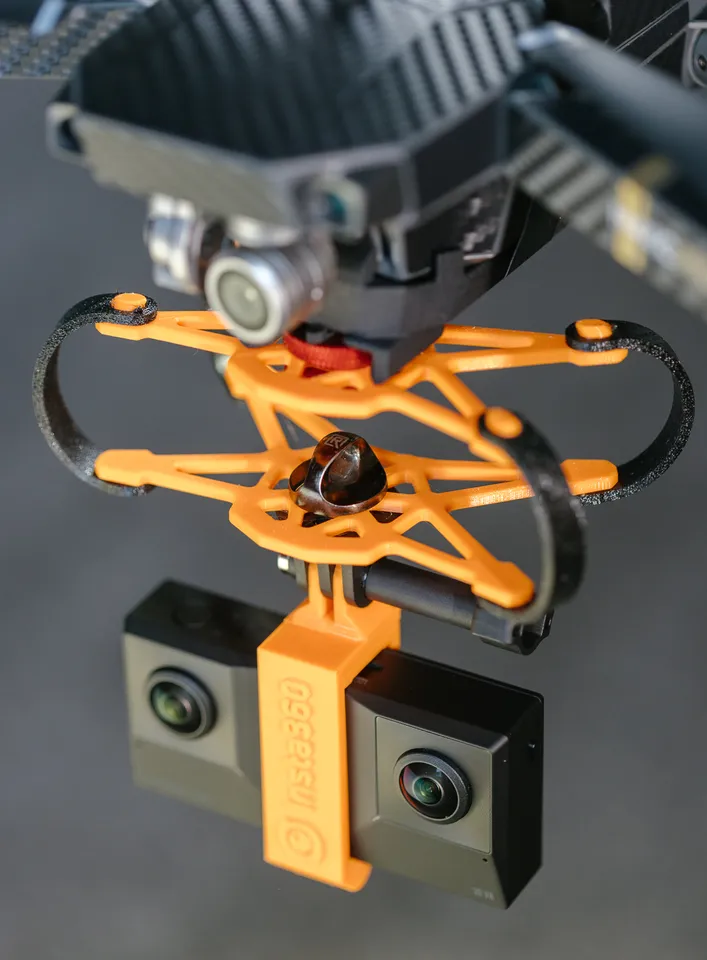
3D-Printed Mount Optimization
Design mounts using PETG with 15% carbon fiber for rigidity without weight gain. Embed TPU dampeners at four corners, allowing 0.3-0.5mm play to absorb vibrations. Test mounts on a bench with the drone at full throttle—visible “jello” in footage means insufficient damping. For racing drones, avoid over-engineering; every 0.5g saved adds 3 seconds flight time.
Professional Mounting Trade-Offs
Machined aluminum mounts offer superior stability for photography drones but add 12-18g. Only choose this for heavy-lift platforms like the DJI Mavic 3. For sub-500g drones like the Tello, the weight penalty outweighs stability benefits—stick with printed solutions under 3g.
Safety-Critical Best Practices
ESD Protection Non-Negotiables
Work on an anti-static mat while wearing a grounded wrist strap. Humidity below 40% increases static risk—use a humidifier if needed. Never handle components on carpeted floors. One static zap can permanently damage the IMU, requiring full drone replacement.
Pre-Flight Validation Sequence
After camera installation: 1) Balance props with a spinner tool, 2) Recalibrate IMU on level ground, 3) Perform 60-second hover at eye level, 4) Verify gimbal movement through full range, 5) Confirm video feed stability. Skipping hover tests risks flyaways from unbalanced weight distribution.
Drone Camera Weight and Power Reference
| Camera System | Weight | Voltage | Critical Notes |
|---|---|---|---|
| DJI FPV Stock | 47g | 11.1V | Includes gimbal motors |
| Runcam Orange 5 | 5g | 5V | Bare board only – FPV king |
| Tello Stock | 8g | 3.8V | Max replacement weight |
| GoPro HERO12 Stripped | 92g | 5V | Requires heavy-lift drone |
Final Pre-Flight Camera Replacement Checklist
Before your first flight: Confirm all screws are torqued to spec (T6: 0.15 Nm), check cables for pinching, complete gimbal calibration, verify video feed stability, balance props, and execute the 60-second hover test. Pro tip: Start with 50-foot altitude flights near your launch point. Camera replacements often reveal hidden crash damage—better to discover motor imbalances at safe heights than during long-range missions.
Mastering how to change drone camera systems transforms expensive failures into quick fixes. Whether swapping a DJI FPV module or installing a third-party FPV camera on a Tello, these proven steps ensure professional results. Remember: patience with micro-screws and voltage checks prevents costly errors. Now get that repaired drone back in the air—your next cinematic shot awaits.


